
The Easiest 3-Ingredient Cool Whip Candy Recipe Ever Made
Sweet treats don’t get easier than this decadent 3-ingredient cool whip candy recipe that combines simplicity with irresistible flavor.
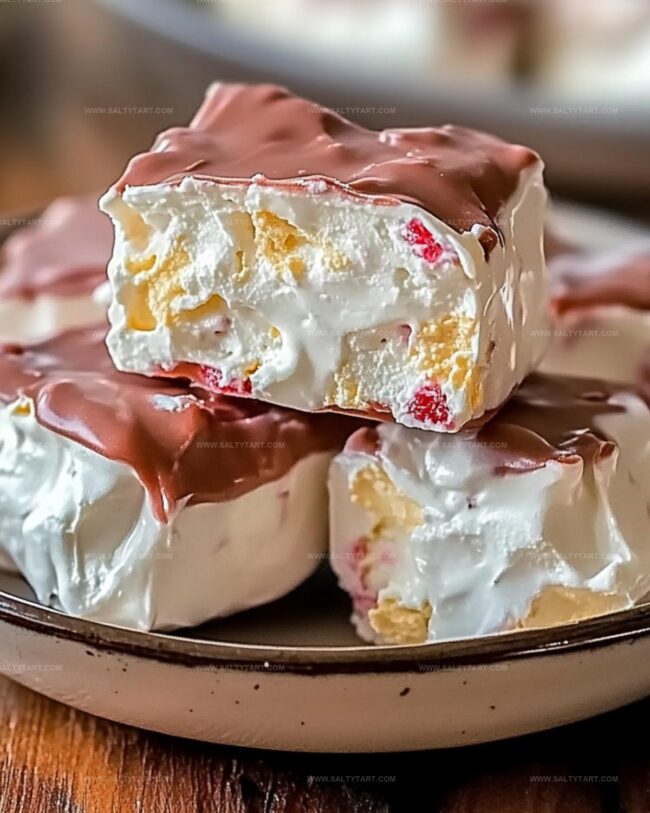
Chocolate lovers will swoon over this effortless dessert that requires minimal effort and delivers maximum satisfaction.
Each bite melts smoothly on your tongue, creating a delightful sensation of creamy richness.
The ingredients come together quickly, making this recipe perfect for spontaneous sweet cravings.
No complicated techniques or extensive baking skills needed here.
With just three pantry staples, you can whip up a delectable confection that looks and tastes like it came from a gourmet kitchen.
Indulge in this delightful treat and watch as friends and family beg for the recipe.
How to Store Cool Whip Candy Properly
FAQs
Yes, you can substitute milk chocolate with dark or white chocolate chips for different flavor profiles.
A microwave, hand mixer, and parchment-lined pan are the only basic tools required for this simple recipe.
When stored in an airtight container in the freezer, these candies can stay fresh for up to 2 weeks.
This recipe contains dairy and might not be appropriate for vegans or those with milk allergies, so check ingredients carefully.
Why Everyone Loves Cool Whip Candy Treats
What Goes into Cool Whip Candy Bites
Chocolate Base:Creamy Mixture:Coating and Preparation:Making Cool Whip Candy in Simple Steps
Step 1: Melt Chocolate Goodness
Place milk chocolate chips in a microwave-safe bowl. Zap in 30-second bursts, stirring between each interval until the chocolate transforms into a silky smooth liquid.
The key is patience – gentle heating prevents burning.
Step 2: Create Creamy Fusion
Grab your hand mixer and combine the molten chocolate with thawed Cool Whip.
Blend until the mixture becomes perfectly smooth and looks like a dreamy chocolate cloud. The texture should be uniform and irresistibly creamy.
Step 3: Shape and Freeze Initial Layer
Grab a pan and line it with parchment paper. Spread your chocolate-Cool Whip mixture evenly across the surface.
Pop the pan into the freezer for a solid 30 minutes to help the candy set and firm up.
Step 4: Slice and Secondary Freeze
Remove the partially set candy from the freezer.
Slice into bite-sized pieces with a sharp knife. Return the pieces to the freezer for another 30-minute chill session to ensure perfect texture.
Step 5: Chocolate Coating Magic
Melt remaining chocolate chips with vegetable shortening. This creates a glossy coating that will make your candies look professional.
Carefully dip each frozen piece into the melted chocolate, ensuring complete coverage.
Step 6: Final Chill and Serve
Place the chocolate-coated pieces back in the refrigerator.
Let them sit for one hour to allow the chocolate shell to set completely. Once firm, these decadent treats are ready to devour and share!
Things to Know Before Making Cool Whip Candy
Creative Takes on Cool Whip Candy Dessert
What Tastes Good with Cool Whip Candy
Print
3-Ingredient Cool Whip Candy Recipe
- Total Time: 2 hours 15 minutes
- Yield: 12 1x
Description
Sweet simplicity meets indulgence in this 3-ingredient cool whip candy, a delightful treat that merges creamy textures with effortless preparation. Quick and irresistible, you’ll savor each melt-in-your-mouth bite of this easy dessert that promises pure satisfaction.
Ingredients
Main Ingredients:
- 6 cups (1,020 grams) milk chocolate chips
- 8 ounces (226 grams) Cool Whip, thawed
Binding/Mixing Ingredients:
- 1.5 tablespoons (22 milliliters) vegetable shortening
Instructions
- Transform milk chocolate chips into a silky liquid by microwaving in 30-second bursts, stirring between each interval until completely smooth and glossy.
- Incorporate thawed Cool Whip into the melted chocolate, using a hand mixer to create a uniform, velvety mixture that blends seamlessly.
- Prepare a pan by lining it with parchment paper, then spread the chocolate-Cool Whip blend evenly across the surface.
- Place the pan in the freezer for half an hour, allowing the mixture to firm up and become slightly solid.
- Remove the pan and slice the chilled mixture into bite-sized pieces using a sharp knife.
- Return the candy pieces to the freezer for an additional 30 minutes to ensure they maintain their shape.
- Create a glossy chocolate coating by melting the remaining chocolate chips with vegetable shortening until perfectly smooth.
- Carefully dip each frozen candy piece into the melted chocolate, ensuring complete and even coverage.
- Transfer the chocolate-coated candies to a clean parchment-lined tray and refrigerate for one hour to set the chocolate completely.
- Once the chocolate has hardened, retrieve the candies and serve at room temperature for a creamy, indulgent treat.
Notes
- Use room temperature Cool Whip for smoother mixing and easier blending with melted chocolate.
- Choose high-quality milk chocolate chips for richer, more decadent flavor profile.
- Prevent chocolate from seizing by melting slowly and stirring consistently during microwave intervals.
- Line pan with parchment paper with slight overhang for easier removal and clean cutting of candy pieces.
- For dairy-free version, substitute Cool Whip with coconut whipped cream and use dairy-free chocolate chips.
- Keep candy stored in airtight container in freezer for up to 2 weeks to maintain texture and freshness.
- Use vegetable shortening sparingly when coating to ensure smooth chocolate shell without excess greasiness.
- Test chocolate temperature before coating to prevent candy from melting during dipping process.
- Prep Time: 15 minutes
- Cook Time: 2 hours
- Category: Desserts, Snacks
- Method: Blending
- Cuisine: American
Nutrition
- Serving Size: 12
- Calories: 253
- Sugar: 18 g
- Sodium: 16 mg
- Fat: 20 g
- Saturated Fat: 9 g
- Unsaturated Fat: 8 g
- Trans Fat: 0.5 g
- Carbohydrates: 22 g
- Fiber: 1 g
- Protein: 2 g
- Cholesterol: 5 mg
Jess Martinez
Contributing Recipe Writer & Nutrition Consultant
Expertise
Southwestern and Latin American cooking, Nutritional analysis and healthy recipe planning, Cultural food traditions, Modifying traditional dishes for better health
Education
Santa Fe Community College
Certificate in Culinary Arts
Focused on mastering the flavors and cooking methods of traditional Southwestern cuisine.
Jess’s love for bold, homegrown flavors led her straight into the world of Southwestern cooking and cultural nutrition.
After completing her Certificate in Culinary Arts at Santa Fe Community College, she made it her mission to show that good-for-you food can still taste incredible.
At saltytart.com, Jess shares vibrant, health-conscious recipes with roots in tradition but a fresh, modern twist. When she’s not testing new recipes, you’ll find her at local growers’ markets, tending her herb garden, or digging into food history books.