
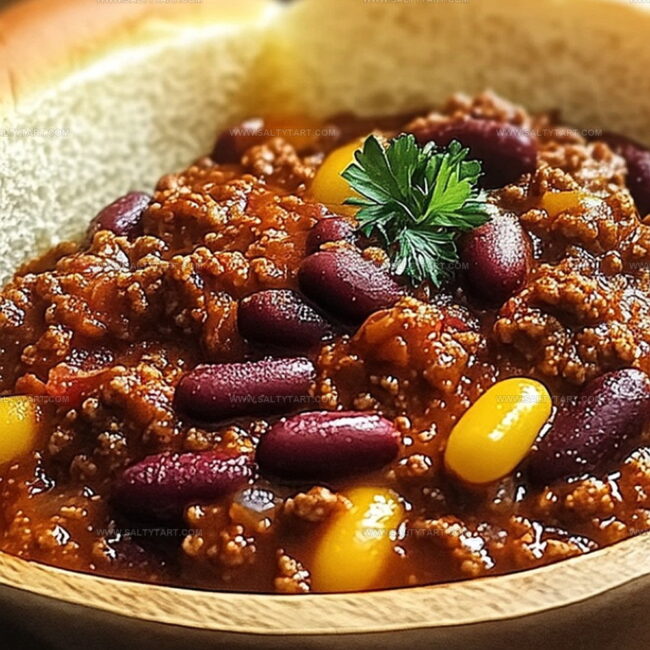
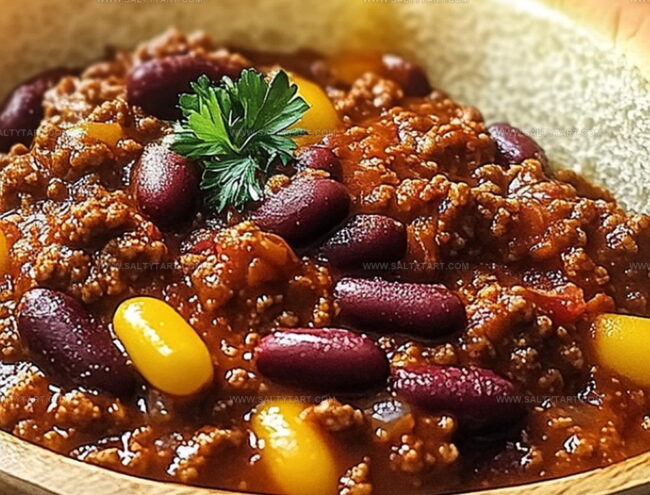
Best Homemade Chili for Burgers and Hotdogs Recipe That Sizzles
Comfort food reaches new heights with this hearty homemade chili for burgers and hotdogs that will make your taste buds dance.
Packed with robust flavors and rich spices, this chili delivers a mouthwatering punch to your favorite grilled classics.
Every spoonful tells a story of slow-simmered goodness and carefully balanced ingredients.
Meaty, zesty, and perfectly seasoned, this recipe transforms ordinary meals into extraordinary culinary experiences.
The secret lies in letting each ingredient meld together, creating a sauce that clings beautifully to juicy burgers and crisp hotdogs.
No store-bought topping comes close to the depth and warmth of this homemade chili.
Bring your grill game to the next level and watch as friends and family crave every last bite.
Why Homemade Chili for Burgers Stands Out
Ingredients Needed for Burger Chili Topping
Meat Base:Liquid Components:Seasoning Blend:Steps for Cooking Burger Hotdog Chili Perfectly
Step 1: Brown The Meaty Base
Start by heating a large skillet over medium-high heat. Crumble ground beef into the pan, breaking it into small, even pieces as it cooks.
Cook until the meat turns completely brown and no pink remains visible.
Step 2: Build Flavor Foundation
Add these ingredients to the cooked beef:Stir everything together, allowing the meat to absorb these rich, tangy flavors.
Step 3: Create Liquid Harmony
Pour in tomato soup and water, mixing thoroughly to create a smooth, consistent texture. This will help distribute the seasonings evenly throughout the chili.
Step 4: Spice It Up
Sprinkle in these seasonings:Stir carefully to ensure all spices are well incorporated and no clumps remain.
Step 5: Simmer And Develop Depth
Reduce heat to low, cover the skillet, and let the chili simmer gently.
Allow it to cook for about 60 minutes, stirring occasionally to prevent sticking and help flavors meld together.
Step 6: Final Touch And Serving
Once the chili reaches a thick, rich consistency, remove from heat.
Serve piping hot over burgers, hotdogs, or your favorite comfort foods. Enjoy the hearty, homemade goodness!
Notes for Classic Homemade Chili Fans
Swaps for Topping Chili With Different Meats
Pairings for Burgers and Hotdogs With Chili
Storing Homemade Chili for Game Day
FAQs
This chili is a quick, no-bean style topping perfect for burgers and hotdogs, using simple pantry ingredients and creating a flavorful sauce with ground beef.
Yes, you can add more chili powder, include some cayenne pepper, or mix in hot sauce to increase the heat level according to your preference.
Absolutely! This chili freezes well and can be stored in the refrigerator for up to 5 days, making it great for quick meals and easy reheating.
Use lean ground beef (80/20 or 85/15) for the best flavor and texture, which helps prevent the chili from becoming too greasy.
Print
Best Homemade Chili For Burgers And Hotdogs Recipe
- Total Time: 1 hour 15 minutes
- Yield: 4 1x
Description
Hearty homemade chili brings bold southwestern flavors to burger and hotdog nights, elevating classic comfort foods with rich, meaty goodness. Spicy, robust ingredients blend seamlessly, inviting friends and family to savor each delicious, satisfying spoonful.
Ingredients
Meat:
- 1 pound (0.45 kilograms) ground beef
Spices and Seasonings:
- 2 tablespoons chili powder
- 1 teaspoon black pepper
- 1 teaspoon salt
Sauces and Liquids:
- 1 tablespoon Worcestershire sauce
- 1 tablespoon mustard
- 1 tablespoon vinegar
- 4 tablespoons ketchup
- 1 (10 3/4 ounces) 305 grams can tomato soup
- 1 can water
- Sugar to taste (optional)
Instructions
- Gather all ingredients including ground beef, mustard, vinegar, black pepper, Worcestershire sauce, ketchup, tomato soup, water, salt, chili powder, and sugar in a large saucepan.
- Thoroughly blend the mixture using a wooden spoon, ensuring all components are evenly distributed and no dry ingredients remain unincorporated.
- Position the saucepan on the stovetop and activate medium-high heat, allowing the mixture to reach a vigorous boil while stirring intermittently.
- Once bubbling intensely, immediately reduce temperature to low, creating a gentle simmer.
- Cover the saucepan with a tight-fitting lid and let the chili slowly cook for approximately 60 minutes, occasionally stirring to prevent bottom scorching and promote uniform flavor development.
- After cooking time concludes, remove lid and assess consistency – the chili should appear thick and richly textured.
- Taste and adjust seasoning if necessary, adding minimal salt or pepper to enhance flavor profile.
- Serve piping hot directly over burgers, hotdogs, or your preferred accompaniment, ensuring maximum flavor enjoyment.
Notes
- Customize heat levels by adjusting chili powder or adding red pepper flakes for those who enjoy spicier condiments.
- Reduce sodium content by using low-sodium ketchup and tomato soup, perfect for heart-healthy diets.
- Consider substituting ground beef with ground turkey or plant-based crumbles for leaner or vegetarian versions of the chili.
- Prep and store extra chili in freezer-safe containers for convenient meal prep, lasting up to 3 months when properly sealed.
- Prep Time: 15 minutes
- Cook Time: 1 hour
- Category: Lunch, Dinner, Snacks
- Method: Simmering
- Cuisine: American
Nutrition
- Serving Size: 4
- Calories: 200 kcal
- Sugar: 4 g
- Sodium: 600 mg
- Fat: 12 g
- Saturated Fat: 5 g
- Unsaturated Fat: 7 g
- Trans Fat: 0.3 g
- Carbohydrates: 10 g
- Fiber: 2 g
- Protein: 15 g
- Cholesterol: 55 mg
Jess Martinez
Contributing Recipe Writer & Nutrition Consultant
Expertise
Southwestern and Latin American cooking, Nutritional analysis and healthy recipe planning, Cultural food traditions, Modifying traditional dishes for better health
Education
Santa Fe Community College
Certificate in Culinary Arts
Focused on mastering the flavors and cooking methods of traditional Southwestern cuisine.
Jess’s love for bold, homegrown flavors led her straight into the world of Southwestern cooking and cultural nutrition.
After completing her Certificate in Culinary Arts at Santa Fe Community College, she made it her mission to show that good-for-you food can still taste incredible.
At saltytart.com, Jess shares vibrant, health-conscious recipes with roots in tradition but a fresh, modern twist. When she’s not testing new recipes, you’ll find her at local growers’ markets, tending her herb garden, or digging into food history books.