The Ultimate Buckeye Bars Recipe: Creamy Chocolate-Peanut Magic
Sweet memories of midwest gatherings dance through my mind when thinking about delectable buckeye bars that blend rich chocolate and creamy peanut butter.
Childhood treats like these always spark nostalgic conversations around kitchen counters.
Midwestern bakers understand the magic of simple ingredients combined with love and precision.
Chocolate and peanut butter create an irresistible duo that feels like a warm hug.
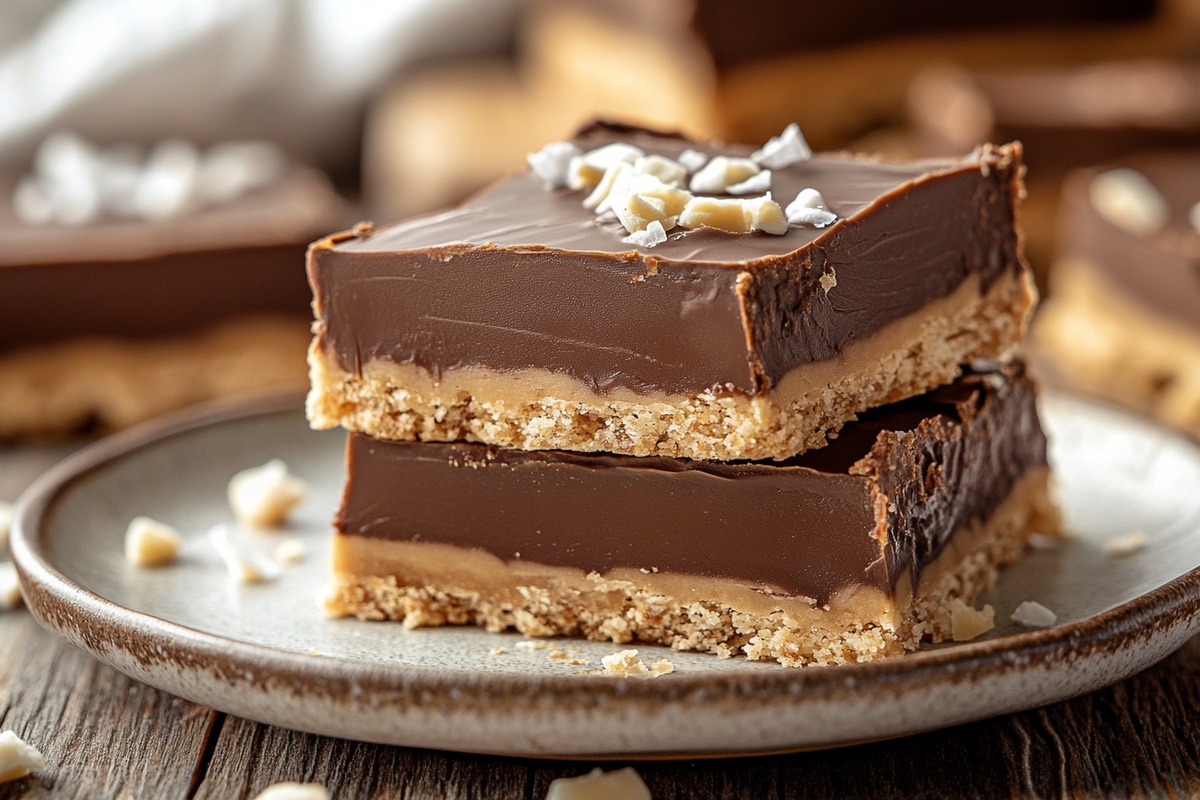
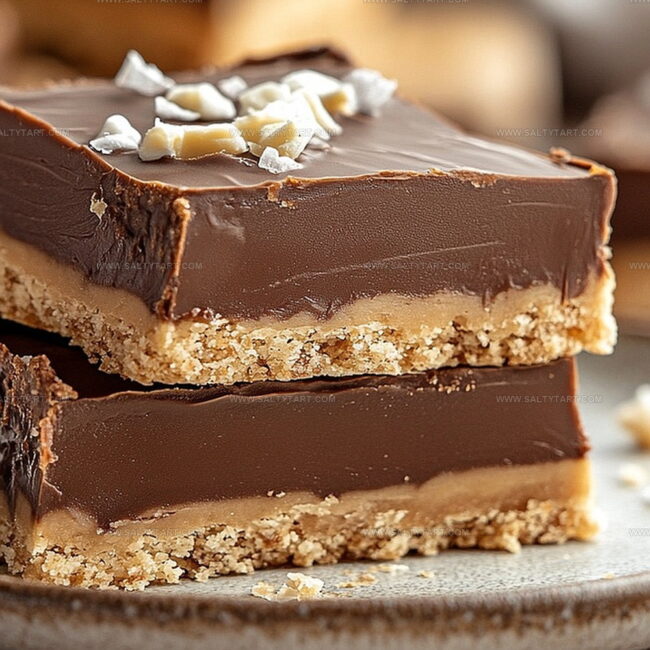
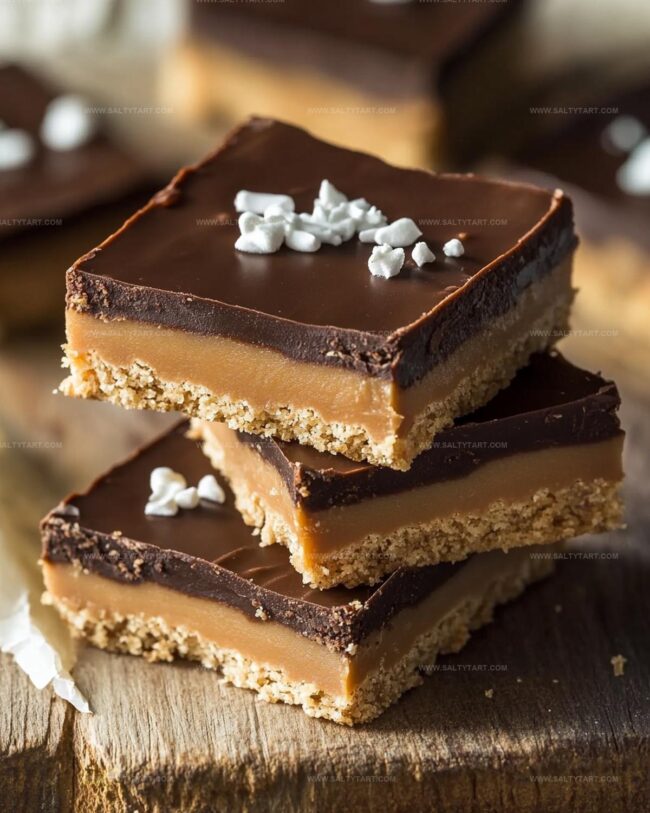
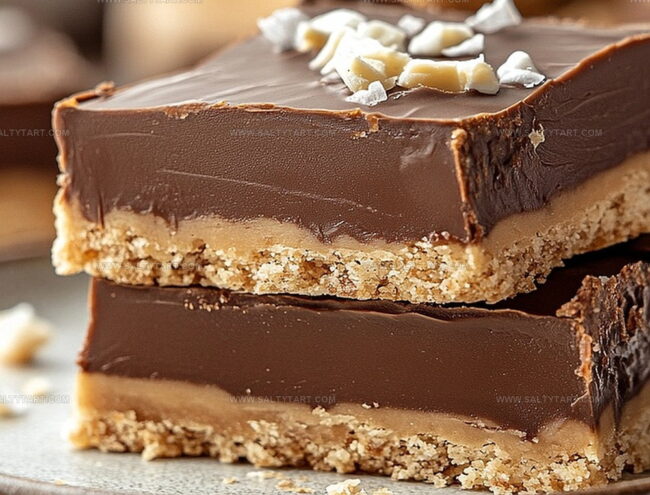
Layers of smooth, velvety goodness promise a decadent experience with each bite.
Mixing these classic flavors guarantees smiles and satisfaction for anyone who tries this classic recipe.
Prepare to indulge in a dessert that captures comfort and joy in every single square.
Why Buckeye Bars Are a Decadent Treat
Essential Ingredients for Buckeye Bars Success
Base Ingredients:Chocolate Topping:Optional Garnish:How to Make Buckeye Bars Perfectly Every Time
Step 1: Warm Up the Oven
Get your oven ready by setting it to 350F (175C). Grab an 8×8-inch baking pan and give it a light coating of cooking spray or line it with parchment paper so your bars will slide out easily.
Step 2: Create Creamy Peanut Butter Base
Grab a big mixing bowl and combine:Blend everything together until the mixture looks smooth and feels like silky clouds.
Step 3: Press and Bake the Foundation
Spread the peanut butter mixture evenly into your prepared pan.
Slide the pan into the preheated oven and bake for about 20 minutes. You’ll know it’s ready when the edges turn a soft golden color.
Take it out and let it cool completely.
Step 4: Craft Chocolate Drizzle
In a microwave-safe bowl, mix:Melt the ingredients by heating in short 30-second bursts, stirring between each interval until everything becomes glossy and smooth.
Step 5: Decorate and Chill
Pour the melted chocolate over the cooled peanut butter base. If you’re feeling fancy, swirl the chocolate to create a marbled design.
Pop the pan into the refrigerator and let it set for at least an hour.
Step 6: Slice and Savor
Once the bars are firm, cut them into squares.
Get ready to enjoy a delicious treat that combines the classic flavors of peanut butter and chocolate!
Tips to Master Buckeye Bars Every Time
Fun Variations on Buckeye Bars to Try
Best Pairings for Buckeye Bars Moments
Pair the rich, sweet Buckeye Bars with cold, creamy chocolate milk for a nostalgic dessert experience that amplifies the peanut butter and chocolate flavors.
Select a sweet port wine or dessert Riesling to complement the bar’s decadent chocolate and peanut butter profile, creating a sophisticated adult treat.
Serve alongside a strong espresso or dark roast coffee to cut through the sweetness and enhance the deep chocolate undertones of the Buckeye Bars.
Enjoy with a scoop of vanilla bean ice cream, allowing the creamy coldness to balance the rich, dense texture of the bars.
How to Keep Buckeye Bars Fresh and Delicious
FAQs
Yes, these bars capture the classic flavor combination of peanut butter and chocolate found in traditional Buckeye candies, but in an easier bar format that eliminates hand-rolling individual chocolates.
It’s recommended to use creamy, commercial peanut butter like Jif or Skippy, as natural peanut butter can separate and affect the texture of the bars.
When stored in an airtight container in the refrigerator, these bars will stay fresh for up to 7-10 days, maintaining their delicious texture and flavor.
Print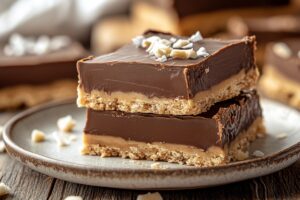
Buckeye Bars Recipe
- Total Time: 40 minutes
- Yield: 20 1x
Description
Chocolate and peanut butter lovers will adore these classic Buckeye Bars, a nostalgic Ohio dessert that blends creamy peanut butter with rich chocolate. Sweet layers meld perfectly, creating an irresistible no-bake treat you’ll crave again and again.
Ingredients
Main Ingredients:
- 1 cup peanut butter
- 1/2 cup unsalted butter
- 2 cups powdered sugar
Chocolate Components:
- 1 1/2 cups semi-sweet chocolate chips
- 2 tablespoons vegetable shortening
Additional Ingredients:
- 1 teaspoon vanilla extract
- 1/4 teaspoon salt
Instructions
- Preheat the oven to 350F (175C) and prepare an 8×8-inch baking pan by greasing or lining with parchment paper for effortless removal.
- Combine softened butter and peanut butter in a large mixing bowl, blending until silky smooth and uniform in texture.
- Incorporate powdered sugar and vanilla extract into the butter mixture, stirring until a creamy, consistent base forms.
- Evenly distribute the peanut butter mixture into the prepared pan, pressing firmly to create a uniform layer.
- Bake in the preheated oven for approximately 20 minutes, watching for lightly golden edges as an indicator of doneness.
- Remove from oven and allow the base to cool completely at room temperature.
- Melt chocolate chips and additional peanut butter in a microwave-safe bowl, using 30-second intervals and stirring between each session until completely smooth.
- Pour the glossy chocolate mixture over the cooled peanut butter base, using a spatula to create an optional marbled design.
- Refrigerate for a minimum of 1 hour to ensure the chocolate sets and firms up completely.
- Once fully chilled, slice into approximately 16 uniform squares and serve chilled.
Notes
- Swap regular peanut butter with natural or almond butter for a healthier twist and different flavor profile.
- Enhance the chocolate layer by using dark chocolate chips for a more intense, less sweet finish.
- For gluten-free option, ensure all ingredients like powdered sugar are certified gluten-free before using.
- Create a vegan version by replacing butter with coconut oil and using dairy-free chocolate chips.
- Prep Time: 20 minutes
- Cook Time: 20 minutes
- Category: Desserts, Snacks
- Method: Baking
- Cuisine: American
Nutrition
- Serving Size: 20
- Calories: 220
- Sugar: 19.5 g
- Sodium: 85 mg
- Fat: 13.8 g
- Saturated Fat: 5.2 g
- Unsaturated Fat: 8.3 g
- Trans Fat: 0.1 g
- Carbohydrates: 23.4 g
- Fiber: 1.2 g
- Protein: 3.2 g
- Cholesterol: 8 mg
Mike Reynolds
Founder & Recipe Developer
Expertise
Farm-to-table cuisine, Seasonal recipe development, Sustainable cooking techniques, Food photography
Education
Asheville-Buncombe Technical Community College (A-B Tech)
Associate Degree in Culinary Arts
Mike studied culinary arts with a strong focus on farm-to-table principles and sustainable cooking. His training emphasized the importance of fresh, local ingredients and environmentally responsible practices in the kitchen.
Mike’s food journey began deep in the Blue Ridge Mountains, where weekends at farmers’ markets and home-cooked meals sparked a lifelong obsession with simple, seasonal eating.
After earning his Associate Degree in Culinary Arts from Asheville-Buncombe Technical Community College, he set out to bring farm-to-table cooking into everyday kitchens, without the fuss.
Mike’s philosophy is all about keeping it fresh, unfussy, and full of heart. When he’s not crafting new single-serving recipes, he’s hiking mountain trails, chatting with local farmers, or experimenting with wild ingredients in his backyard kitchen.