Hop Into Fun: Adorable Bunny Pizza Recipe For Family Night
Crafting a whimsical bunny pizza brings playful creativity to your kitchen adventures.
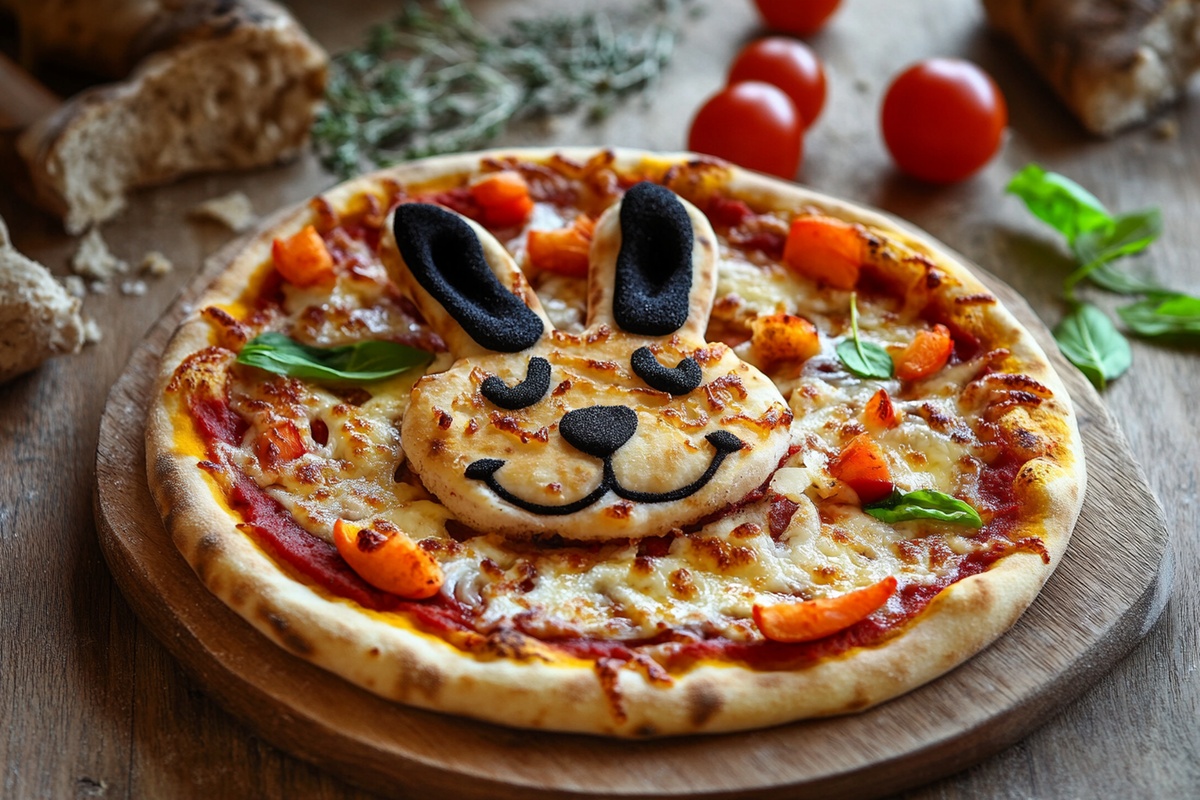
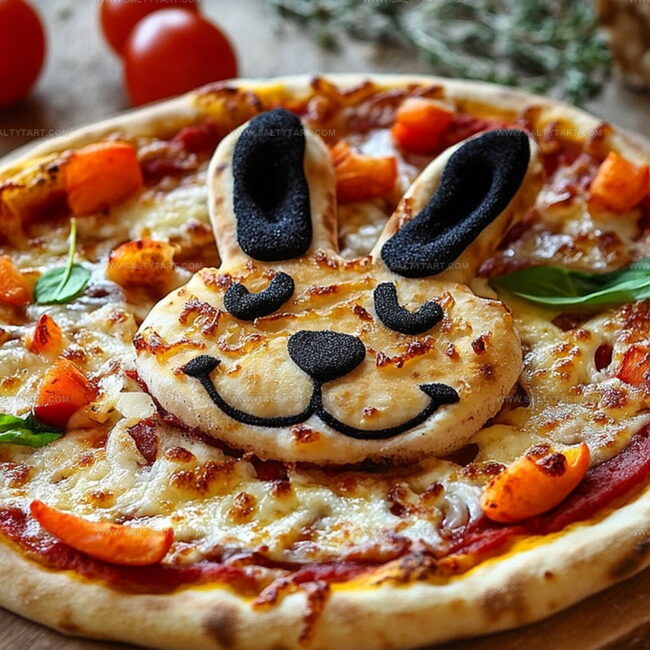
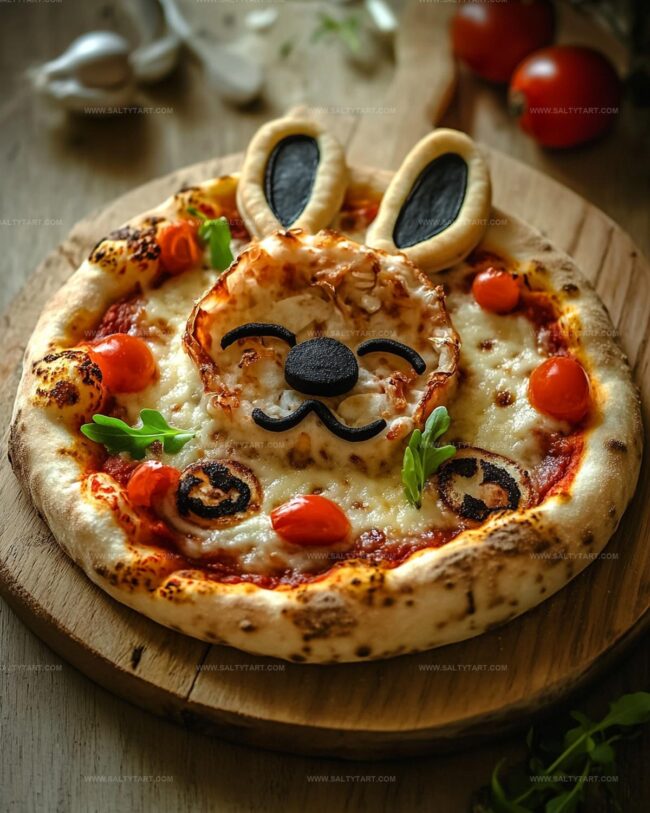
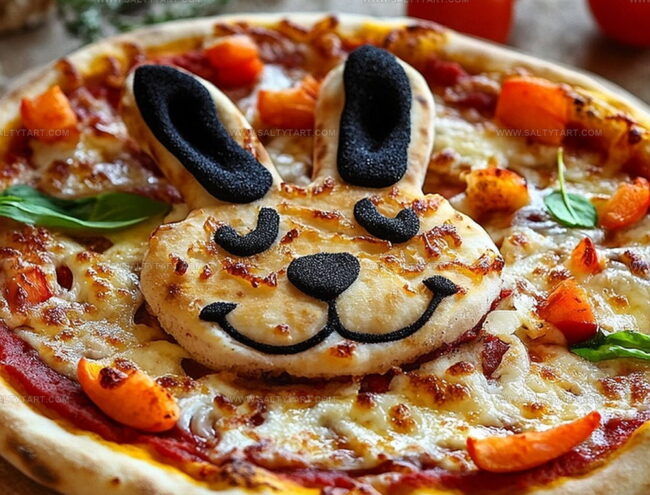
Adorable ears and cute facial features transform an ordinary meal into a delightful experience.
Soft pizza dough becomes a canvas for imaginative culinary art.
Kids absolutely adore helping design these charming animal-shaped treats.
Colorful toppings like olives, peppers, and cheese make each bunny unique.
Homemade pizzas spark joy and create memorable moments around the dinner table.
You’ll become a kitchen hero with this delightful recipe that combines fun and flavor.
Reasons to Enjoy Bunny Pizza
Ingredients for Bunny Pizza
Base Ingredients:Decorative Ingredients:Seasoning and Finishing Ingredients:How to Prepare Bunny Pizza
Step 1: Prepare The Cooking Space
Warm up your oven to a toasty 425F (220C). Grab a pizza pan or baking sheet and give it a light coating of cooking spray to prevent sticking.
Step 2: Shape The Dough
Sprinkle flour on your work surface and roll out the pizza dough into a large circle. Carefully transfer the dough to your prepared pan.
Step 3: Craft The Bunny Outline
Using a sharp knife or pizza cutter, transform the circle into a cute bunny shape:Step 4: Sauce It Up
Spread tomato sauce across the dough, leaving a small border around the edges for a perfect crust.
Step 5: Cheese Blanket
Shower the sauce with a generous layer of shredded mozzarella cheese, covering the entire bunny canvas.
Step 6: Add Bunny Features
Decorate your pizza with adorable details:Step 7: Create Fluffy Ears
Line pepperoni or zucchini strips along the top edge to create realistic bunny ears.
Step 8: Final Flavor Touch
Drizzle olive oil over the pizza and sprinkle a light dash of salt and pepper for extra flavor.
Step 9: Bake To Perfection
Slide the pizza into the preheated oven and bake for 12-15 minutes. Watch for a golden crust and bubbling cheese.
Step 10: Serve And Enjoy
Pull out your masterpiece, optionally dust with grated Parmesan, slice, and serve while warm. Get ready for delighted smiles!
Helpful Tips for Bunny Pizza
Flavor Variations for Bunny Pizza
Best Pairings for Bunny Pizza
How to Store Bunny Pizza Properly
FAQs
Use a sharp knife or pizza cutter to carefully outline the bunny silhouette. Cut two pointed ears at the top of the dough and create a rounded head shape. Trace slowly and deliberately for clean edges.
Yes! Kids can help arrange toppings like olives for eyes, cherry tomatoes for nose, and place pepperoni or zucchini strips for bunny ears. Adult supervision is recommended for cutting and oven handling.
No problem! Get creative with what you have. Use different colored vegetables or cheeses to create the bunny face. The key is maintaining the fun bunny shape and playful design.
Print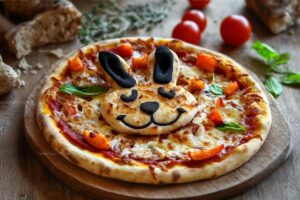
Bunny Pizza Recipe
- Total Time: 30 minutes
- Yield: 4 1x
Description
Playful Bunny Pizza brings whimsical charm to family dinner tables, blending adorable design with delicious flavor. Kids and adults alike will delight in this creative culinary adventure that turns mealtime into an exciting, memorable experience.
Ingredients
Main Pizza Ingredients:
- 1 pound (454 grams) pizza dough
- 2 cups shredded mozzarella cheese
- 1/2 cup tomato sauce
Toppings and Decorative Ingredients:
- 1/2 cup cherry tomatoes, halved
- 1/4 cup black olives, sliced
- 1 small red bell pepper, thinly sliced
- 4–6 thin strips of pepperoni or zucchini slices
Seasoning and Finishing Ingredients:
- 1/4 cup fresh basil leaves
- 2 tablespoons olive oil
- 1/4 cup grated Parmesan cheese
- Salt, to taste
- Pepper, to taste
Instructions
- Preheat the oven to 425F (220C) and prepare a pizza pan or baking sheet with a light coating of grease.
- On a floured surface, roll the pizza dough into a large circle and carefully transfer it to the prepared pan.
- Craft the bunny shape by trimming the dough’s edges, creating distinctive ear shapes at the top and a rounded head outline.
- Evenly distribute tomato sauce across the dough, maintaining a small border around the perimeter.
- Cover the sauce with a generous layer of shredded mozzarella cheese, ensuring complete coverage.
- Artfully position cherry tomato halves, olive slices, and red bell pepper pieces to form the bunny’s facial features – creating expressive eyes, a cute nose, and a playful mouth.
- Strategically place pepperoni or zucchini strips along the top edge to resemble realistic bunny ears.
- Enhance the pizza’s flavor by drizzling olive oil and sprinkling a light touch of salt and pepper.
- Bake in the hot oven for 12-15 minutes until the crust transforms to a golden hue and the cheese becomes beautifully melted and bubbly.
- After removing from the oven, optional garnish with grated Parmesan, then slice and serve while still warm for maximum enjoyment.
Notes
- Dough Flexibility: Roll the pizza dough gently to avoid tearing and maintain its bunny shape, using a light touch and minimal handling.
- Cheese Distribution: Sprinkle mozzarella evenly to ensure consistent melting and prevent dry or soggy spots on the pizza.
- Vegetarian Adaptation: Swap pepperoni with zucchini strips or roasted vegetable slices for a plant-based alternative that maintains the bunny ear design.
- Gluten-Free Option: Use gluten-free pizza dough or cauliflower crust to accommodate dietary restrictions without compromising the playful bunny shape.
- Prep Time: 15 minutes
- Cook Time: 15 minutes
- Category: Lunch, Dinner, Snacks, Appetizer
- Method: Baking
- Cuisine: Italian
Nutrition
- Serving Size: 4
- Calories: 490 kcal
- Sugar: 4 g
- Sodium: 720 mg
- Fat: 24 g
- Saturated Fat: 10 g
- Unsaturated Fat: 12 g
- Trans Fat: 0.2 g
- Carbohydrates: 44 g
- Fiber: 3 g
- Protein: 25 g
- Cholesterol: 45 mg
Jess Martinez
Contributing Recipe Writer & Nutrition Consultant
Expertise
Southwestern and Latin American cooking, Nutritional analysis and healthy recipe planning, Cultural food traditions, Modifying traditional dishes for better health
Education
Santa Fe Community College
Certificate in Culinary Arts
Focused on mastering the flavors and cooking methods of traditional Southwestern cuisine.
Jess’s love for bold, homegrown flavors led her straight into the world of Southwestern cooking and cultural nutrition.
After completing her Certificate in Culinary Arts at Santa Fe Community College, she made it her mission to show that good-for-you food can still taste incredible.
At saltytart.com, Jess shares vibrant, health-conscious recipes with roots in tradition but a fresh, modern twist. When she’s not testing new recipes, you’ll find her at local growers’ markets, tending her herb garden, or digging into food history books.