
Fluffy Buttermilk Crockpot Bread Recipe for Homemade Comfort
Crafting a warm buttermilk crockpot bread fills my kitchen with memories of grandma’s comforting recipes.
Slow cookers revolutionize traditional baking techniques with minimal effort.
My favorite part involves watching simple ingredients transform into a golden, soft loaf without heating up the entire kitchen.
Soft, pillowy textures emerge from this unexpected cooking method that surprises even seasoned bakers.
Rich buttermilk adds deep flavor and incredible moisture to every slice.
Homemade bread becomes incredibly accessible when you eliminate complicated steps and complex equipment.
I promise this recipe will make you feel like a culinary genius with zero stress.
Prepare to wow everyone with an effortless bread that tastes like it came from a professional bakery.
Crockpot Bread for Busy Days
Ingredients for Slow Cooker Bread
Wet Ingredients:Dry Ingredients:Additional Ingredients:How to Make Crockpot Bread Successfully
Step 1: Activate Yeast Mixture
Grab a bowl and combine warm water, sugar, and yeast. Let the mixture sit and bubble for 5-10 minutes until it becomes frothy and alive with tiny bubbles.
Step 2: Create Dough Base
In a separate large mixing bowl, blend:Pour the activated yeast mixture and olive oil into the flour blend. Stir everything together until a sticky dough ball forms.
If the dough feels too dry, add water one tablespoon at a time to achieve the right consistency.
Step 3: Knead and Develop Dough
Work the dough on a clean surface for 5-7 minutes.
Knead until the texture becomes smooth and elastic, developing gluten and creating a nice stretchy feel.
Step 4: Prepare Crockpot
Lightly coat the inside of your crockpot with olive oil.
Gently place the prepared dough into the crockpot. Cover with a clean kitchen towel and allow the dough to rise for 1 hour or until it doubles in size.
Step 5: Slow Cook the Bread
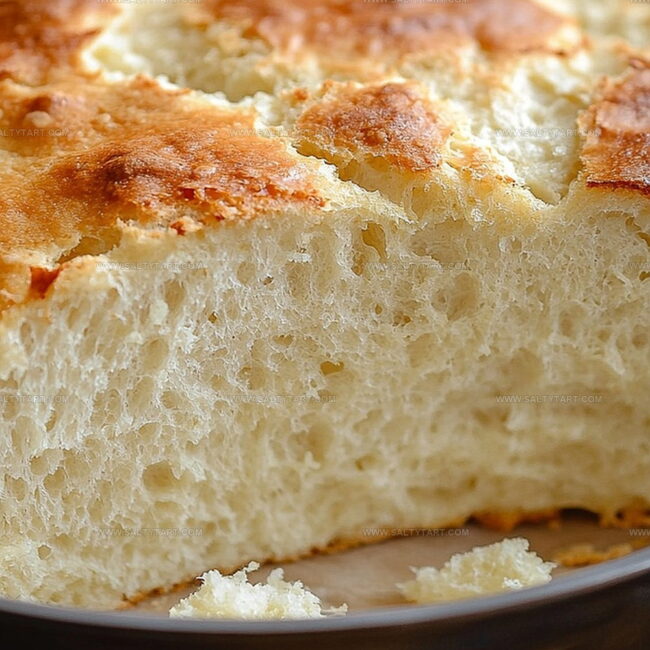
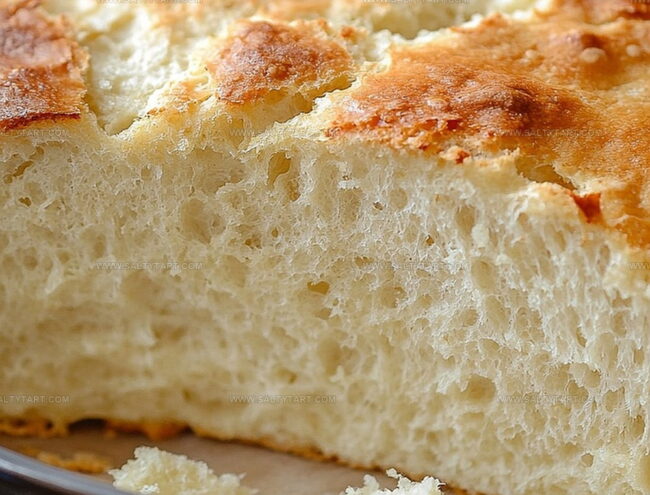
Set your crockpot to low heat. Cook the bread for 2-2.5 hours. The bread is ready when it turns golden brown and produces a hollow sound when tapped on top.
Step 6: Cool and Serve
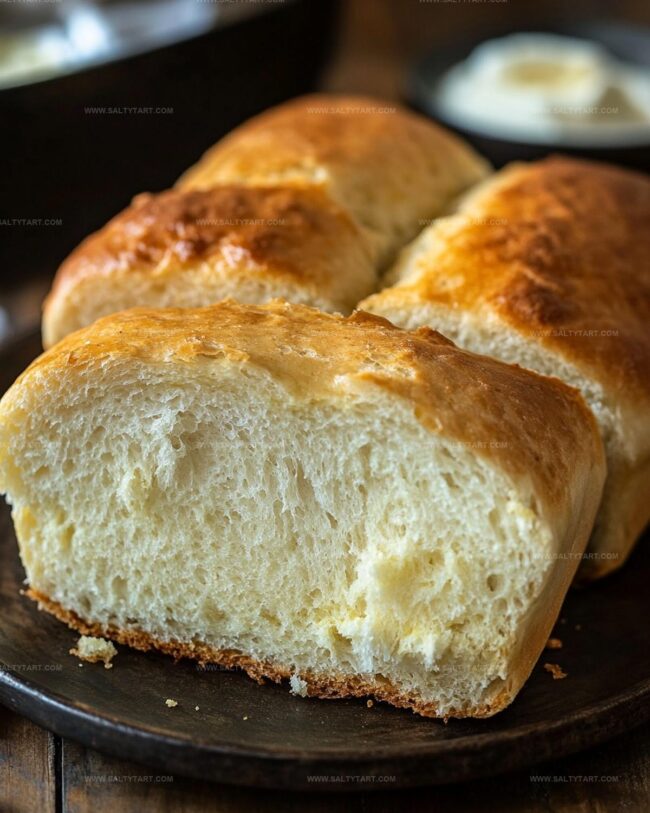
Remove the bread from the crockpot and let it cool for 10 minutes. Slice and enjoy your homemade slow-cooked bread.
Expert Tips for Crockpot Bread Baking
Variations to Try with Crockpot Bread
Pairings Perfect for Crockpot Bread
Create a vibrant tomato-based marinara sauce with fresh basil, garlic, and olive oil to complement the crockpot bread’s hearty texture.
Blend kalamata olives, capers, and herbs for a rich, tangy spread that enhances the bread’s subtle olive oil notes.
Select a medium-bodied Italian red wine like Chianti or Sangiovese to balance the bread’s warm, comforting flavor profile and provide a delightful drinking experience.
Whip softened butter with chopped parsley, thyme, and a pinch of sea salt to create a creamy, aromatic spread that elevates the bread’s simple yet delicious taste.
How to Store Crockpot Bread Correctly
FAQs
Yes, crockpot bread can be soft, fluffy, and delicious with a slightly different texture that’s still enjoyable and perfect for those without an oven.
Absolutely! You can experiment with whole wheat, bread flour, or all-purpose flour. Just keep in mind that different flours might slightly change the bread’s texture and rise.
The bread is ready when it turns golden brown and sounds hollow when you tap the top. Most recipes take about 2-2.5 hours on low setting.
Dense bread usually happens when the yeast isn’t activated properly or the dough isn’t kneaded enough.
Print
Buttermilk Crockpot Bread Recipe
- Total Time: 2 hours 55 minutes
- Yield: 8 1x
Description
Warm, rustic buttermilk crockpot bread brings comfort straight from your kitchen’s heart. Simple ingredients and slow cooking create a golden, aromatic loaf you’ll savor with every delightful slice.
Ingredients
Bread Ingredients:
Flour and Yeast:
- 3 cups (750 milliliters) all-purpose flour
- 1 tablespoon (15 milliliters) active dry yeast
Seasoning and Sweetener:
- 1 teaspoon (5 milliliters) salt
- 1 tablespoon (15 milliliters) sugar
- 1/4 teaspoon (1.25 milliliters) garlic powder
Liquid Ingredients:
- 1 1/4 cups (300 milliliters) warm water
- 2 tablespoons (30 milliliters) olive oil
Instructions
- Activate yeast by whisking warm water, sugar, and yeast together in a mixing vessel, allowing the mixture to become foamy and fragrant for 5-10 minutes.
- Create dry base by combining flour and salt in a separate large mixing bowl, preparing for incorporation of wet ingredients.
- Pour activated yeast mixture and olive oil into flour mixture, blending thoroughly to form a cohesive, slightly tacky dough consistency.
- Adjust dough texture by incrementally adding water if mixture appears too dense, ensuring smooth and pliable texture.
- Knead dough vigorously for 5-7 minutes, developing gluten structure and achieving silky, elastic consistency.
- Prepare crockpot interior by lightly coating with olive oil, creating non-stick surface for bread formation.
- Transfer dough into prepared crockpot, covering with clean kitchen towel to enable rising process for approximately 1 hour until volume doubles.
- Set crockpot to low temperature, allowing bread to bake for 2-2.5 hours, monitoring for golden-brown exterior and hollow sound when gently tapped.
- Remove bread from crockpot, allowing 10-minute cooling period to stabilize internal structure before slicing and serving.
Notes
- Check yeast freshness by ensuring it foams actively within 10 minutes, indicating it’s alive and ready to help bread rise perfectly.
- Add whole wheat flour or gluten-free alternatives to modify the recipe for different dietary needs, maintaining similar texture and consistency.
- Use a parchment paper sling inside the crockpot to easily lift the bread out without breaking its delicate structure after cooking.
- Insert a kitchen thermometer to confirm internal bread temperature reaches 190-200°F for guaranteed doneness, preventing undercooked centers.
- Prep Time: 25 minutes
- Cook Time: 2 hours 30 minutes
- Category: Breakfast, Snacks, Dinner
- Method: Slow Cooking
- Cuisine: American
Nutrition
- Serving Size: 8
- Calories: 140 kcal
- Sugar: 1.3 g
- Sodium: 152 mg
- Fat: 2.0 g
- Saturated Fat: 0.3 g
- Unsaturated Fat: 1.7 g
- Trans Fat: 0 g
- Carbohydrates: 27 g
- Fiber: 1.1 g
- Protein: 4.5 g
- Cholesterol: 0 mg
Mike Reynolds
Founder & Recipe Developer
Expertise
Farm-to-table cuisine, Seasonal recipe development, Sustainable cooking techniques, Food photography
Education
Asheville-Buncombe Technical Community College (A-B Tech)
Associate Degree in Culinary Arts
Mike studied culinary arts with a strong focus on farm-to-table principles and sustainable cooking. His training emphasized the importance of fresh, local ingredients and environmentally responsible practices in the kitchen.
Mike’s food journey began deep in the Blue Ridge Mountains, where weekends at farmers’ markets and home-cooked meals sparked a lifelong obsession with simple, seasonal eating.
After earning his Associate Degree in Culinary Arts from Asheville-Buncombe Technical Community College, he set out to bring farm-to-table cooking into everyday kitchens, without the fuss.
Mike’s philosophy is all about keeping it fresh, unfussy, and full of heart. When he’s not crafting new single-serving recipes, he’s hiking mountain trails, chatting with local farmers, or experimenting with wild ingredients in his backyard kitchen.