
Dreamy Fluffy Buttermilk Pancakes Recipe: Morning Magic Awaits
Fluffy buttermilk pancakes promise a morning filled with pure comfort and deliciousness.
Golden edges crisp up beautifully in a hot skillet.
Weekends deserve something special that makes everyone smile.
These pancakes blend simple ingredients into something magical.
Soft, light textures melt instantly on your tongue.
Breakfast becomes an experience worth savoring with each delicate bite.
Dive into this recipe and create breakfast memories that sparkle.
FAQs
Buttermilk adds tanginess and helps create a tender, fluffy texture by reacting with baking soda to create light, airy pancakes.
Look for bubbles forming on the surface and edges starting to look dry, which typically takes 2-3 minutes on medium heat.
Yes, you can prepare pancake batter the night before and store it in the refrigerator, but mix it gently before cooking to prevent deflating the air bubbles.
Overmixing develops gluten, which makes pancakes tough and dense instead of light and fluffy, so mix just until ingredients are combined.
Why Buttermilk Pancakes Are a Breakfast Favorite
Ingredients for Fluffy Buttermilk Pancakes
Dry Ingredients:Wet Ingredients:Cooking Ingredient:How to Make Buttermilk Pancakes
Step 1: Whip Up Dry Ingredients
Grab a spacious mixing bowl and toss in flour, baking powder, baking soda, and salt. Whisk these dry ingredients together until they’re perfectly blended and free of lumps.
Step 2: Create Wet Mixture Magic
In a separate bowl, pour in buttermilk, crack in an egg, and add melted butter. Stir these ingredients until they transform into a smooth, silky liquid.
Step 3: Gently Marry the Mixtures
Slowly combine the dry and wet ingredients, stirring with a light touch. Mix just until the batter comes together – stop as soon as you see no more flour streaks.
Overmixing will make your pancakes tough.
Step 4: Heat Up the Cooking Surface
Place a non-stick skillet on the stove and set the heat to medium.
Lightly grease the pan with a touch of butter or cooking spray to prevent sticking.
Step 5: Pour and Sizzle
Ladle the batter onto the hot skillet, creating circular pancakes.
Watch for tiny bubbles to form across the surface – this is your signal that it’s time to flip.
Step 6: Flip and Finish
When bubbles appear and edges look slightly dry, carefully flip each pancake.
Cook the other side until it turns a beautiful golden brown.
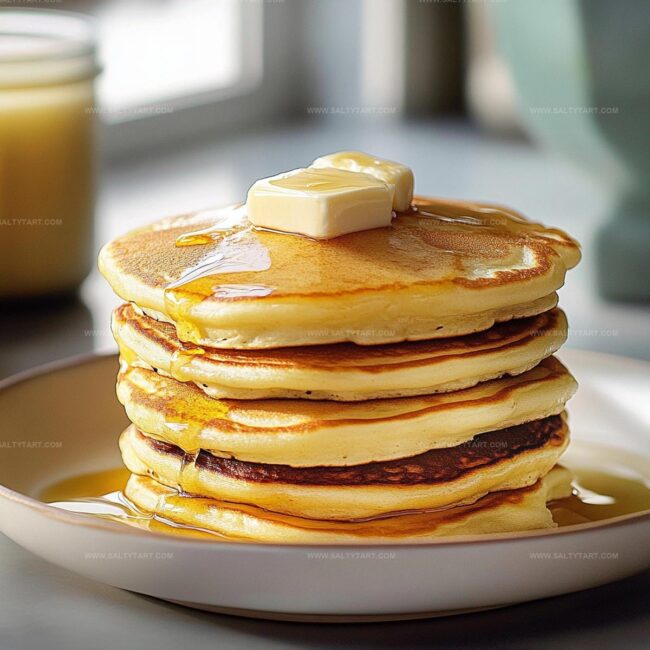
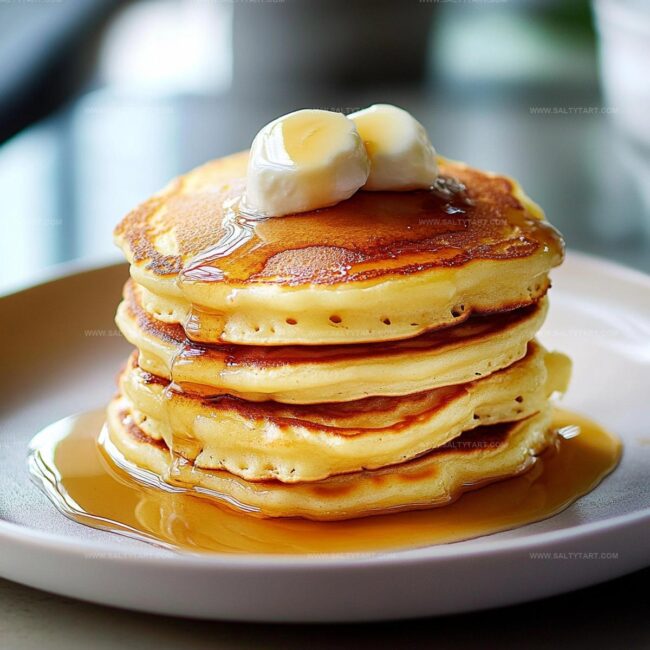
Step 7: Serve and Enjoy
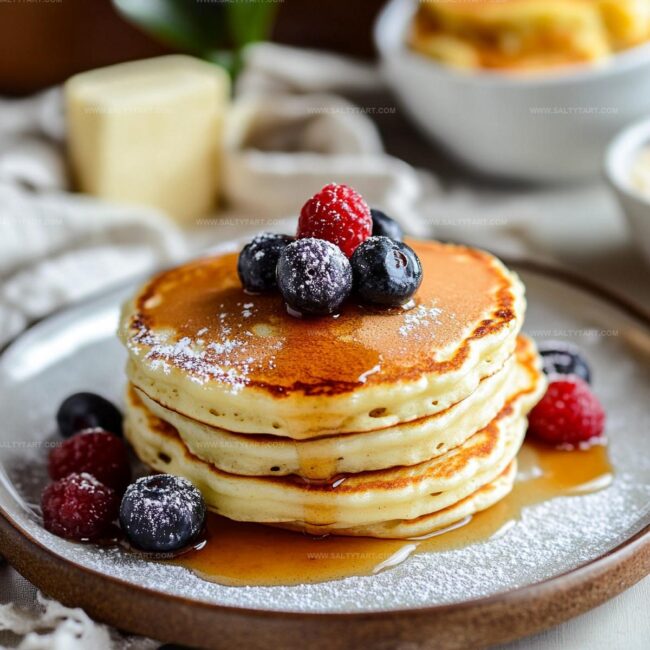
Transfer the pancakes to a plate and top with your favorite delights like:Enjoy your fluffy, mouthwatering breakfast creation!
Tips for Perfect Buttermilk Pancakes
Flavorful Twists on Buttermilk Pancakes
Pairing Ideas for Buttermilk Pancakes
Rich, smooth bourbon complements the buttermilk pancakes’ sweetness, adding depth and warmth to each delightful bite.
Tart blueberries, raspberries, and strawberries cut through the pancakes’ richness, providing a bright, refreshing contrast that elevates the entire breakfast experience.
Smooth, slightly bitter cold brew coffee balances the pancakes’ sweetness, creating a harmonious morning meal that awakens your taste buds with complex flavor notes.
Delicate lavender-infused honey adds a sophisticated floral touch, transforming classic buttermilk pancakes into an elegant, gourmet breakfast sensation.
Proper Storage for Buttermilk Pancakes
Print
Buttermilk Pancakes Recipe
- Total Time: 20 minutes
- Yield: 4 1x
Description
Fluffy buttermilk pancakes deliver golden comfort straight from grandmother’s kitchen. Stacked high with maple syrup, these classic breakfast treasures promise delightful mornings with crisp edges and tender centers you’ll savor to the last bite.
Ingredients
Main Ingredients:
- 1 cup all-purpose flour
- 1 cup buttermilk
- 1 large egg
Leavening Agents:
- 1 tablespoon baking powder
- 1/2 teaspoon baking soda
Seasonings and Fats:
- 1/4 teaspoon salt
- 2 tablespoons melted butter
Instructions
- Sift dry ingredients in a spacious mixing vessel, ensuring uniform distribution of flour, leavening agents, and seasoning.
- Whisk wet components in a separate container, blending buttermilk, egg, and liquefied butter until achieving a silky consistency.
- Delicately merge wet and dry mixtures, stirring minimally to prevent dense texture; slight lumps are acceptable.
- Heat a non-stick griddle to medium temperature (approximately 375°F), applying a thin layer of cooking spray or butter.
- Ladle batter onto the heated surface, creating circular shapes with approximately 4-inch diameter.
- Monitor pancakes carefully; when small bubbles emerge across the surface and edges appear matte (about 2-3 minutes), gently flip using a wide spatula.
- Cook reverse side for an additional 60-90 seconds until achieving a golden-brown complexion and ensuring complete interior cooking.
- Transfer finished pancakes to a warm plate, maintaining temperature and preventing sogginess.
- Garnish with preferred accompaniments such as maple syrup, fresh berries, whipped cream, or powdered sugar, serving immediately for optimal taste and texture.
Notes
- Choose room temperature ingredients to ensure smooth blending and consistent pancake texture.
- Avoid overmixing the batter, which can create tough and dense pancakes; small lumps are perfectly fine.
- For gluten-free option, substitute all-purpose flour with a 1:1 gluten-free baking blend containing xanthan gum.
- Letting the batter rest for 5-10 minutes before cooking helps develop better flavor and allows flour to absorb liquid, resulting in fluffier pancakes.
- Prep Time: 10 minutes
- Cook Time: 10 minutes
- Category: Breakfast, Snacks, Desserts
- Method: Frying
- Cuisine: American
Nutrition
- Serving Size: 4
- Calories: 245 kcal
- Sugar: 3 g
- Sodium: 320 mg
- Fat: 9 g
- Saturated Fat: 5 g
- Unsaturated Fat: 3.5 g
- Trans Fat: 0.4 g
- Carbohydrates: 33 g
- Fiber: 1 g
- Protein: 7 g
- Cholesterol: 55 mg
Mike Reynolds
Founder & Recipe Developer
Expertise
Farm-to-table cuisine, Seasonal recipe development, Sustainable cooking techniques, Food photography
Education
Asheville-Buncombe Technical Community College (A-B Tech)
Associate Degree in Culinary Arts
Mike studied culinary arts with a strong focus on farm-to-table principles and sustainable cooking. His training emphasized the importance of fresh, local ingredients and environmentally responsible practices in the kitchen.
Mike’s food journey began deep in the Blue Ridge Mountains, where weekends at farmers’ markets and home-cooked meals sparked a lifelong obsession with simple, seasonal eating.
After earning his Associate Degree in Culinary Arts from Asheville-Buncombe Technical Community College, he set out to bring farm-to-table cooking into everyday kitchens, without the fuss.
Mike’s philosophy is all about keeping it fresh, unfussy, and full of heart. When he’s not crafting new single-serving recipes, he’s hiking mountain trails, chatting with local farmers, or experimenting with wild ingredients in his backyard kitchen.