The Dreamiest Chocolate Whipped Cream Recipe Ever Made
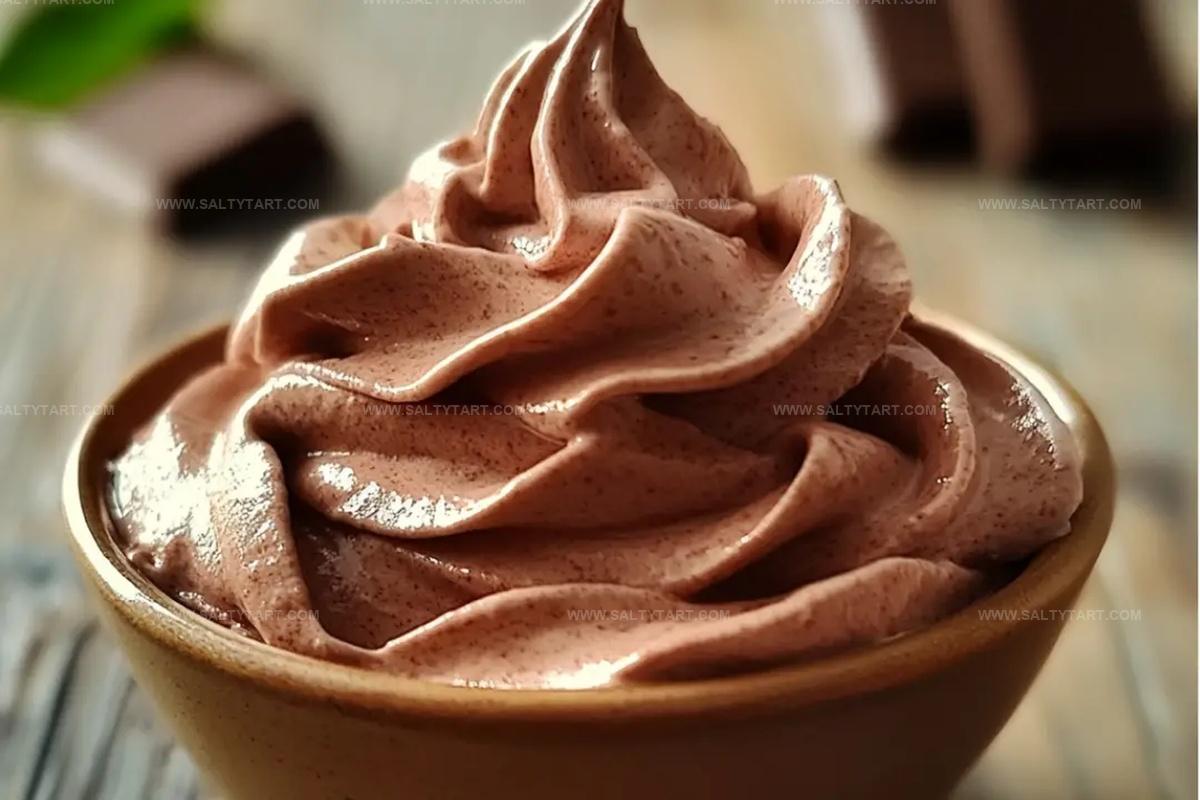
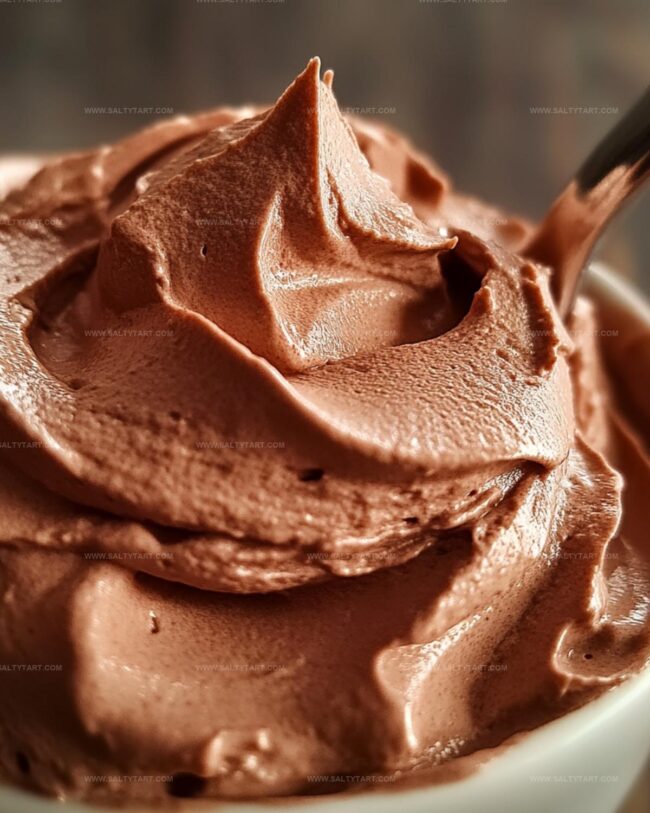
Creamy, dreamy chocolate whipped cream adds a luxurious touch to any dessert you serve.
This silky smooth recipe brings decadence to your favorite treats with minimal effort.
Rich chocolate flavor infuses each delicate dollop, creating pure indulgence.
Whipping up this delightful cream takes just minutes and requires only a few simple ingredients.
The magic happens when chocolate and heavy cream blend into a cloud-like topping that melts in your mouth.
Soft peaks and deep cocoa notes transform ordinary desserts into extraordinary culinary experiences.
Prepare to delight your taste buds with this irresistible chocolate whipped cream that promises to elevate every sweet moment.
Chocolate Whipped Cream: Best Storage At Home
FAQs
Look for visual cues like soft or stiff peaks. Soft peaks will curl when you lift the beaters, while stiff peaks will stand straight up.
An electric mixer is recommended for best results, as it provides consistent speed and helps achieve the desired texture more easily.
Use high-quality unsweetened cocoa powder for the richest chocolate flavor. Dutch-processed cocoa can provide a smoother taste.
Ensure all ingredients are cold and add sugar gradually while mixing to help create a smooth, creamy texture.
Chocolate Whipped Cream That’s Light and Luscious
Everything Needed For Chocolate Whipped Cream
Dairy Base:Sweeteners:Flavor Enhancers:Directions For Making Chocolate Whipped Cream
Step 1: Gather Chilled Mixing Bowl
Select a large metal or glass mixing bowl and place it in the refrigerator for about 15 minutes to ensure it’s thoroughly chilled. Cold equipment helps create perfect whipped cream.
Step 2: Combine Creamy Ingredients
Pour heavy whipping cream, powdered sugar, and cocoa powder into the chilled bowl. The cold bowl will help the cream whip faster and maintain its structure.
Step 3: Start Gentle Whisking
Use an electric mixer with a whisk attachment. Begin whisking at low speed, allowing ingredients to blend smoothly without splattering.
Mix for about 30 seconds until ingredients are initially combined.
Step 4: Gradually Increase Mixer Speed
Slowly increase mixer speed to medium-high.
Continue whisking, watching the cream transform from liquid to soft, billowy texture. This process typically takes 2-3 minutes.
Step 5: Check Whipping Consistency
Watch for two distinct whipping stages:Step 6: Stop Mixing at Perfect Moment
Stop whisking as soon as desired peak consistency is reached. Overmixing can cause cream to become grainy or turn into butter.
Step 7: Serve or Store
Use immediately as a dessert topping or store in refrigerator for up to 2 hours. Gently re-whip if separation occurs.
Smart Tips For Great Chocolate Whipped Cream
Tasty Ways To Mix Up Chocolate Whipped Cream
What Pairs With Chocolate Whipped Cream Desserts
Print
Chocolate Whipped Cream Recipe
- Total Time: 10 minutes
- Yield: 4 1x
Description
Indulgent chocolate whipped cream elevates desserts with rich, silky goodness. Effortless preparation brings a luxurious touch to cakes, pies, and beverages you’ll savor.
Ingredients
Main Ingredients:
- 2 cups (473 ml) heavy cream
- 1/3 cup (66 grams) granulated sugar
- 1/4 cup (20 grams) unsweetened cocoa powder
Flavoring:
- 1 teaspoon (5 ml) vanilla extract
Instructions
- Gather all ingredients and a large mixing bowl, ensuring ingredients are chilled for optimal whipping performance.
- Attach the whisk to an electric mixer and begin blending on low speed, creating a gentle, foamy texture.
- Gradually elevate the mixer’s speed to medium-high, continuing to whip the cream until it transforms and begins to thicken.
- Monitor the cream’s consistency carefully: for dessert topping, aim for soft peaks that gracefully curl when beaters are lifted.
- For precise piping designs, continue whipping until stiff peaks form, standing upright when beaters are removed.
- Stop mixing immediately once desired peak consistency is achieved to prevent over-beating, which can cause butter-like separation.
- Use cream immediately for optimal texture and visual appeal, or refrigerate briefly until ready to serve.
Notes
- Chill your mixing bowl and whisk attachment beforehand to help the cream whip faster and hold its structure more effectively.
- Use high-quality cocoa powder for a rich, deep chocolate flavor that elevates the entire dessert topping.
- Ensure heavy cream is very cold directly from the refrigerator to achieve maximum volume and stability when whipping.
- Avoid overbeating, which can cause the cream to turn grainy or start separating into butter, by stopping once soft or stiff peaks form.
- Prep Time: 10 minutes
- Cook Time: 0 minutes
- Category: Desserts, Snacks
- Method: Blending
- Cuisine: American
Nutrition
- Serving Size: 4
- Calories: 232
- Sugar: 7 g
- Sodium: 16 mg
- Fat: 23 g
- Saturated Fat: 14 g
- Unsaturated Fat: 9 g
- Trans Fat: 0.5 g
- Carbohydrates: 6 g
- Fiber: 1 g
- Protein: 1.5 g
- Cholesterol: 80 mg
Jess Martinez
Contributing Recipe Writer & Nutrition Consultant
Expertise
Southwestern and Latin American cooking, Nutritional analysis and healthy recipe planning, Cultural food traditions, Modifying traditional dishes for better health
Education
Santa Fe Community College
Certificate in Culinary Arts
Focused on mastering the flavors and cooking methods of traditional Southwestern cuisine.
Jess’s love for bold, homegrown flavors led her straight into the world of Southwestern cooking and cultural nutrition.
After completing her Certificate in Culinary Arts at Santa Fe Community College, she made it her mission to show that good-for-you food can still taste incredible.
At saltytart.com, Jess shares vibrant, health-conscious recipes with roots in tradition but a fresh, modern twist. When she’s not testing new recipes, you’ll find her at local growers’ markets, tending her herb garden, or digging into food history books.