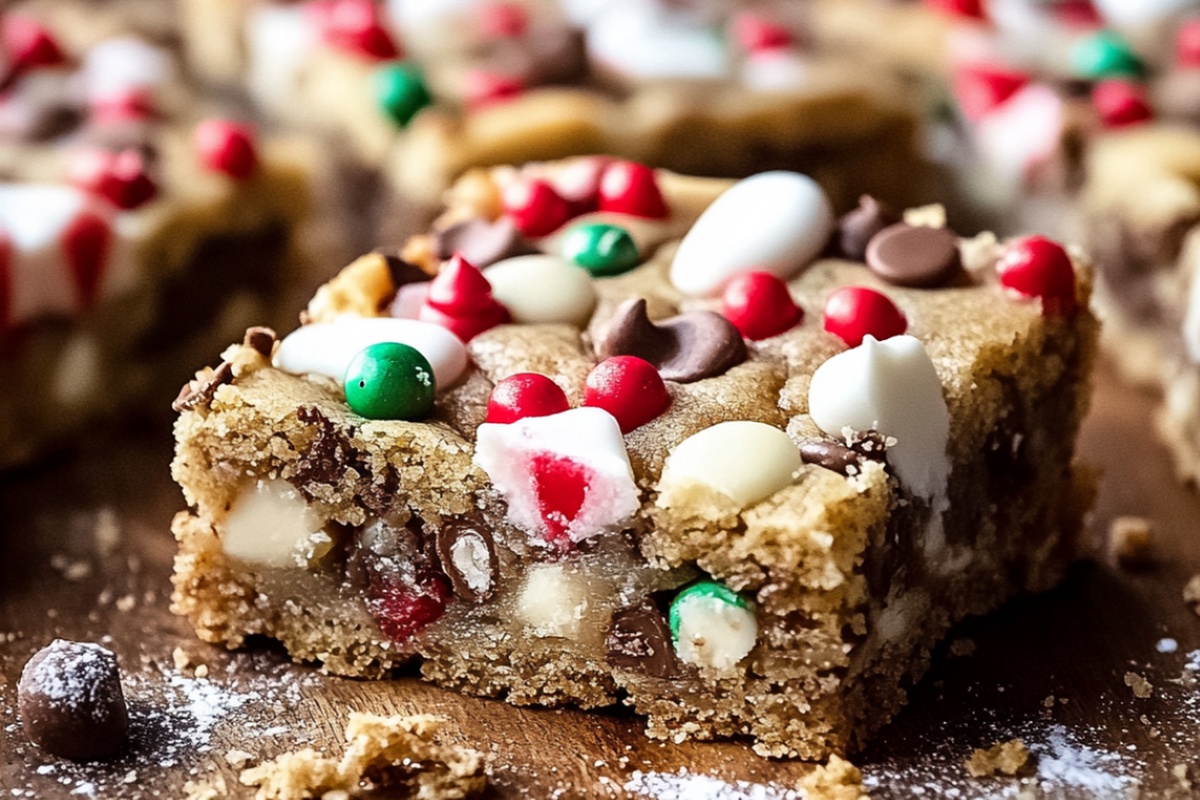
Jolly Christmas Cookie Bars Recipe: Festive Baking Magic
Sweet memories often emerge from my grandmother’s magical Christmas cookie bars that always drew cousins from miles around.
Nostalgic aromas would drift through her cozy kitchen, creating anticipation for something extraordinary.
Buttery layers and delicate spices promise a delightful experience that connects generations.
Soft edges and crisp centers hint at the perfect balance of textures waiting to surprise you.
Childhood comfort meets festive cheer in this simple yet remarkable treat.
Memories baked into every square invite you to create your own delicious traditions.
Warm ovens and cheerful spirits await your baking adventure.
Christmas Cookie Bars Breakdown
Ingredients for Christmas Cookie Bars
Main Ingredients:Mix-In Ingredients:Leavening and Seasoning Ingredients:How to Bake Christmas Cookie Bars
Step 1: Warm Up The Oven
Crank your oven to a toasty 350°F. Grab a 9×13-inch pan and give it a quick spray with cooking spray or line it with parchment paper for super easy bar removal.
Step 2: Whip Up Butter Mixture
In a spacious mixing bowl, blend together:Whip these ingredients until they transform into a fluffy cloud-like texture. This should take around 3-4 minutes on medium speed.
Step 3: Incorporate Egg Magic
Drop in eggs one by one, making sure each gets fully mixed before adding the next. Pour in vanilla extract and continue mixing until everything looks perfectly combined.
Step 4: Create Dry Ingredient Blend
In a separate bowl, whisk together:Slowly add this dry mixture to your wet ingredients, stirring gently until just combined. Don’t go crazy with mixing!
Step 5: Add Festive Goodies
Fold in your colorful mix-ins:Gently distribute these throughout the dough for maximum deliciousness.
Step 6: Spread The Love
Transfer the dough into your prepared pan.
Press it down evenly and sprinkle remaining holiday sprinkles on top for extra cheer.
Step 7: Bake To Perfection
Slide the pan into the oven and bake for 25-30 minutes.
You’ll know they’re done when edges turn golden brown and the center looks set. A toothpick inserted in the middle should come out clean.
Step 8: Cool And Slice
Let the bars cool completely in the pan. Once cooled, slice into 24 delightful squares and get ready to enjoy!
Tips for Soft Christmas Cookie Bars
Variations for Christmas Cookie Bars
Serving Suggestions for Christmas Cookie Bars
Enjoy a chilled glass of creamy whole milk alongside these Christmas cookie bars for a classic, nostalgic combination that highlights the sweet, buttery flavors.
Brew a warm mug of cinnamon or ginger-spiced tea to complement the rich, festive notes of the chocolate and sprinkle-filled bars, creating a cozy winter treat experience.
Serve a mug of rich hot chocolate topped with marshmallows, which beautifully enhances the chocolate chips and candies in the cookie bars, bringing out their decadent holiday essence.
Pair with a smooth vanilla latte to add a sophisticated coffee undertone that balances the sweetness of the Christmas cookie bars and provides a warm, comforting contrast.
Storage Advice for Christmas Cookie Bars
FAQs
Yes, you can substitute the red and green chocolate candies with your favorite holiday-themed candies or chocolate chips for a personalized touch.
Stop mixing as soon as the dry ingredients are just incorporated. Overmixing can lead to tough, dense cookie bars instead of soft and chewy ones.
Regular sprinkles work just fine. The goal is to add a festive and colorful element to your Christmas cookie bars.
Absolutely! You can prepare the dough a day in advance and store it in the refrigerator. Just bring it to room temperature before baking.
Print
Christmas Cookie Bars Recipe
- Total Time: 45 minutes
- Yield: 24 1x
Description
Festive Christmas Cookie Bars bring holiday cheer with layers of sweet nostalgia and rich buttery flavor. Homemade treats create warm memories that invite celebration and joy for family gatherings.
Ingredients
Main Ingredients:
- 2 ½ cups (310g) all-purpose flour
- 1 cup (226g) unsalted butter, softened
- 2 large eggs
- 1 cup (200g) granulated sugar
- ½ cup (100g) brown sugar
Chocolate and Candies:
- 1 cup (180g) red and green chocolate candies (like M&Ms)
- ½ cup (90g) white chocolate chips
Leavening and Seasonings:
- 1 teaspoon baking powder
- ½ teaspoon baking soda
- ½ teaspoon salt
- 2 teaspoons vanilla extract
- ¼ cup (40g) holiday sprinkles
Instructions
- Prepare the baking environment by heating the oven to 350°F and lining a 9×13-inch pan with parchment paper for easy removal.
- In a large mixing bowl, vigorously cream butter with granulated and brown sugars until the mixture becomes light and airy, approximately 3-4 minutes using medium-speed mixing.
- Incorporate eggs individually, ensuring complete blending after each addition. Mix in vanilla extract thoroughly until the mixture is smooth and uniform.
- Separately combine flour, baking powder, baking soda, and salt by whisking. Gradually integrate the dry ingredients into the wet mixture, stirring minimally to prevent overmixing.
- Gently fold holiday-colored chocolate candies, white chocolate chips, and half of the sprinkles into the dough, distributing ingredients evenly throughout the mixture.
- Transfer the dough into the prepared pan, pressing and smoothing to create an uniform layer. Scatter remaining holiday sprinkles across the surface for decorative flair.
- Slide the pan into the preheated oven and bake for 25-30 minutes. Look for golden-brown edges and a set center. Test doneness by inserting a toothpick—it should emerge clean when the bars are fully baked.
- Remove from oven and allow complete cooling in the pan. Once cooled, slice into 24 consistent squares, ready to serve and enjoy.
Notes
- Customize sprinkle colors to match different holiday themes or personal preferences for a unique touch.
- Swap chocolate candies with seasonal M&Ms or crushed candy canes to create variety and keep the festive spirit.
- Reduce baking time by 2-3 minutes for chewier, softer bars or extend by 2-3 minutes for crispier edges.
- Use room temperature eggs and butter to ensure smoother mixing and more consistent texture throughout the dough.
- Prep Time: 15 minutes
- Cook Time: 30 minutes
- Category: Desserts, Snacks
- Method: Baking
- Cuisine: American
Nutrition
- Serving Size: 24
- Calories: 178
- Sugar: 12 g
- Sodium: 75 mg
- Fat: 10 g
- Saturated Fat: 6 g
- Unsaturated Fat: 4 g
- Trans Fat: 0.1 g
- Carbohydrates: 22 g
- Fiber: 0.5 g
- Protein: 2 g
- Cholesterol: 15 mg
Mike Reynolds
Founder & Recipe Developer
Expertise
Farm-to-table cuisine, Seasonal recipe development, Sustainable cooking techniques, Food photography
Education
Asheville-Buncombe Technical Community College (A-B Tech)
Associate Degree in Culinary Arts
Mike studied culinary arts with a strong focus on farm-to-table principles and sustainable cooking. His training emphasized the importance of fresh, local ingredients and environmentally responsible practices in the kitchen.
Mike’s food journey began deep in the Blue Ridge Mountains, where weekends at farmers’ markets and home-cooked meals sparked a lifelong obsession with simple, seasonal eating.
After earning his Associate Degree in Culinary Arts from Asheville-Buncombe Technical Community College, he set out to bring farm-to-table cooking into everyday kitchens, without the fuss.
Mike’s philosophy is all about keeping it fresh, unfussy, and full of heart. When he’s not crafting new single-serving recipes, he’s hiking mountain trails, chatting with local farmers, or experimenting with wild ingredients in his backyard kitchen.