The Golden Classic: Homemade Apple Pie Recipe for Everyone
Sweet memories often swirl around a classic homemade apple pie that connects generations through simple, delightful flavors.
Grandmothers carefully perfected their unique techniques over decades of patient baking.
Warm cinnamon and buttery pastry create an irresistible aroma that fills kitchens with comfort.
Crisp autumn apples provide the perfect foundation for this timeless dessert.
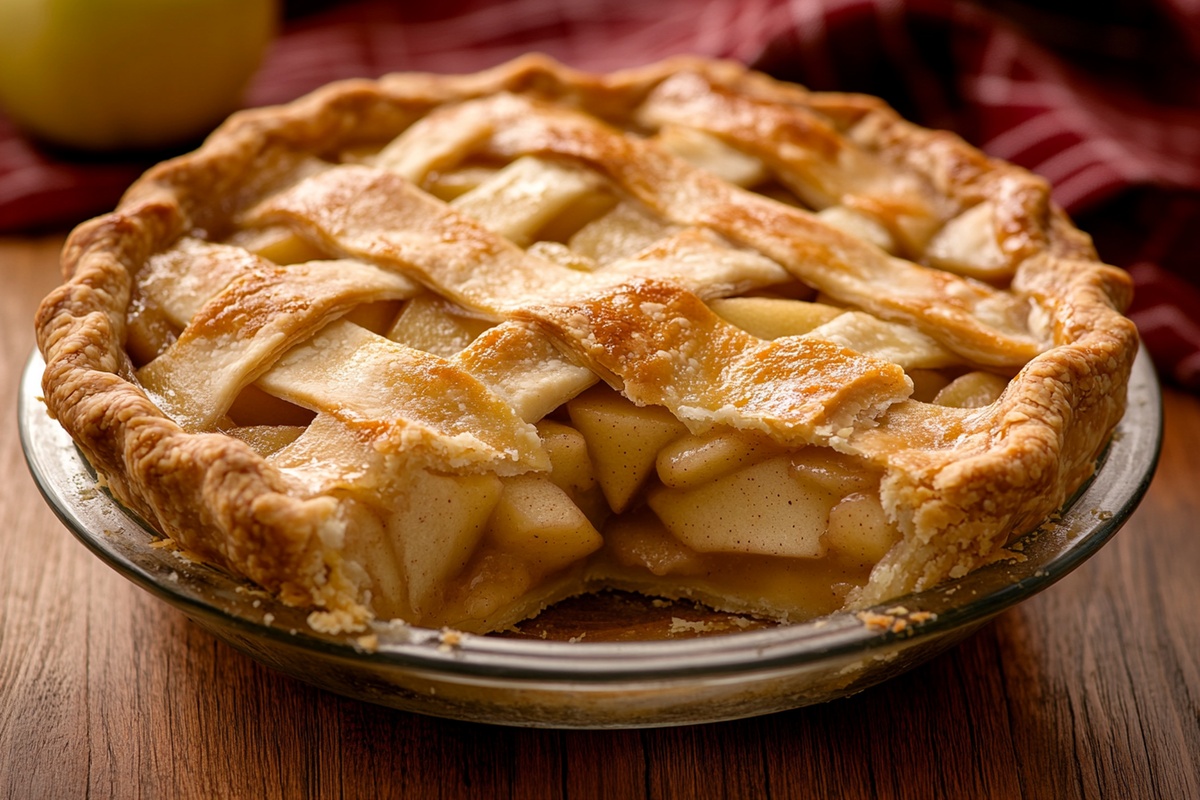
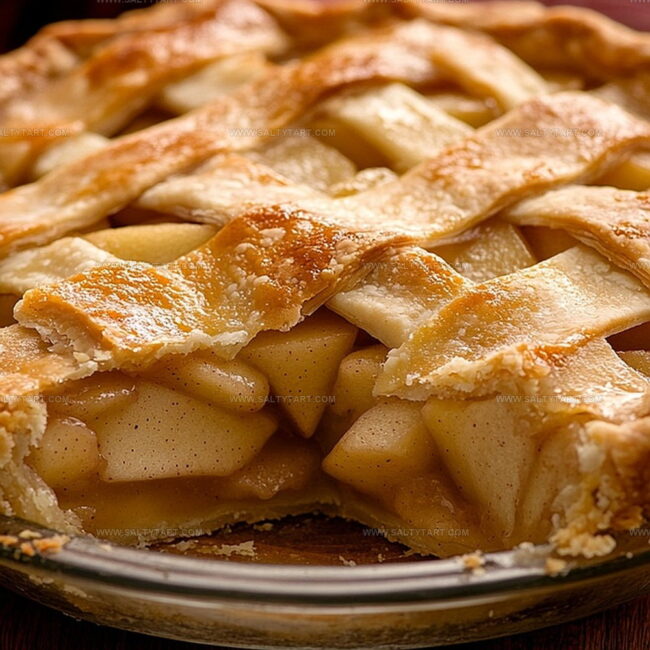
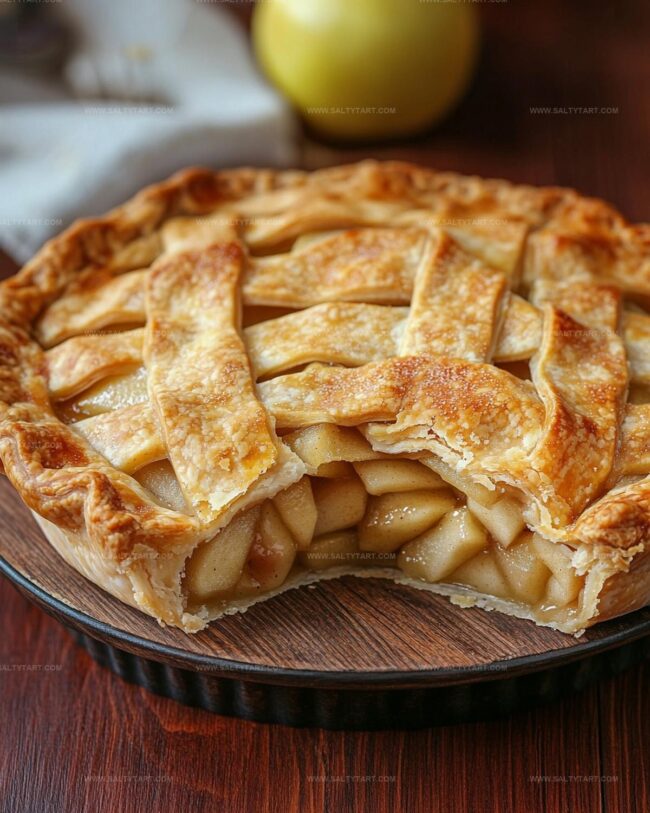
Flaky crusts golden-brown and slightly crisp invite eager forks to break through delicate layers.
Baking this pie represents more than a recipe, it’s a cherished tradition passed down through loving hands.
Each slice tells a story of tradition, warmth, and delicious nostalgia.
You’ll want to savor every single bite of this incredible homemade treasure.
Why Classic Homemade Apple Pie Feels Like Home
Essential Ingredients for Classic Homemade Apple Pie Perfection
Pie Crust Ingredients:Filling Ingredients:Finishing Ingredients:How to Bake Classic Homemade Apple Pie Perfectly
Step 1: Mix Pie Dough
Create a delectable pie crust by combining flour and salt in a spacious mixing bowl. Gently incorporate cold butter using a pastry cutter until the mixture looks like rough crumbs.
Slowly add icy water, blending until the dough forms a cohesive ball. Divide the dough into two equal portions, wrap each in plastic wrap, and chill in the refrigerator for a minimum of 60 minutes.
Step 2: Prepare Apple Filling
Combine the following ingredients in a large mixing bowl:Gently toss the ingredients, allowing the flavors to mingle while you prepare the pie crust.
Step 3: Roll Out Bottom Crust
Dust a clean surface with flour and roll out one dough disk into a circular shape large enough to line a 9-inch pie dish.
Carefully transfer the dough into the dish, ensuring some overhang remains around the edges.
Step 4: Add Apple Mixture
Pour the prepared apple filling into the pie crust, creating a slight mound in the center for a classic, elevated look.
Step 5: Create Top Crust
Roll out the second dough disk and place it over the apple filling. Trim excess dough and crimp the edges to create a beautiful seal.
Cut several small slits on the top crust to allow steam to escape during baking.
Step 6: Finish Pie Preparation
Brush the top crust with beaten egg and sprinkle with additional granulated sugar for a golden, sparkling finish.
Step 7: Bake the Pie
Place the pie on a baking sheet and slide it into a preheated oven at 425F. Bake for 20 minutes, then reduce temperature to 375F and continue baking for an additional 30 minutes.
The crust should turn a beautiful golden brown, and the filling should bubble temptingly.
Step 8: Cool and Serve
Allow the pie to rest and cool for at least 2 hours.
This cooling period helps the filling set and makes slicing easier. Serve and enjoy your homemade masterpiece!
Tips to Master Classic Homemade Apple Pie Every Time

Fun Variations on Classic Homemade Apple Pie
Best Pairings to Serve with Classic Homemade Apple Pie
Elevate your classic apple pie experience with these perfect pairings.
Scoop a creamy, cold vanilla ice cream alongside the warm, spiced pie for a heavenly contrast of temperatures and textures.
Enhance the pie’s sweetness by adding a rich, golden caramel sauce that complements the cinnamon and nutmeg notes.
Pour a small glass of smooth cinnamon-infused whiskey to echo the pie’s warm spices and provide a cozy, sophisticated touch to dessert.
Brew a hot, spicy chai tea that mirrors the pie’s aromatic cinnamon and nutmeg flavors, creating a harmonious and comforting pairing.
How to Keep Classic Homemade Apple Pie Fresh and Flaky
FAQs
Cold butter and minimal handling create a flaky crust. Cut butter into flour quickly and avoid overworking the dough to keep the butter chunks intact, which create layers when baked.
Sprinkle a thin layer of breadcrumbs or crushed graham crackers on the bottom crust before adding filling. This helps absorb excess moisture and keeps the crust crisp.
Yes! Mix tart apples like Granny Smith with sweeter varieties like Honeycrisp or Fuji. This combination provides balanced flavor and ideal texture for the pie filling.
Print
Classic Homemade Apple Pie Recipe
- Total Time: 2 hours 20 minutes
- Yield: 8 1x
Description
Warm, golden “Classic Homemade Apple Pie” embodies comfort from Grandma’s kitchen with layers of cinnamon-spiced apples nestled in flaky, buttery crust. Delightful slices promise sweet memories and pure American dessert tradition you’ll cherish with each delectable bite.
Ingredients
Main Ingredients:
- 6 cups apples (Granny Smith or mix of sweet and tart), peeled, cored, and thinly sliced
- 2 1/2 cups all-purpose flour
- 1 cup cold unsalted butter, cubed
Filling and Seasoning Ingredients:
- 3/4 cup granulated sugar
- 1/2 teaspoon ground cinnamon
- 1/4 teaspoon ground nutmeg
- 2 tablespoons all-purpose flour
- 1 tablespoon lemon juice
Binding and Finishing Ingredients:
- 1 teaspoon salt
- 1/4 to 1/2 cup ice water
- 1 egg, beaten
- 1 tablespoon granulated sugar (optional)
Instructions
- Craft a buttery pastry by blending flour and salt, then incorporate cold butter until the mixture resembles coarse sand. Carefully introduce ice water, kneading gently until the dough coheres. Partition into two equal spheres, encase in plastic wrap, and chill for a minimum of 60 minutes.
- Heat the oven to a precise 425F (220C), positioning the rack in the center for optimal baking.
- Create a vibrant filling by combining apple slices with sugar, flour, aromatic cinnamon, warm nutmeg, tangy lemon juice, and a delicate salt sprinkle. Allow the ingredients to intermingle and develop robust flavors while preparing the crust.
- On a lightly dusted surface, roll the first dough disk into a circular shape large enough to drape comfortably within a 9-inch pie dish. Carefully transfer the delicate pastry, allowing a gentle overhang. Generously distribute the seasoned apple mixture, creating a slight dome in the center.
- Transform the second dough disk into a protective canopy, draping it elegantly over the fruit. Trim excess edges and meticulously crimp to create a secure seal. Delicately score several small vents to facilitate steam escape.
- Enhance the pie’s appearance by gently brushing the surface with beaten egg, then sprinkle a light dusting of granulated sugar for a glistening finish.
- Position the pie on a sturdy baking sheet. Initiate baking at 425F for 20 minutes, then reduce temperature to 375F (190C) and continue baking for approximately 30 minutes until the crust achieves a golden hue and the filling bubbles enticingly.
- Exercise patience by allowing the pie to rest and set for a minimum of 2 hours before slicing, ensuring a perfectly structured and gloriously delicious dessert.
Notes
- Choose crisp, tart apples like Granny Smith or Honeycrisp for the best pie texture and balanced sweetness.
- Keep butter and water extremely cold to achieve a flaky, tender pie crust that melts in your mouth.
- Let the pie filling rest to allow natural apple juices to develop, creating a more concentrated and rich flavor profile.
- Create decorative venting patterns on the top crust to help steam escape and add visual appeal to your pie.
- Prep Time: 1 hour 30 minutes
- Cook Time: 50 minutes
- Category: Desserts
- Method: Baking
- Cuisine: American
Nutrition
- Serving Size: 8
- Calories: 292 kcal
- Sugar: 17 g
- Sodium: 210 mg
- Fat: 15 g
- Saturated Fat: 9 g
- Unsaturated Fat: 6 g
- Trans Fat: 0.2 g
- Carbohydrates: 38 g
- Fiber: 3 g
- Protein: 3 g
- Cholesterol: 40 mg
Jess Martinez
Contributing Recipe Writer & Nutrition Consultant
Expertise
Southwestern and Latin American cooking, Nutritional analysis and healthy recipe planning, Cultural food traditions, Modifying traditional dishes for better health
Education
Santa Fe Community College
Certificate in Culinary Arts
Focused on mastering the flavors and cooking methods of traditional Southwestern cuisine.
Jess’s love for bold, homegrown flavors led her straight into the world of Southwestern cooking and cultural nutrition.
After completing her Certificate in Culinary Arts at Santa Fe Community College, she made it her mission to show that good-for-you food can still taste incredible.
At saltytart.com, Jess shares vibrant, health-conscious recipes with roots in tradition but a fresh, modern twist. When she’s not testing new recipes, you’ll find her at local growers’ markets, tending her herb garden, or digging into food history books.