
The Ultimate Crispy Chicken Katsu Recipe You’ll Adore
Culinary magic happens when crispy chicken katsu meets your kitchen expertise.
Japanese comfort food beckons with its golden, crunchy exterior and tender meat inside.
Panko breadcrumbs create an irresistible coating that elevates this simple dish.
Home cooks adore how quickly these cutlets come together with basic ingredients.
Crisp and juicy, each bite promises a delightful crunch that satisfies deeply.
Seasonings like garlic powder and salt bring incredible depth to the breading.
A perfect companion for steamed rice or tangy tonkatsu sauce awaits you.
Jump into this recipe and surprise yourself with restaurant-quality deliciousness right at home.
Why Crispy Chicken Katsu Is a Family Favorite
Master the Crispy Chicken Katsu Magic
What Goes Into Crispy Chicken Katsu
Main Protein:Breading Ingredients:Cooking and Seasoning:Serving Accompaniments:Sauce and Garnish:How to Make Crispy Chicken Katsu Step by Step
Step 1: Prepare the Chicken
Grab chicken breasts and gently flatten them between plastic wrap using a meat mallet. Season both sides with salt and pepper to enhance the flavor.
Step 2: Create Breading Station
Set up three shallow dishes: one with flour, another with beaten eggs, and the last with panko breadcrumbs. This will help create a perfect crispy coating.
Step 3: Coat the Chicken
Dip each chicken piece first in flour, shaking off any excess. Next, dunk into beaten eggs, ensuring complete coverage.
Finally, roll in panko breadcrumbs, pressing gently to help the coating stick firmly.
Step 4: Heat the Cooking Oil
Pour vegetable oil into a large skillet, filling about half an inch deep.
Heat over medium-high temperature. Test oil readiness by dropping a breadcrumb – if it sizzles immediately, the oil is perfect for frying.
Step 5: Fry the Chicken
Carefully place breaded chicken into hot oil. Cook each side for 4-5 minutes until golden brown and crispy.
Ensure chicken reaches an internal temperature of 165°F. Cook in batches to prevent overcrowding.
Step 6: Remove Excess Oil
Transfer fried chicken to a plate lined with paper towels. This helps absorb extra oil and keeps the coating crisp.
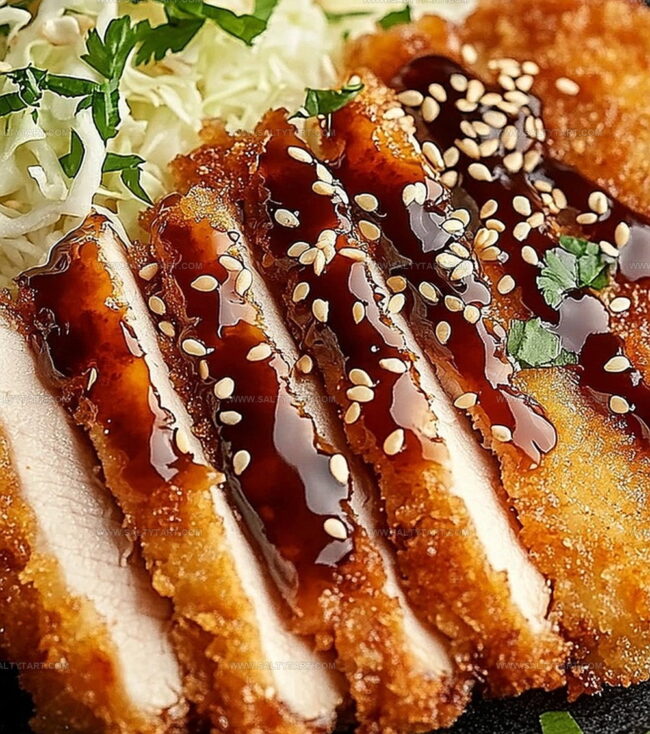
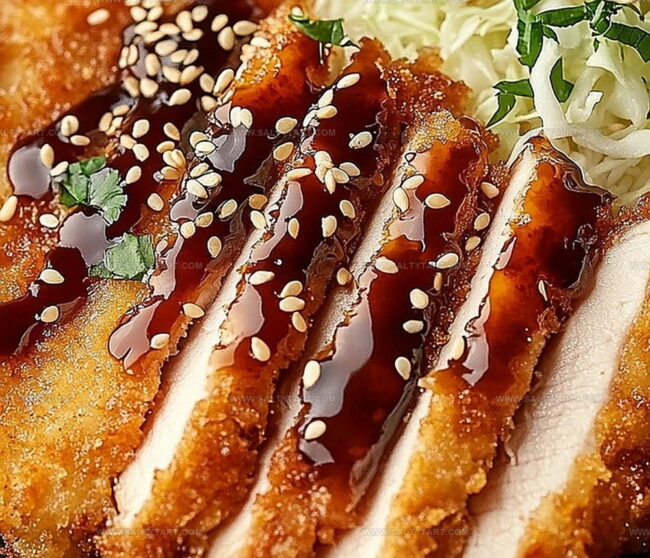
Step 7: Plate and Garnish
Slice chicken into strips. Serve alongside steamed white rice and shredded cabbage.
Drizzle with tangy tonkatsu sauce and sprinkle sesame seeds on top.
Step 8: Serve Immediately
Enjoy the chicken while it’s hot and wonderfully crispy for the best taste and texture.
Pro Techniques for Crispy Chicken Katsu Success
Custom Spins on Crispy Chicken Katsu
Best Pairings with Crispy Chicken Katsu Dinner
Keeping Crispy Chicken Katsu Fresh and Crunchy
FAQs
Press the panko breadcrumbs gently onto the chicken after dipping, making sure to cover the entire surface completely and shake off any excess for an even, crispy coating.
Drop a breadcrumb into the oil – if it sizzles immediately, the oil is ready for frying. The ideal temperature helps create a crispy exterior without burning the chicken.
While the recipe is for chicken katsu, you can substitute with pork cutlets (tonkatsu) or even thin beef cutlets to create a similar crispy breaded dish.
Print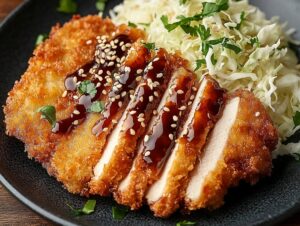
Crispy Chicken Katsu Recipe
- Total Time: 25 minutes
- Yield: 2 1x
Description
Crispy chicken katsu delivers a mouthwatering Japanese classic that combines golden-brown perfection with tender, juicy meat. Crunchy panko breadcrumbs and perfectly seasoned chicken create an irresistible meal you’ll want to savor again and again.
Ingredients
Chicken and Main Ingredients:
- 2 boneless, skinless chicken breasts
- 2 cups cooked white rice
Coating Ingredients:
- 1/2 cup (120 ml) all-purpose flour
- 2 eggs, beaten
- 1 cup (240 ml) panko breadcrumbs
Seasoning, Garnish, and Accompaniments:
- Salt and pepper, to taste
- Vegetable oil, for frying
- 1 cup shredded cabbage
- Tonkatsu sauce, for drizzling
- Sesame seeds, for garnish
Instructions
- Tenderize chicken breasts between plastic wrap, creating an even 1/2-inch thickness. Season generously with salt and pepper on both surfaces.
- Construct a three-station breading setup: flour, beaten eggs, and panko breadcrumbs in separate shallow containers.
- Coat each chicken piece systematically: first dust with flour, shaking off excess; next immerse in egg wash, then thoroughly cover with panko, pressing crumbs gently to ensure adherence.
- Heat vegetable oil in a large skillet to medium-high temperature, approximately 1/2 inch deep. Verify oil readiness by dropping a breadcrumb – it should immediately sizzle upon contact.
- Gently slide breaded chicken into hot oil, maintaining sufficient space between pieces. Fry for 4-5 minutes per side until achieving a rich golden-brown exterior and internal temperature reaches 165°F. Cook in multiple batches if skillet becomes crowded.
- Remove fried chicken and place on paper towel-lined plate to absorb excess oil and maintain crispiness.
- Slice chicken into elegant strips. Accompany with steamed white rice, shredded cabbage, tonkatsu sauce, and a sprinkle of sesame seeds.
- Serve immediately while chicken remains hot and perfectly crisp for optimal texture and flavor.
Notes
- Pick chicken breasts of uniform thickness to ensure even cooking and consistent crispiness.
- Pat chicken completely dry before breading to help coating adhere better and create extra crunch.
- Keep oil temperature steady around 350°F for perfectly golden-brown exterior without burning.
- Use fresh panko breadcrumbs for maximum crispiness and lighter texture compared to traditional breadcrumbs.
- Allow chicken to rest on paper towels briefly to drain excess oil and maintain crispy coating.
- Store leftover katsu in refrigerator and reheat in oven to preserve crunchiness instead of microwave.
- Experiment with gluten-free alternatives like almond flour or gluten-free panko for celiac-friendly version.
- Add spices like garlic powder or paprika to breadcrumb mixture for extra flavor complexity.
- Prep Time: 15 minutes
- Cook Time: 10 minutes
- Category: Lunch, Dinner, Appetizer, Snacks
- Method: Frying
- Cuisine: Japanese
Nutrition
- Serving Size: 2
- Calories: 625 kcal
- Sugar: 5 g
- Sodium: 450 mg
- Fat: 20 g
- Saturated Fat: 4 g
- Unsaturated Fat: 14 g
- Trans Fat: 0.2 g
- Carbohydrates: 65 g
- Fiber: 3 g
- Protein: 45 g
- Cholesterol: 140 mg
Mike Reynolds
Founder & Recipe Developer
Expertise
Farm-to-table cuisine, Seasonal recipe development, Sustainable cooking techniques, Food photography
Education
Asheville-Buncombe Technical Community College (A-B Tech)
Associate Degree in Culinary Arts
Mike studied culinary arts with a strong focus on farm-to-table principles and sustainable cooking. His training emphasized the importance of fresh, local ingredients and environmentally responsible practices in the kitchen.
Mike’s food journey began deep in the Blue Ridge Mountains, where weekends at farmers’ markets and home-cooked meals sparked a lifelong obsession with simple, seasonal eating.
After earning his Associate Degree in Culinary Arts from Asheville-Buncombe Technical Community College, he set out to bring farm-to-table cooking into everyday kitchens, without the fuss.
Mike’s philosophy is all about keeping it fresh, unfussy, and full of heart. When he’s not crafting new single-serving recipes, he’s hiking mountain trails, chatting with local farmers, or experimenting with wild ingredients in his backyard kitchen.