
The Best Crispy Chicken Twister Wrap Recipe For Lunch Heaven
Crafting a mouthwatering crispy chicken twister wrap brings pure culinary excitement to your kitchen.
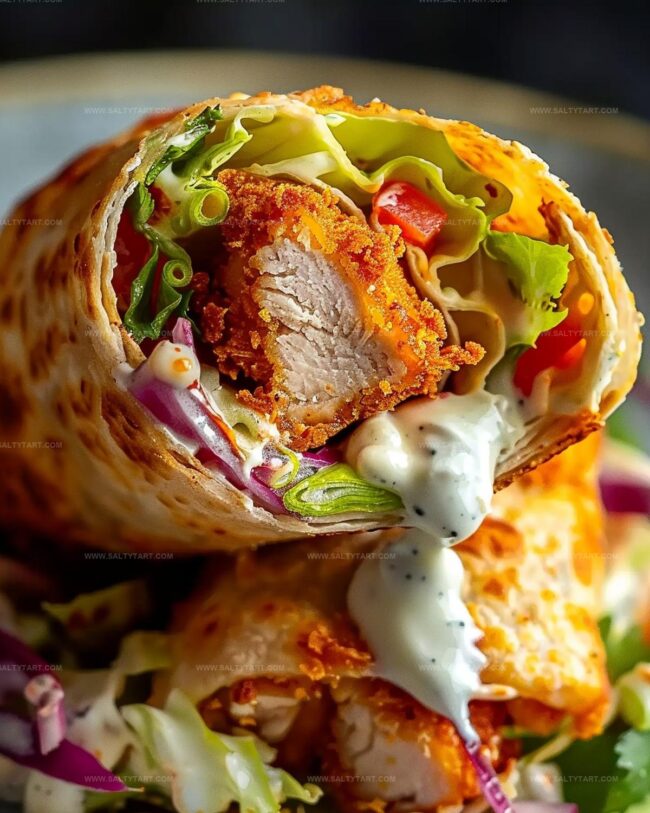
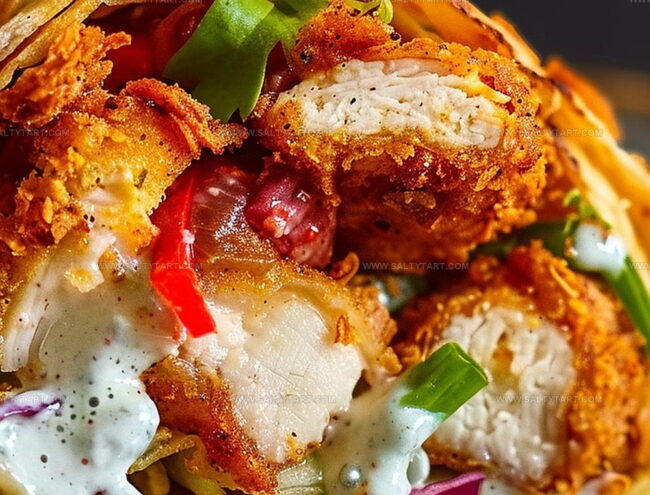
Layers of golden-brown chicken nestle inside soft tortillas, creating an irresistible handheld meal.
Crunchy textures blend seamlessly with zesty seasonings that dance across your palate.
Homemade wraps beat any fast-food version by miles, offering fresh ingredients and personalized flavor profiles.
Simple techniques turn ordinary chicken into a crispy sensation that everyone will devour.
Mixing spices and achieving that perfect crunch takes minimal effort but delivers maximum satisfaction.
Prepare to become the wrap champion among your friends with this game-changing recipe!
Why Crispy Chicken Twister Wraps Are a Hit

Everything for Making Chicken Twister Wraps
Main Ingredients:Dry Coating Ingredients:Fresh Ingredients:Binding and Flavor Ingredients:Steps for Rolling Crispy Chicken Twister Wraps
Step 1: Craft Flavorful Coating
Blend all dry seasonings into flour, creating a zesty mixture that will give your chicken incredible taste. Ensure each spice is thoroughly mixed for maximum flavor distribution.
Step 2: Prepare Chicken Breading Station
Set up a three-part breading process where you’ll:Make sure each chicken strip is completely covered for maximum crunch.
Step 3: Transform Chicken into Golden Delights
Heat vegetable oil in a skillet over medium temperature.
Carefully place chicken strips into hot oil, cooking until each side turns a beautiful golden brown. This process typically takes 3-4 minutes per side.
Transfer cooked strips onto paper towels to absorb excess oil.
Step 4: Warm Tortilla Foundations
Gently heat tortillas in microwave or on skillet until they become soft and pliable.
Warm tortillas prevent cracking when wrapping.
Step 5: Build Flavor-Packed Layer
Arrange tortilla and create delicious base with:Step 6: Assemble Mouthwatering Wrap
Strategically place crispy chicken strips on vegetable layer.
Drizzle with ranch dressing or your preferred sauce for extra zing.
Step 7: Master Wrap Technique
Carefully roll tortilla around fillings, tucking sides inward to secure ingredients.
Apply gentle pressure to create tight, compact wrap.
Step 8: Serve and Enjoy
Slice wrap diagonally, revealing delicious inner layers.
Serve immediately while chicken remains crispy and warm.
Tips for Juicy and Crispy Chicken Wraps
Wrap Variations for Chicken Twister Fans
Pairings for Crispy Chicken Wraps
Crisp, cold beer like a light lager or wheat ale cuts through the chicken’s richness and complements the crispy texture perfectly.
Homemade spicy sriracha mayo or tangy blue cheese dressing adds extra kick and enhances the wrap’s flavor profile, providing a creamy counterpoint to the crunchy chicken.
Bright, citrusy mixed green salad with cucumber and lemon vinaigrette balances the wrap’s heaviness, offering a refreshing contrast and lightening the overall meal experience.
Chilled iced tea with a splash of lemon neutralizes the wrap’s spiciness and provides a smooth, refreshing accompaniment that cleanses the palate between bites.
Storing Chicken Twister Wraps for Lunch
FAQs
Breadcrumbs create a crispy, golden exterior that adds texture and helps seal in the chicken’s moisture, making each bite crunchy and delicious.
Yes, you can substitute all-purpose flour with whole wheat flour, cornmeal, or gluten-free flour blends to suit your dietary needs or preferences.
Use a meat thermometer to check that the internal temperature of the chicken reaches 165°F (74°C), which guarantees it’s safe to eat and perfectly cooked.
Print
Crispy Chicken Twister Wrap Recipe
- Total Time: 30 minutes
- Yield: 4 1x
Description
Savor mouthwatering crispy chicken twister wrap, a delightful fusion of crunchy chicken, fresh vegetables, and zesty sauce wrapped in a warm tortilla. Packed with flavor and easy to prepare, this wrap delivers a perfect balance of textures that satisfies hunger and delights taste buds.
Ingredients
Protein:
- 2 boneless, skinless chicken breasts, cut into strips
Dry Coating:
- 1/2 cup all-purpose flour
- 1 cup breadcrumbs
- 1/2 teaspoons garlic powder
- 1/2 teaspoons onion powder
- 1/2 teaspoons paprika
- 1/4 teaspoons salt
- 1/4 teaspoons black pepper
Wet Ingredients and Wrap Components:
- 1 egg, beaten
- 2 tablespoons vegetable oil (for frying)
- 4 large flour tortillas
- 1 cup shredded lettuce
- 1/2 cup sliced tomatoes
- 1/4 cup sliced red onions
- 1/4 cup ranch dressing or your preferred sauce
Instructions
- Craft a seasoned flour blend by combining dry ingredients to create a flavorful coating for the chicken.
- Prepare a three-stage breading station: first dredge chicken strips in the seasoned flour mixture, then dip into whisked eggs, and finally coat thoroughly with crisp breadcrumbs.
- Preheat vegetable oil in a skillet to medium-high temperature (around 350°F), ensuring sufficient heat for achieving a golden, crunchy exterior.
- Carefully lower breaded chicken strips into hot oil, frying for 3-4 minutes per side until they transform into a rich, amber-brown color and reach an internal temperature of 165°F.
- Transfer fried chicken to a paper towel-lined plate to absorb excess oil and maintain crispiness.
- Gently warm tortillas for 10-15 seconds to enhance flexibility and prevent cracking during wrapping.
- Lay out tortilla and strategically arrange fresh, crisp lettuce as the foundational layer.
- Add vibrant tomato slices and thinly sliced red onions for additional texture and flavor complexity.
- Position golden-brown chicken strips diagonally across the vegetable base.
- Drizzle ranch dressing or preferred sauce to enhance moisture and taste profile.
- Execute a precise wrap technique by folding sides inward and rolling tightly to secure all ingredients.
- Slice diagonally and serve immediately to preserve optimal temperature and crispness.
Notes
- Experiment with alternative flour coatings like almond or coconut flour for gluten-free options that maintain crispiness.
- Use panko breadcrumbs for extra crunch and lighter texture compared to traditional breadcrumbs.
- Pat chicken strips completely dry before coating to help breading adhere better and prevent soggy results.
- Adjust oil temperature around 350°F for perfect golden-brown chicken without burning the exterior.
- Prep Time: 20 minutes
- Cook Time: 10 minutes
- Category: Lunch, Dinner, Snacks
- Method: Frying
- Cuisine: American
Nutrition
- Serving Size: 4
- Calories: 480 kcal
- Sugar: 3 g
- Sodium: 650 mg
- Fat: 22 g
- Saturated Fat: 4 g
- Unsaturated Fat: 16 g
- Trans Fat: 0.2 g
- Carbohydrates: 40 g
- Fiber: 4 g
- Protein: 35 g
- Cholesterol: 110 mg
Jess Martinez
Contributing Recipe Writer & Nutrition Consultant
Expertise
Southwestern and Latin American cooking, Nutritional analysis and healthy recipe planning, Cultural food traditions, Modifying traditional dishes for better health
Education
Santa Fe Community College
Certificate in Culinary Arts
Focused on mastering the flavors and cooking methods of traditional Southwestern cuisine.
Jess’s love for bold, homegrown flavors led her straight into the world of Southwestern cooking and cultural nutrition.
After completing her Certificate in Culinary Arts at Santa Fe Community College, she made it her mission to show that good-for-you food can still taste incredible.
At saltytart.com, Jess shares vibrant, health-conscious recipes with roots in tradition but a fresh, modern twist. When she’s not testing new recipes, you’ll find her at local growers’ markets, tending her herb garden, or digging into food history books.