Crispy Fried Cod Sandwich Recipe: Golden Delight in Every Bite
Fish lovers, a crispy fried cod sandwich can turn an ordinary lunch into a spectacular feast.
Crunchy golden batter wraps each delicate piece of seafood in pure deliciousness.
Perfectly seasoned and expertly fried, this sandwich promises a mouthwatering experience that’ll make you forget every other lunch option.
Maritime traditions blend with modern culinary techniques to create something truly remarkable.
Fresh cod becomes a canvas for incredible flavor combinations and textures.
Succulent fish meets crisp coating, promising a meal that dances between comfort and excitement.
When you bite into this sandwich, prepare for a flavor adventure that’ll transport you straight to coastal kitchens.
Why Crispy Fried Cod Sandwich Hits the Spot
What Goes Into Crispy Fried Cod Sandwiches
Main Protein:Breading Ingredients:Seasoning and Flavoring Ingredients:Sandwich Components:Easy Steps to Fried Cod Sandwich Success
Step 1: Prep the Fish
Grab your fresh cod fillets and give them a good pat down with paper towels to remove excess moisture. Sprinkle both sides with salt, pepper, and a dash of paprika for a flavor kick.
Step 2: Create the Coating Station
Set up three shallow dishes for your breading process:Dredge each cod fillet through the flour, shaking off any extra. Next, dunk the floured fish into the beaten eggs, making sure it’s completely coated.
Finally, roll the fillet in panko breadcrumbs, pressing gently to help the coating stick like a glove.
Step 3: Heat the Cooking Oil
Pour vegetable oil into a deep skillet or fryer.
Bring the temperature up to a sizzling 350°F (175°C). Pro tip: Use a cooking thermometer to nail the perfect oil temperature.
Step 4: Fry to Golden Perfection
Carefully lower the breaded cod fillets into the hot oil. Cook in small batches for 3-4 minutes per side.
You’re looking for a gorgeous golden-brown crust that’s crispy and irresistible. Use a slotted spoon to transfer the fried fish onto paper towels, which will help drain excess oil.
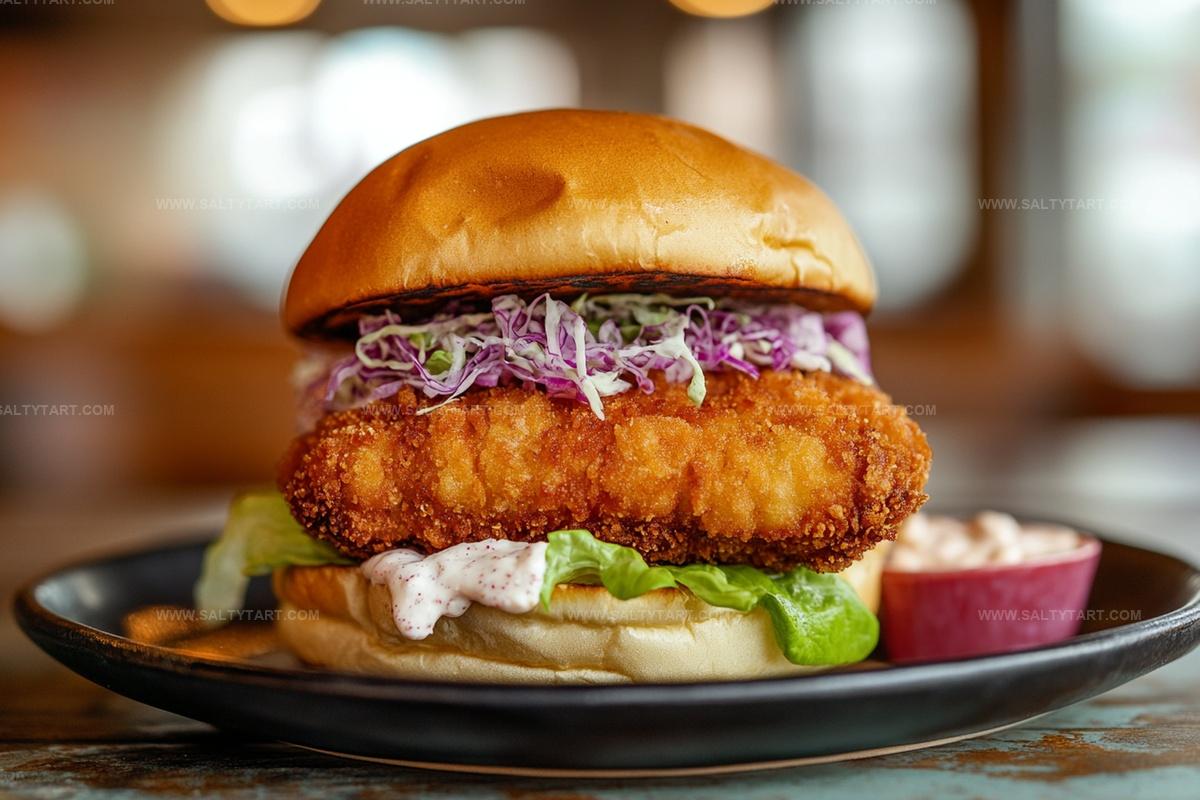
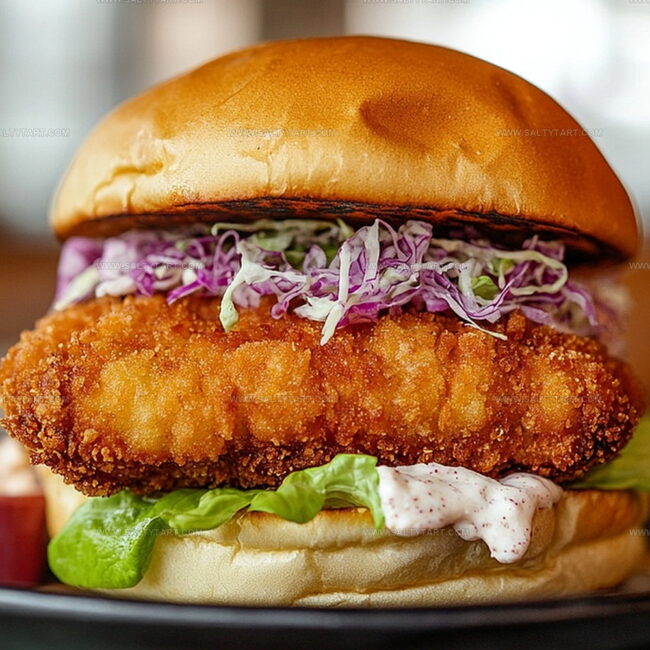
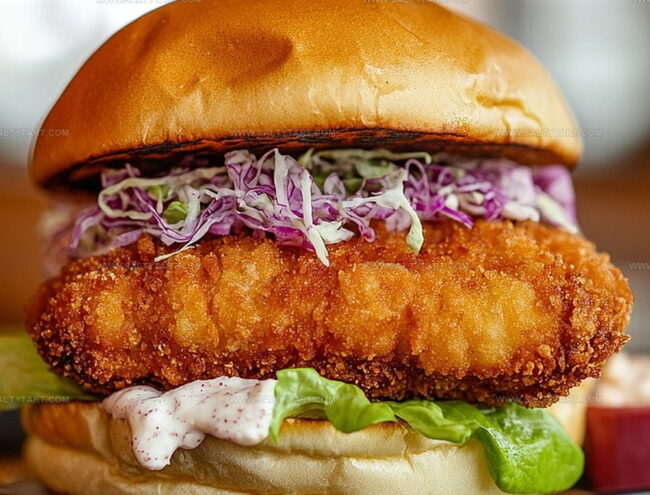
Step 5: Build Your Sandwich
Toast your sandwich buns until they’re lightly golden and crisp. Spread a thick layer of tangy tartar sauce on the bottom bun.
Layer your sandwich with:Squeeze a bright splash of lemon juice over the fish for an extra zing. Crown your masterpiece with the top bun.
Step 6: Serve and Enjoy
Cut the sandwich in half and serve immediately while the fish is still hot and crispy. Pair with your favorite sides like french fries or coleslaw for a complete meal that’ll make your taste buds dance.
Helpful Notes for Crispy Fried Cod Sandwiches
Try These Fun Spins on Fried Cod Sandwiches
Sides That Work Well with Fried Cod Sandwiches
Select a zesty Sauvignon Blanc or a light Pinot Grigio to complement the crispy cod’s delicate flavor and cut through the richness of the fried fish.
Opt for a light lager or wheat beer that balances the sandwich’s crispy texture and provides a clean, bright accompaniment to the seafood.
Create a side of creamy coleslaw with a hint of apple cider vinegar to add a cool, crunchy contrast to the hot, crispy fish sandwich.
Prepare homemade or store-bought chips with a sprinkle of lemon zest to echo the sandwich’s bright, zesty flavors and provide a satisfying crunch.
How to Store Crispy Fried Cod Sandwiches Safely
FAQs
Panko creates an extra crispy, light coating that stays crunchier longer than traditional breadcrumbs. They have a flakier texture and absorb less oil, resulting in a perfectly golden and crisp exterior.
The fish should turn golden brown and reach an internal temperature of 145F. It will flake easily with a fork and look opaque white throughout without any translucent areas.
Yes, you can bake the cod instead of frying by placing breaded fillets on a parchment-lined baking sheet and cooking at 425F for about 12-15 minutes until crispy and golden. This method reduces oil consumption while maintaining a crunchy texture.
Print
Crispy Fried Cod Sandwich Recipe
- Total Time: 25 minutes
- Yield: 4 1x
Description
Cod lovers rejoice with this irresistible crispy fried cod sandwich that brings salty ocean flavors to your plate. Perfectly golden, crunchy batter and fresh fish create a mouthwatering lunch you’ll crave again and again.
Ingredients
Main Protein:
- 4 cod fillets (about 6 ounces / 170 grams each)
Seasonings:
- Salt, to taste
- 1/2 teaspoon paprika
- Freshly ground black pepper, to taste
Instructions
- Carefully blot cod fillets with paper towels to remove excess moisture, ensuring a crisp coating.
- Season fish thoroughly with salt, pepper, and paprika on both sides for enhanced flavor profile.
- Create a breading station by coating each fillet completely in flour, gently shaking off surplus powder.
- Submerge floured fillets into beaten eggs, allowing complete egg coverage for optimal breadcrumb adhesion.
- Roll the egg-coated fillets in panko breadcrumbs, firmly pressing to create a uniform, textured exterior.
- Heat vegetable oil in a deep skillet to precisely 350F, maintaining consistent temperature for perfect frying.
- Carefully lower breaded cod into hot oil, cooking each batch 3-4 minutes until achieving a rich golden-brown color.
- Transfer fried fillets onto paper towels, allowing excess oil to drain and maintaining crispy texture.
- Lightly toast sandwich buns to provide a warm, slightly crunchy foundation.
- Spread thick tartar sauce across bottom bun for a creamy, tangy base.
- Layer sandwich with fresh lettuce, crispy cod fillet, juicy tomato slice, and zesty pickles.
- Finish by drizzling fresh lemon juice over fish and crowning with top bun.
Notes
- Choose fresh, high-quality cod for the best flavor and texture in your sandwich.
- Pat the fish completely dry before seasoning to ensure a crispy, golden-brown coating that sticks perfectly.
- Use a thermometer to maintain consistent oil temperature, preventing soggy or greasy breading.
- For a gluten-free version, swap wheat flour with rice flour and use gluten-free breadcrumbs or crushed cornflakes.
- Add extra crunch by mixing finely chopped herbs or spices into the panko breadcrumbs for a flavor boost.
- Keep fried fish warm in a low-temperature oven while preparing additional batches to maintain crispiness.
- Experiment with alternative sauces like sriracha mayo or chipotle aioli for a unique twist on traditional tartar sauce.
- Prep Time: 15 minutes
- Cook Time: 10 minutes
- Category: Lunch, Dinner, Snacks
- Method: Frying
- Cuisine: American
Nutrition
- Serving Size: 4
- Calories: 150 kcal
- Sugar: 0 g
- Sodium: 300 mg
- Fat: 3 g
- Saturated Fat: 0.5 g
- Unsaturated Fat: 2 g
- Trans Fat: 0 g
- Carbohydrates: 0 g
- Fiber: 0 g
- Protein: 28 g
- Cholesterol: 60 mg
Mike Reynolds
Founder & Recipe Developer
Expertise
Farm-to-table cuisine, Seasonal recipe development, Sustainable cooking techniques, Food photography
Education
Asheville-Buncombe Technical Community College (A-B Tech)
Associate Degree in Culinary Arts
Mike studied culinary arts with a strong focus on farm-to-table principles and sustainable cooking. His training emphasized the importance of fresh, local ingredients and environmentally responsible practices in the kitchen.
Mike’s food journey began deep in the Blue Ridge Mountains, where weekends at farmers’ markets and home-cooked meals sparked a lifelong obsession with simple, seasonal eating.
After earning his Associate Degree in Culinary Arts from Asheville-Buncombe Technical Community College, he set out to bring farm-to-table cooking into everyday kitchens, without the fuss.
Mike’s philosophy is all about keeping it fresh, unfussy, and full of heart. When he’s not crafting new single-serving recipes, he’s hiking mountain trails, chatting with local farmers, or experimenting with wild ingredients in his backyard kitchen.