
Homemade Flu/Cold Tea Ball Bombs Recipe for Cozy Relief
Battling a pesky cold or flu can drain your energy and dampen your spirits.
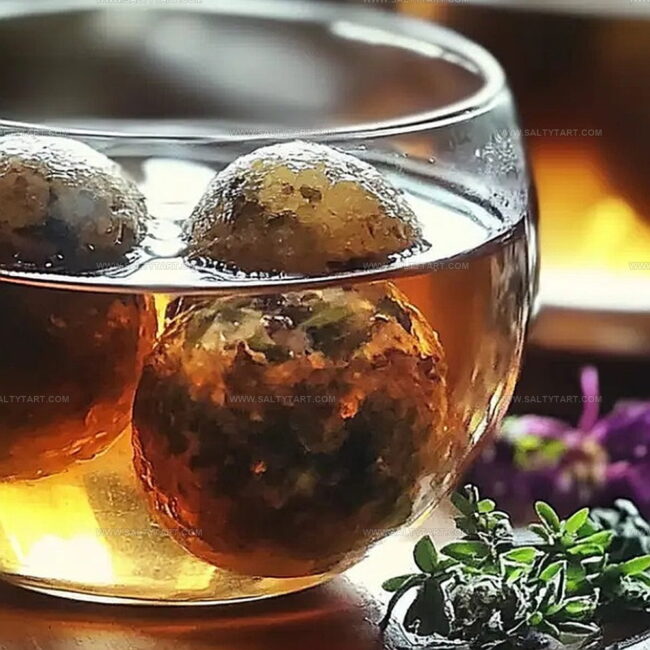
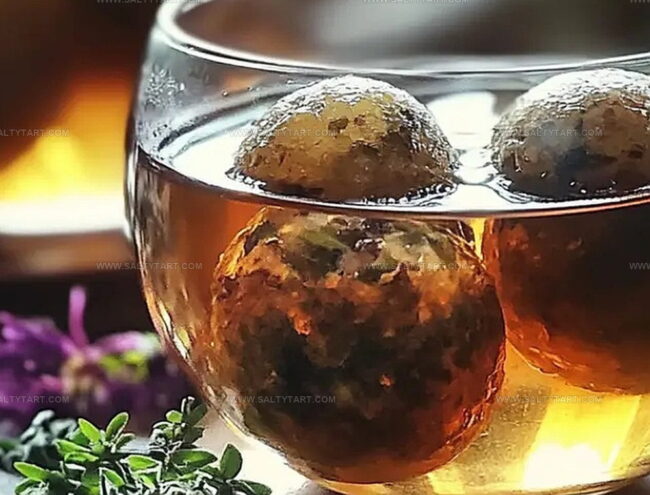
These homemade flu and cold tea ball bombs pack a powerful punch against seasonal sniffles.
Crafted with natural ingredients, each tea ball offers a soothing blend of herbs and spices to support your immune system.
You’ll love how simple these wellness bombs are to prepare, combining dried herbs, honey, and healing spices into compact spheres.
Steep one in hot water for an instant remedy that warms you from the inside out.
The combination of ginger, echinacea, and elderberry creates a potent wellness elixir that helps your body fight off those nasty cold symptoms.
Embrace this natural approach to healing and give your immune system the support it craves.
Why DIY Tea Ball Bombs Help When Sick
Everything for Making Your Own Tea Bombs
Sweeteners:Spices and Seasonings:Herbal Components:Steps to Make DIY Cold and Flu Tea Bombs
Step 1: Whip Up Healing Ingredients
Grab a clean mixing bowl and toss in honey, freshly squeezed lemon juice, ground turmeric, warm cinnamon, and a pinch of zesty black pepper. Blend these powerful ingredients together until they create a smooth, harmonious mixture that looks like liquid gold.
Step 2: Transform into Magical Dough
Gradually sprinkle in your herbal tea blend, stirring continuously. Keep mixing until the concoction transforms into a moldable dough with a consistency that holds together perfectly when pressed.
Step 3: Shape Healing Spheres
Select silicone molds with fun shapes. Press the herbal mixture firmly into each mold, ensuring every nook and cranny is packed tightly.
Use your fingers to compact the mixture, creating solid, well-formed tea bombs.
Step 4: Freeze and Solidify
Place the filled molds in the freezer.
Let them chill and set for 1-2 hours until they become completely firm and hold their shape beautifully.
Step 5: Release and Store
Gently pop the tea bombs out of the molds.
Transfer these wellness spheres to an airtight container and return them to the freezer for safekeeping.
Step 6: Brew Your Wellness Drink
When you’re ready to enjoy, drop one tea bomb into a mug of steaming hot water.
Watch it dissolve, stir briefly, and savor the healing warmth and flavor.
Notes for Crafting Your Own Tea Bombs
Fun Twists for Homemade Tea Ball Bombs
Pairings for DIY Tea Ball Bomb Sips
Storing Tea Ball Bombs for Sick Days
FAQs
These tea bombs contain natural ingredients like honey, turmeric, and herbal tea mix, but individuals with specific allergies or medical conditions should consult their healthcare provider before consuming.
Tea bombs can be stored in an airtight container in the freezer for up to 3 months without losing their potency or flavor.
Yes, you can customize the herbal tea mix or adjust spice levels to suit your taste preferences, but maintain the basic ratio of ingredients for best results.
The combination of ingredients like honey, turmeric, and herbal tea have natural anti-inflammatory and immune-boosting properties that may help support your body during illness.
Print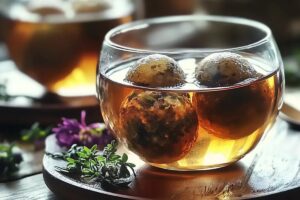
Diy Flu/Cold Tea Ball Bombs Recipe
- Total Time: 15 minutes
- Yield: 8 1x
Description
Soothing Cold & Flu Tea Ball Bombs deliver powerful wellness support for fighting winter illnesses with simple herbal ingredients. Crafted with natural medicinal elements, these compact spheres provide quick relief when you need comfort most.
Ingredients
Main Active Ingredients:
- 2 cups herbal tea mix (chamomile, ginger, or lemon)
- 1/4 cup raw honey
- 1/4 cup fresh lemon juice
- 1 teaspoon ground turmeric
Spices and Flavor Enhancers:
- 1/2 teaspoon ground cinnamon
- 1/4 teaspoon ground black pepper
Molding Equipment:
- Silicone molds (for shaping)
Instructions
- In a spacious mixing vessel, whisk together honey, lemon juice, turmeric, cinnamon, and black pepper until the ingredients form a smooth, uniform blend.
- Incorporate the herbal tea mix gradually, stirring consistently until the mixture transforms into a compact, moldable dough with a consistent texture.
- Select silicone molds with intricate or simple designs, then firmly compress the herbal mixture into each cavity, ensuring complete and dense filling without air pockets.
- Transfer the filled molds to the freezer, allowing them to solidify for approximately 60-120 minutes, or until the tea bombs achieve a sturdy, compact form.
- Gently extract the tea bombs from the molds, ensuring careful handling to maintain their structural integrity.
- Preserve the prepared tea bombs in a sealed, frost-resistant container within the freezer to maintain their potency and prevent moisture infiltration.
- When ready to enjoy, immerse a single tea bomb into a steaming cup of water, stirring thoroughly to dissolve and release the therapeutic herbal essence, creating a comforting and healing beverage.
Notes
- Customize the herbal tea mix based on personal health needs or flavor preferences, exploring options like chamomile, ginger, or echinacea for varied wellness benefits.
- Use raw, unfiltered honey for maximum natural healing properties and enhanced immune-boosting potential.
- Adjust spice ratios to balance flavor intensity and personal taste preferences, ensuring a pleasant drinking experience.
- Store tea bombs in parchment paper layers within the airtight container to prevent sticking and maintain individual shape integrity.
- Prep Time: 15 minutes
- Cook Time: 0 minutes
- Category: Tea
- Method: Freezing
- Cuisine: American
Nutrition
- Serving Size: 8
- Calories: 36 kcal
- Sugar: 8 g
- Sodium: 1 mg
- Fat: 0.1 g
- Saturated Fat: 0 g
- Unsaturated Fat: 0.1 g
- Trans Fat: 0 g
- Carbohydrates: 9 g
- Fiber: 1 g
- Protein: 0.2 g
- Cholesterol: 0 mg
Jess Martinez
Contributing Recipe Writer & Nutrition Consultant
Expertise
Southwestern and Latin American cooking, Nutritional analysis and healthy recipe planning, Cultural food traditions, Modifying traditional dishes for better health
Education
Santa Fe Community College
Certificate in Culinary Arts
Focused on mastering the flavors and cooking methods of traditional Southwestern cuisine.
Jess’s love for bold, homegrown flavors led her straight into the world of Southwestern cooking and cultural nutrition.
After completing her Certificate in Culinary Arts at Santa Fe Community College, she made it her mission to show that good-for-you food can still taste incredible.
At saltytart.com, Jess shares vibrant, health-conscious recipes with roots in tradition but a fresh, modern twist. When she’s not testing new recipes, you’ll find her at local growers’ markets, tending her herb garden, or digging into food history books.