The Easiest No-Bake Cherry Cheesecake Recipe You’ll Ever Make
My go-to no-bake cherry cheesecake recipe promises pure dessert magic without turning on the oven.
Creamy layers melt together with delightful smoothness and zero complicated steps.
Chilled ingredients and simple techniques make this treat incredibly approachable for anyone seeking a sweet adventure.
Graham cracker crusts provide the perfect crisp foundation for silky cream cheese goodness.
Fresh cherries or premium preserves add vibrant color and tangy brightness to each delectable slice.
Cool, luxurious textures blend seamlessly in this foolproof dessert that looks far more sophisticated than its straightforward preparation suggests.
Whip this stunning cheesecake together and watch everyone’s eyes light up with pure dessert excitement.
How to Make No-Bake Cherry Cheesecake
Step 1: Craft the Crumbly Base
Create a delectable foundation by mixing graham cracker crumbs with melted butter and sugar until the mixture feels like damp beach sand. Press this magical blend firmly into the bottom of a springform pan, creating a solid, even layer.
Pop the pan into the refrigerator to chill while you work on the creamy magic.
Step 2: Whip Up the Dreamy Filling
Grab your mixing bowl and beat cream cheese with powdered sugar until it transforms into a silky-smooth cloud of deliciousness.
Splash in some vanilla extract for an extra flavor punch. In a separate bowl, whip the heavy cream until it forms beautiful, sturdy peaks.
Gently fold the whipped cream into the cream cheese mixture, being careful to keep the mixture light and airy.
Step 3: Build Your Cheesecake Masterpiece
Spread the luscious cream cheese filling over the chilled crust, using a spatula to create a perfectly smooth surface.
Cover the pan and let it rest in the refrigerator for at least 4 hours – or even better, overnight – allowing the cheesecake to set into a gloriously creamy texture.
Step 4: Add the Crowning Glory
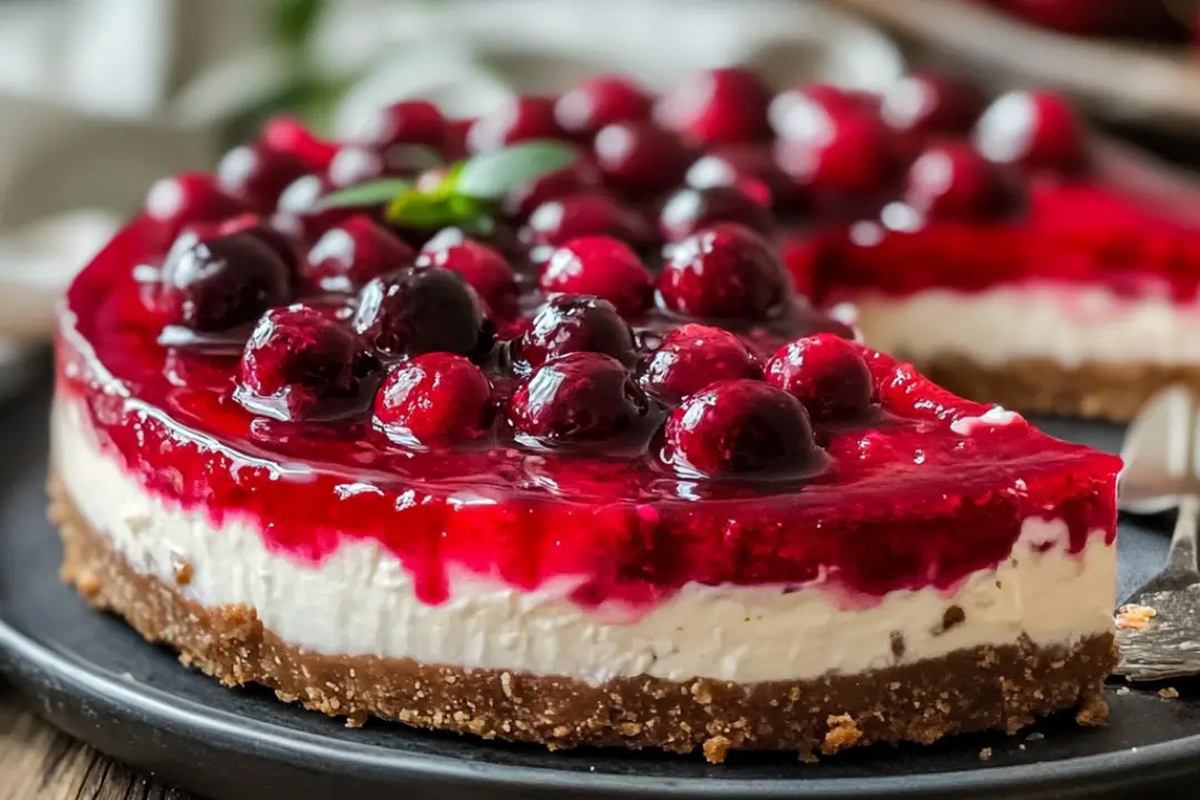
Just before serving, lavish the top of your cheesecake with a generous layer of cherry pie filling.
The vibrant red cherries will create a stunning contrast against the creamy white base.
Step 5: Slice and Indulge
Cut into this heavenly creation and prepare for a mouthwatering experience that will have everyone begging for seconds!
Tips for Smooth No-Bake Cherry Cheesecake
Variations on No-Bake Cherry Cheesecake
Serving Suggestions for No-Bake Cherry Cheesecake
Select a chilled Moscato d’Asti or Prosecco to complement the cherry cheesecake’s creamy sweetness and enhance its fruity notes.
Serve crisp almond biscotti alongside the dessert to provide a delightful textural contrast and subtle nutty undertone that balances the cheesecake’s richness.
Add a small mint leaf as a garnish to introduce a refreshing herbal element that cuts through the dessert’s sweetness and provides a sophisticated visual touch.
Brew a smooth medium-roast coffee or creamy cappuccino to serve alongside the cheesecake, allowing the warm beverage to highlight the dessert’s cool, silky texture.
Storage Advice for No-Bake Cherry Cheesecake
FAQs
Softened cream cheese should be at room temperature, smooth, and easily spreadable. It should not be melted or too cold, which can cause lumps in your cheesecake filling.
Yes, you can use low-fat cream cheese, but the texture and richness might be slightly different. Full-fat cream cheese provides the best flavor and creamy consistency.
You can use a regular 9-inch cake pan, but line it with parchment paper for easy removal. Alternatively, use a disposable aluminum pan or individual serving dishes.
Easiest No-Bake Cherry Cheesecake Overview
Ingredients for Easiest No-Bake Cherry Cheesecake
Base:Filling:Topping: Print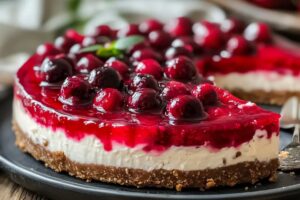
Easiest No-Bake Cherry Cheesecake Recipe
- Total Time: 20 minutes
- Yield: 8 1x
Description
Delightful “No-Bake Cherry Cheesecake” brings creamy comfort to dessert lovers with minimal kitchen effort. Rich graham cracker crust and silky cream cheese filling topped with luscious cherry compote promise pure indulgence you’ll savor in every heavenly bite.
Ingredients
Main Ingredients:
- 16 ounces (454 grams) cream cheese, softened
- 1 cup (240 milliliters) heavy whipping cream
- 1 can (21 ounces / 595 grams) cherry pie filling
Crust Ingredients:
- 1.5 cups (180 grams) graham cracker crumbs
- 0.5 cup (113 grams) unsalted butter, melted
- 0.25 cup (50 grams) granulated sugar
Flavoring Ingredients:
- 0.75 cup (90 grams) powdered sugar
- 1 teaspoon (5 milliliters) vanilla extract
Instructions
- Create a uniform base by blending graham cracker crumbs with melted butter and sugar until the mixture resembles coarse sand.
- Transfer the crumb mixture into a 9-inch springform pan, pressing firmly to create an even, compact layer.
- Chill the crust in the refrigerator for 15 minutes while preparing the filling.
- Using an electric mixer, whip cream cheese and powdered sugar until achieving a silky, lump-free consistency.
- Incorporate vanilla extract into the cream cheese mixture, mixing thoroughly.
- In a separate bowl, whip heavy cream until it forms stiff, peaks that hold their shape.
- Delicately fold the whipped cream into the cream cheese mixture, maintaining the cream’s airy texture.
- Carefully spread the creamy filling over the chilled crust, ensuring a smooth, even surface.
- Refrigerate the cheesecake for 4-6 hours, or ideally overnight, allowing it to set completely.
- Prior to serving, distribute cherry pie filling evenly across the top of the chilled cheesecake.
- Cut into elegant slices and serve immediately for the best texture and flavor.
Notes
- Chill graham cracker crust thoroughly to prevent crumbling and create a solid base for the creamy filling.
- Use room temperature cream cheese for smoother, lump-free mixing and a silkier texture throughout the cheesecake.
- Fold whipped cream gently into cream cheese mixture to maintain its light, airy consistency and prevent deflation.
- For a gluten-free version, swap graham cracker crumbs with almond flour or gluten-free cookie crumbs without compromising the delicious crust.
- Prep Time: 20 minutes
- Cook Time: 0 minutes
- Category: Desserts
- Method: Refrigerating
- Cuisine: American
Nutrition
- Serving Size: 8
- Calories: 421 kcal
- Sugar: 38 g
- Sodium: 210 mg
- Fat: 29 g
- Saturated Fat: 17 g
- Unsaturated Fat: 11 g
- Trans Fat: 0.5 g
- Carbohydrates: 34 g
- Fiber: 1 g
- Protein: 5 g
- Cholesterol: 95 mg
Mike Reynolds
Founder & Recipe Developer
Expertise
Farm-to-table cuisine, Seasonal recipe development, Sustainable cooking techniques, Food photography
Education
Asheville-Buncombe Technical Community College (A-B Tech)
Associate Degree in Culinary Arts
Mike studied culinary arts with a strong focus on farm-to-table principles and sustainable cooking. His training emphasized the importance of fresh, local ingredients and environmentally responsible practices in the kitchen.
Mike’s food journey began deep in the Blue Ridge Mountains, where weekends at farmers’ markets and home-cooked meals sparked a lifelong obsession with simple, seasonal eating.
After earning his Associate Degree in Culinary Arts from Asheville-Buncombe Technical Community College, he set out to bring farm-to-table cooking into everyday kitchens, without the fuss.
Mike’s philosophy is all about keeping it fresh, unfussy, and full of heart. When he’s not crafting new single-serving recipes, he’s hiking mountain trails, chatting with local farmers, or experimenting with wild ingredients in his backyard kitchen.