
The Best Easter Egg Sugar Cookie Bars Recipe for Spring Fun
Sweet memories often spark when baking these delightful Easter egg sugar cookie bars that melt in your mouth.
Childhood nostalgia rushes back with each buttery, soft bite.
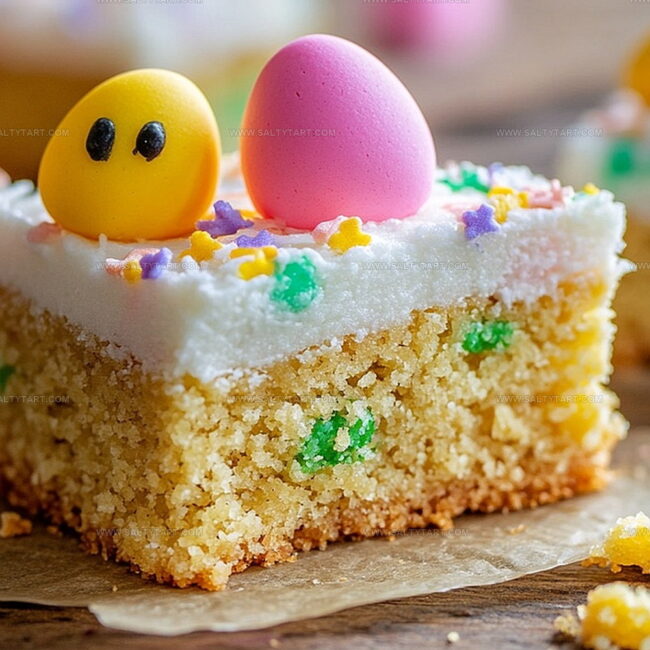
Colorful sprinkles dance across the golden surface, creating a festive treat everyone adores.
Minimal ingredients combine for maximum flavor in this simple dessert.
Soft, chewy textures promise pure happiness in every square.
Each bar delivers a perfect balance of sweetness and comfort.
Whip up this crowd-pleasing recipe and watch smiles spread around the table.
What Makes Easter Egg Sugar Cookie Bars Delightful
Ingredients for Easter Egg Sugar Cookie Bars
Dry Ingredients:Wet Ingredients:Decorative Ingredients:How to Bake Easter Egg Sugar Cookie Bars

Step 1: Prep the Oven and Pan
Warm up your oven to 350F (175C). Grab a 9×13-inch baking pan and give it a quick spray of cooking oil or rub with butter to prevent sticking.
Step 2: Mix Dry Ingredients
Grab a medium bowl and whisk together:Blend these ingredients until they’re well combined and look smooth.
Step 3: Create Butter Base
In a large mixing bowl, take softened butter and granulated sugar.
Use an electric mixer or strong arm power to cream them together until the mixture looks light, fluffy, and almost cloud-like.
Step 4: Add Wet Ingredients
Drop in one egg and splash of vanilla extract.
Beat these into the butter mixture until everything looks perfectly blended and silky.
Step 5: Combine Wet and Dry Mixtures
Slowly add your dry ingredient mixture into the wet ingredients.
Pour in a splash of milk between additions. Mix gently until just combined – don’t overmix.
Step 6: Spread the Batter
Pour the cookie batter into your prepared pan. Use a spatula to spread it evenly, making sure it reaches all corners.
Step 7: Bake to Perfection
Slide the pan into the preheated oven. Bake for 18-20 minutes.
You’ll know it’s done when the edges turn a light golden color and a toothpick comes out clean from the center.
Step 8: Cool Down
Remove the pan from the oven and let the bars cool completely right in the pan.
Patience is key here!
Step 9: Decorate with Easter Charm
Once cooled, gently press mini Easter eggs into the top of the bars.
For extra festivity, sprinkle some colorful candy sprinkles across the surface.
Step 10: Slice and Serve
Cut the bars into squares and serve.
Watch as smiles spread across faces enjoying these sweet, springtime treats!
Helpful Tips for Easter Egg Sugar Cookie Bars
Flavorful Variations for Easter Egg Sugar Cookie Bars
Best Pairings for Easter Egg Sugar Cookie Bars
Proper Storage for Easter Egg Sugar Cookie Bars
FAQs
You can substitute the egg with 1/4 cup of unsweetened applesauce or a mashed banana to keep the bars moist and binding.
Let the bars cool for about 10 minutes after baking, then gently press the eggs on top so they stick without sinking completely.
Absolutely! These colorful Easter egg sugar cookie bars are perfect for children’s celebrations and will be a hit with their bright, festive appearance.
Yes, you can use any color or style of sprinkles that match your Easter theme or personal preference to make the bars more decorative.
Print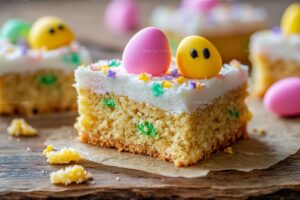
Easter Egg Sugar Cookie Bars Recipe
- Total Time: 35 minutes
- Yield: 16 1x
Description
Sweet Easter vibes shine through these delightful sugar cookie bars, blending festive charm with irresistible flavor. Pastel-glazed squares deliver springtime joy, promising pure deliciousness that will make your dessert table sparkle with celebration.
Ingredients
Main Ingredients:
- 2 cups (280 grams) all-purpose flour
- 1 cup (200 grams) granulated sugar
- 3/4 cup (170 grams) unsalted butter, softened
- 1/2 cup (120 milliliters) milk
- 1 large egg
Binding and Flavoring Ingredients:
- 1/2 teaspoon baking powder
- 1/4 teaspoon salt
- 1 teaspoon vanilla extract
Decorative Ingredients:
- 1/2 cup mini chocolate Easter eggs or colored candy eggs
- Optional: Colored sprinkles for garnish
Instructions
- Prepare the oven to 350F (175C) and thoroughly coat a 9×13-inch baking pan with cooking spray or butter.
- Combine flour, baking powder, and salt in a medium mixing bowl, whisking until well blended.
- Using an electric mixer, cream butter and granulated sugar until the mixture becomes pale and airy, approximately 3-4 minutes.
- Incorporate egg and vanilla extract into the butter mixture, blending until smooth and uniform.
- Slowly fold dry ingredients into the wet ingredients, alternating with milk, and mix until just combined to prevent overmixing.
- Transfer the cookie batter into the prepared pan, using a spatula to distribute evenly and create a level surface.
- Bake for 18-20 minutes, watching for light golden edges and checking with a toothpick for clean insertion in the center.
- Remove from oven and let the bars cool completely within the pan, which typically takes about 1 hour.
- Once fully cooled, gently press mini Easter eggs across the surface, creating an attractive decorative pattern.
- Optional: Sprinkle colorful confetti or themed sprinkles over the eggs for additional festive decoration.
- Slice into rectangular bars and serve at room temperature.
Notes
- Check egg and butter temperature to ensure smooth, creamy base for cookie bars.
- Use room temperature ingredients for better mixing and consistent texture.
- Avoid overmixing batter to prevent tough, dense bars that lose their soft, tender crumb.
- Rotate pan halfway through baking to guarantee even golden-brown coloring and prevent uneven cooking.
- Prep Time: 15 minutes
- Cook Time: 20 minutes
- Category: Desserts, Snacks
- Method: Baking
- Cuisine: American
Nutrition
- Serving Size: 16
- Calories: 172
- Sugar: 11 g
- Sodium: 70 mg
- Fat: 8 g
- Saturated Fat: 5 g
- Unsaturated Fat: 3 g
- Trans Fat: 0 g
- Carbohydrates: 22 g
- Fiber: 0.4 g
- Protein: 2 g
- Cholesterol: 30 mg
Jess Martinez
Contributing Recipe Writer & Nutrition Consultant
Expertise
Southwestern and Latin American cooking, Nutritional analysis and healthy recipe planning, Cultural food traditions, Modifying traditional dishes for better health
Education
Santa Fe Community College
Certificate in Culinary Arts
Focused on mastering the flavors and cooking methods of traditional Southwestern cuisine.
Jess’s love for bold, homegrown flavors led her straight into the world of Southwestern cooking and cultural nutrition.
After completing her Certificate in Culinary Arts at Santa Fe Community College, she made it her mission to show that good-for-you food can still taste incredible.
At saltytart.com, Jess shares vibrant, health-conscious recipes with roots in tradition but a fresh, modern twist. When she’s not testing new recipes, you’ll find her at local growers’ markets, tending her herb garden, or digging into food history books.