
Whip Up a Magical Easter Oreo Cookie Casserole Recipe Today
When baking this Easter Oreo cookie casserole, magic happens in unexpected ways.
Sweet layers of creamy goodness blend with crunchy cookie textures.
Chocolate cookies create a delightful base for decadent ingredients.
Easter-themed sprinkles add playful color and festive charm.
Crumbly edges mix perfectly with smooth cream cheese filling.
Dessert lovers will appreciate how simple ingredients come together quickly.
You can create this showstopping treat in less than an hour and impress everyone at your gathering.
What Makes Easter Oreo Cookie Casserole Fun
Ingredients for Oreo Cookie Casserole
Base Layer:Cream Layers:Topping and Garnish:Steps to Build an Easter Oreo Cookie Casserole
Step 1: Prepare the Oven
Preheat the oven to 350 degrees Fahrenheit (175 degrees Celsius). Ensure the oven rack is positioned in the center for even baking.
Step 2: Create the Oreo Crust
Crush the Oreo cookies into fine crumbs. Mix the cookie crumbs with melted unsalted butter.
Press the mixture firmly and evenly into the bottom of a greased casserole dish, creating a solid base for the dessert.
Step 3: Whip the Cream Cheese Filling
In a mixing bowl, blend softened cream cheese with powdered sugar and vanilla extract.
Beat the ingredients until the mixture becomes smooth, creamy, and free of lumps.
Step 4: Layer the Cream Cheese
Spread the cream cheese mixture evenly over the Oreo cookie crust, ensuring a consistent layer that covers the entire surface.
Step 5: Prepare the Whipped Cream
Using a clean mixing bowl, whip the heavy cream until stiff peaks form. The cream should stand up straight and hold its shape when the whisk is lifted.
Step 6: Add Whipped Cream Layer
Gently spread the whipped cream over the cream cheese layer, creating a light and airy topping.
Step 7: Decorate the Top
Sprinkle the remaining crushed Oreo cookies across the surface.
Scatter chocolate chips evenly over the whipped cream layer.
Step 8: Add Chocolate Drizzle
Melt additional chocolate and drizzle it artfully over the top of the dessert, creating an attractive pattern.
Step 9: Chill and Set
Refrigerate the dessert for a minimum of 2 hours, allowing the layers to set and the flavors to meld together.
Step 10: Final Garnish
Before serving, sprinkle pastel-colored sprinkles over the top for a festive and springtime touch.
Tips for Gooey and Sweet Oreo Cookie Casserole
Creative Easter Oreo Casserole Swaps
Pairings for Oreo Cookie Casserole Dessert
Smooth, cold milk perfectly complements the rich chocolate and creamy layers of the Oreo casserole, cutting through the sweetness with its cool refreshment.
Light, crisp mint tea provides a delightful contrast to the dessert’s decadence, offering a clean palate cleanser between each indulgent bite.
A bold, short espresso brings out the deep chocolate notes, creating a sophisticated flavor balance that elevates the entire dessert experience.
A small pour of creamy chocolate liqueur intensifies the dessert’s chocolate profile, adding an elegant adult twist to this playful Easter treat.
Storing Oreo Cookie Casserole After Baking
FAQs
Yes, you can experiment with flavors like Mint, Peanut Butter, or Birthday Cake Oreos to create unique variations of the dessert.
No, this recipe contains dairy products like cream cheese, heavy cream, and butter, which are not suitable for those with lactose intolerance.
Absolutely! You can prepare this casserole a day in advance and keep it refrigerated until you’re ready to serve. The flavors will meld together even better overnight.
Print
Easter Oreo Cookie Casserole Recipe
- Total Time: 20 minutes
- Yield: 8 1x
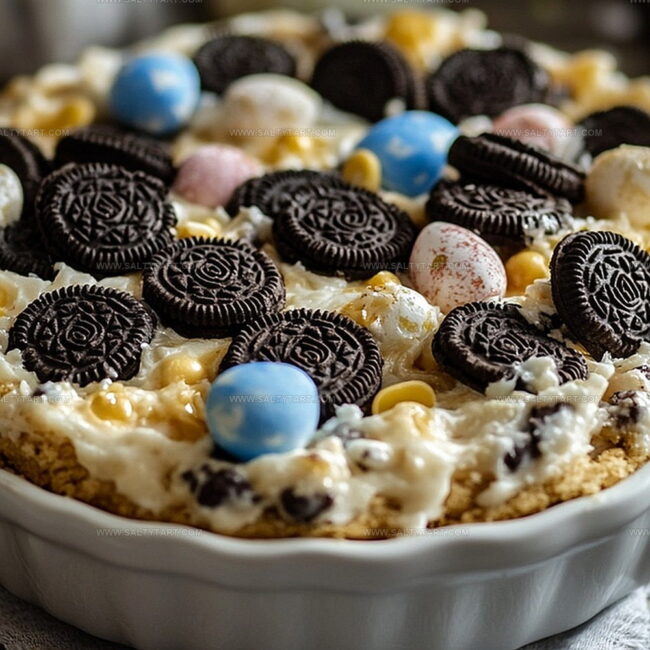
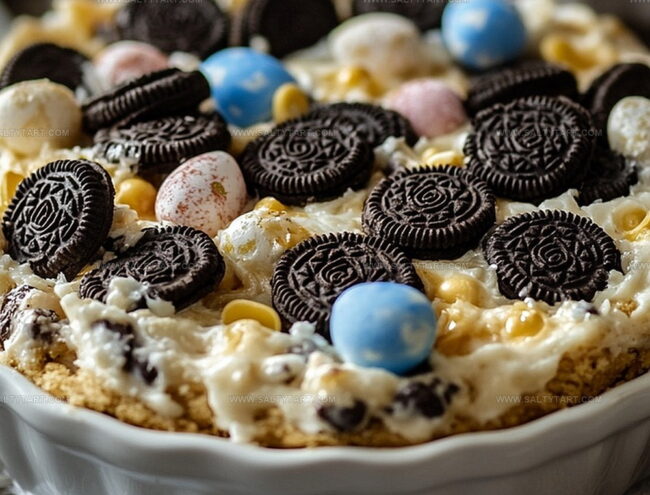
Description
Heavenly Easter Oreo cookie casserole blends creamy dessert magic with nostalgic cookie crunch. Layers of chocolate, marshmallow, and crushed Oreos create a springtime treat you cannot resist.
Ingredients
Main Ingredients:
- 2 cups (480 ml) crushed oreo cookies
- 1 cup (240 ml) unsalted butter, melted
- 8 ounces (226 grams) cream cheese, softened
- 1 cup (240 ml) chocolate chips
Sweeteners and Flavorings:
- 1 cup (240 ml) powdered sugar
- 1 teaspoon (5 ml) vanilla extract
Garnish and Decoration:
- Pastel sprinkles (optional)
- 2 cups (480 ml) heavy cream
Instructions
- Prepare the oven at 350F(175C) and grease a casserole dish to ensure easy serving and removal.
- Crush Oreo cookies and blend thoroughly with melted unsalted butter, creating a uniform crumbly texture.
- Press the cookie-butter mixture firmly and evenly across the bottom of the prepared dish, forming a compact base layer.
- Blend cream cheese with powdered sugar and vanilla extract, whisking until achieving a silky, lump-free consistency.
- Carefully spread the cream cheese mixture across the Oreo crust, creating an even and smooth second layer.
- Whip heavy cream until it develops sturdy, defined peaks that hold their shape when the whisk is lifted.
- Gently distribute the whipped cream over the cream cheese layer, maintaining a delicate and even coverage.
- Scatter remaining crushed Oreo cookies and chocolate chips across the surface, ensuring uniform distribution.
- Drizzle melted chocolate in artistic patterns to enhance visual appeal and add extra richness.
- Refrigerate the dessert for a minimum of 2 hours to allow layers to set and flavors to meld.
- Before serving, optionally garnish with pastel sprinkles for a festive Easter-themed presentation.
Notes
- Swap regular Oreos with gluten-free or vegan alternatives to accommodate dietary restrictions and make the dessert more inclusive.
- Experiment with different extracts like almond or peppermint in the cream cheese layer to create unique flavor variations that surprise your guests.
- Use a food processor to crush Oreos evenly and quickly, ensuring a consistent texture for the crust and topping that looks professionally prepared.
- Freeze the casserole for a chilled, ice cream-like dessert perfect for warmer Easter celebrations, transforming the recipe into a cool and refreshing treat.
- Prep Time: 20 minutes
- Cook Time: 0 minutes
- Category: Breakfast, Desserts, Snacks
- Method: Baking
- Cuisine: American
Nutrition
- Serving Size: 8
- Calories: 530
- Sugar: 38g
- Sodium: 150mg
- Fat: 36g
- Saturated Fat: 22g
- Unsaturated Fat: 12g
- Trans Fat: 1g
- Carbohydrates: 50g
- Fiber: 2g
- Protein: 5g
- Cholesterol: 90mg
Jess Martinez
Contributing Recipe Writer & Nutrition Consultant
Expertise
Southwestern and Latin American cooking, Nutritional analysis and healthy recipe planning, Cultural food traditions, Modifying traditional dishes for better health
Education
Santa Fe Community College
Certificate in Culinary Arts
Focused on mastering the flavors and cooking methods of traditional Southwestern cuisine.
Jess’s love for bold, homegrown flavors led her straight into the world of Southwestern cooking and cultural nutrition.
After completing her Certificate in Culinary Arts at Santa Fe Community College, she made it her mission to show that good-for-you food can still taste incredible.
At saltytart.com, Jess shares vibrant, health-conscious recipes with roots in tradition but a fresh, modern twist. When she’s not testing new recipes, you’ll find her at local growers’ markets, tending her herb garden, or digging into food history books.