Irresistible Garlic Butter Cheese Bombs Recipe for Cozy Nights
Unleashing pure comfort, these mouthwatering garlic butter cheese bombs deliver instant culinary delight.
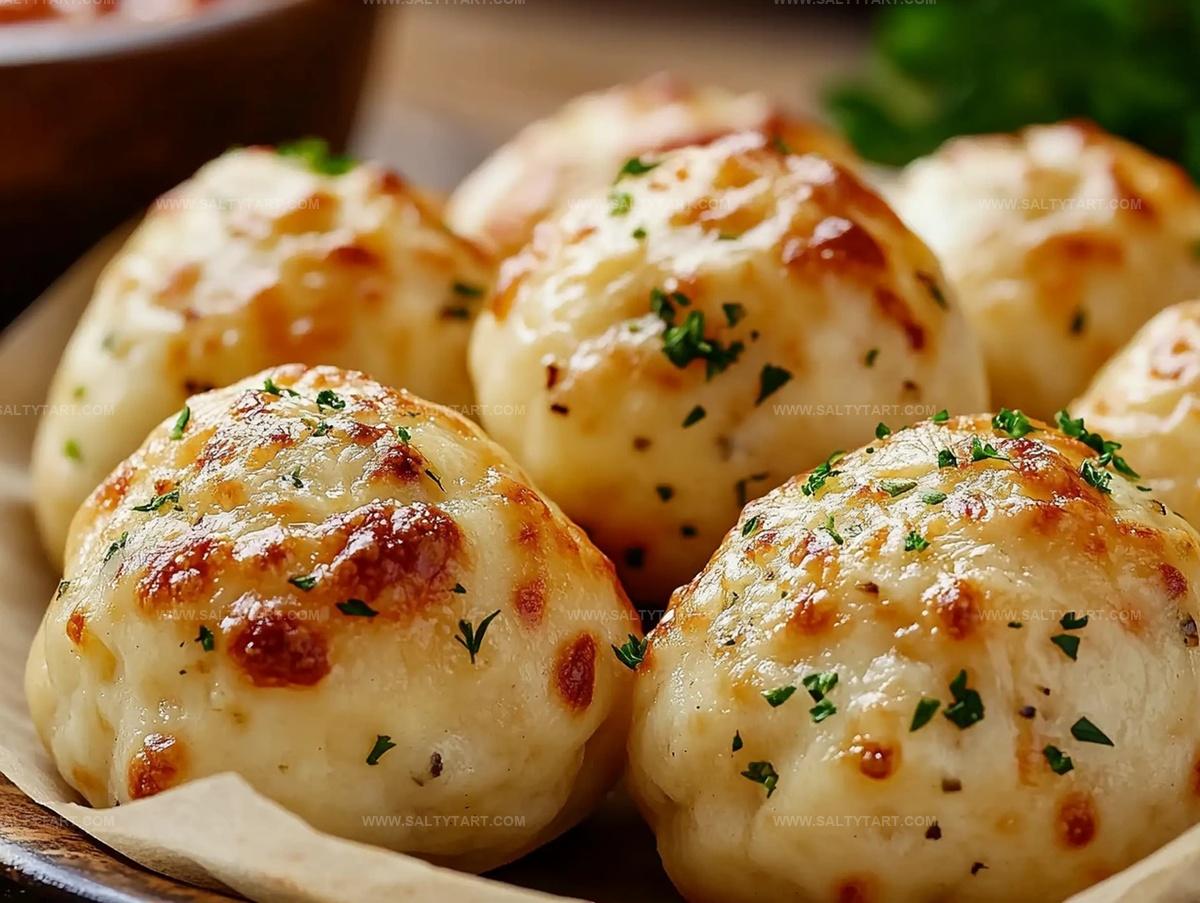
Crispy golden exteriors promise an irresistible crunch with every bite.
Warm, gooey cheese centers melt seamlessly through soft bread dough.
Imagine pulling apart these delectable parcels and watching melted goodness cascade across your plate.
Perfect for spontaneous gatherings or quiet weekend indulgences, they spark instant smiles.
Minimal ingredients and simple preparation mean you can whip up magic in minutes.
Each bomb packs an explosion of savory flavors that’ll have everyone asking for seconds.
Garlic Butter Cheese Bombs Melt-In-Your-Mouth Appetizers
Ingredients Needed To Prepare Garlic Butter Cheese Bombs
Main Ingredients:Flavor Enhancers:Sauce and Coating Ingredients:Step-By-Step Guide To Make Garlic Butter Cheese Bombs
Step 1: Warm Up The Oven
Crank the oven to 375°F (190°C). Grab a baking dish and either spray it with cooking spray or line with parchment paper to prevent sticking.
Step 2: Prepare Dough Circles
Open the biscuit container and gently separate each biscuit. Using your fingers or a rolling pin, flatten each biscuit into a soft, thin circle about the size of your palm.
Step 3: Create Cheesy Centers
Place a generous dollop of shredded mozzarella right in the middle of each dough circle. Carefully fold the edges over the cheese, pinching and sealing the sides to form a perfect round ball.
Make sure no cheese peeks out.
Step 4: Whip Up Flavor-Packed Butter Sauce
In a small mixing bowl, combine:Stir everything until well mixed and aromatic.
Step 5: Dress The Bombs
Arrange the cheese-filled dough balls in your prepared baking dish. Use a pastry brush to generously coat each bomb with the garlic butter mixture, ensuring complete coverage.
Step 6: Bake To Golden Perfection
Slide the baking dish into the preheated oven. Bake for 12-15 minutes until the bombs turn a beautiful golden brown and the cheese inside becomes deliciously melted.
Step 7: Serve And Enjoy
Allow the cheese bombs to cool slightly. Serve warm alongside marinara sauce or your favorite dipping sauce for an absolute flavor explosion.
Helpful Tips To Perfect Garlic Butter Cheese Bombs
Flavor Variations To Refresh Garlic Butter Cheese Bombs
Pairings That Go Well With Garlic Butter Cheese Bombs
Choose a bold Chianti or Cabernet Sauvignon that complements the rich, cheesy flavor of the garlic butter bombs.
Pair with a classic marinara sauce that provides a tangy contrast to the creamy, buttery cheese bombs.
Toss a light arugula salad with lemon vinaigrette to balance the heavy, indulgent appetizer and add a crisp, refreshing element.
Select a hoppy IPA or amber ale that cuts through the richness and enhances the garlic and cheese flavors.
Storage Tips To Keep Garlic Butter Cheese Bombs Fresh
FAQs
You’ll need refrigerated biscuit dough, mozzarella cheese, butter, minced garlic, Italian seasoning, salt, and fresh parsley.
Yes, you can substitute mozzarella with cheddar, provolone, or a cheese blend for different flavor profiles.
Absolutely! Kids love these cheesy, buttery bites, and they’re easy to make as a fun snack or appetizer.
Pinch the edges of the biscuit dough firmly when sealing the cheese inside to create a tight seal and prevent cheese from oozing out during baking.
Print
Garlic Butter Cheese Bombs Recipe
- Total Time: 30 minutes
- Yield: 8 1x
Description
Cheesy garlic butter bombs elevate comfort food with explosive flavor and irresistible golden-brown charm. Melted cheese and herbed butter create a mouthwatering experience you’ll crave again and again.
Ingredients
Cheese and Filling:
- 1 cup shredded mozzarella cheese
Dough:
- 1 can refrigerated biscuit dough
Seasoning and Topping:
- 1/4 cup unsalted butter (melted)
- 3 garlic cloves (minced)
- 1/2 teaspoon Italian seasoning
- 1 tablespoon chopped parsley
- 1/4 teaspoon salt
Instructions
- Preheat oven to 375°F (190°C) and prepare a baking dish with non-stick spray or parchment paper to ensure easy removal of the cheese bombs.
- Carefully unroll the biscuit dough and gently separate each individual biscuit, creating a soft, malleable base for the cheese bombs.
- Using your fingertips, delicately flatten each biscuit into a thin, uniform circular shape, creating an ideal pocket for the cheese filling.
- Position a generous portion of shredded mozzarella precisely in the center of each flattened biscuit, preparing for the signature cheesy interior.
- Carefully fold the biscuit edges over the cheese, meticulously pinching and sealing the borders to create a compact, fully enclosed spherical shape.
- Craft the aromatic garlic butter blend by combining melted butter, finely minced garlic, Italian seasoning, a pinch of salt, and freshly chopped parsley in a small mixing bowl.
- Arrange the cheese-filled dough spheres in the prepared baking dish, ensuring slight spacing between each bomb for even cooking.
- Liberally brush the entire surface of each dough ball with the fragrant garlic butter mixture, ensuring complete and even coverage.
- Slide the baking dish into the preheated oven and bake for 12-15 minutes, watching for a golden-brown exterior and visibly melted cheese interior.
- Remove from oven and allow the cheese bombs to cool momentarily, then serve immediately alongside marinara sauce or your preferred dipping condiment.
Notes
- Cheese Selection: Choose low-moisture mozzarella for a gooey, stretchy interior that melts perfectly without becoming watery.
- Sealing Technique: Pinch dough edges firmly to prevent cheese leakage during baking, ensuring a clean and intact cheese bomb.
- Butter Enhancement: Use fresh garlic instead of pre-minced for a more robust, authentic flavor profile in the garlic butter sauce.
- Dietary Adaptation: Swap regular biscuit dough with gluten-free options for celiac-friendly version, maintaining the same delicious texture and taste.
- Prep Time: 15 minutes
- Cook Time: 15 minutes
- Category: Appetizer, Snacks
- Method: Baking
- Cuisine: American
Nutrition
- Serving Size: 8
- Calories: 195 kcal
- Sugar: 1 g
- Sodium: 210 mg
- Fat: 14 g
- Saturated Fat: 8 g
- Unsaturated Fat: 5 g
- Trans Fat: 0.3 g
- Carbohydrates: 10 g
- Fiber: 0.4 g
- Protein: 7 g
- Cholesterol: 30 mg
Mike Reynolds
Founder & Recipe Developer
Expertise
Farm-to-table cuisine, Seasonal recipe development, Sustainable cooking techniques, Food photography
Education
Asheville-Buncombe Technical Community College (A-B Tech)
Associate Degree in Culinary Arts
Mike studied culinary arts with a strong focus on farm-to-table principles and sustainable cooking. His training emphasized the importance of fresh, local ingredients and environmentally responsible practices in the kitchen.
Mike’s food journey began deep in the Blue Ridge Mountains, where weekends at farmers’ markets and home-cooked meals sparked a lifelong obsession with simple, seasonal eating.
After earning his Associate Degree in Culinary Arts from Asheville-Buncombe Technical Community College, he set out to bring farm-to-table cooking into everyday kitchens, without the fuss.
Mike’s philosophy is all about keeping it fresh, unfussy, and full of heart. When he’s not crafting new single-serving recipes, he’s hiking mountain trails, chatting with local farmers, or experimenting with wild ingredients in his backyard kitchen.