Heavenly Garlic Parmesan Cheeseburger Bombs Recipe for Dinner
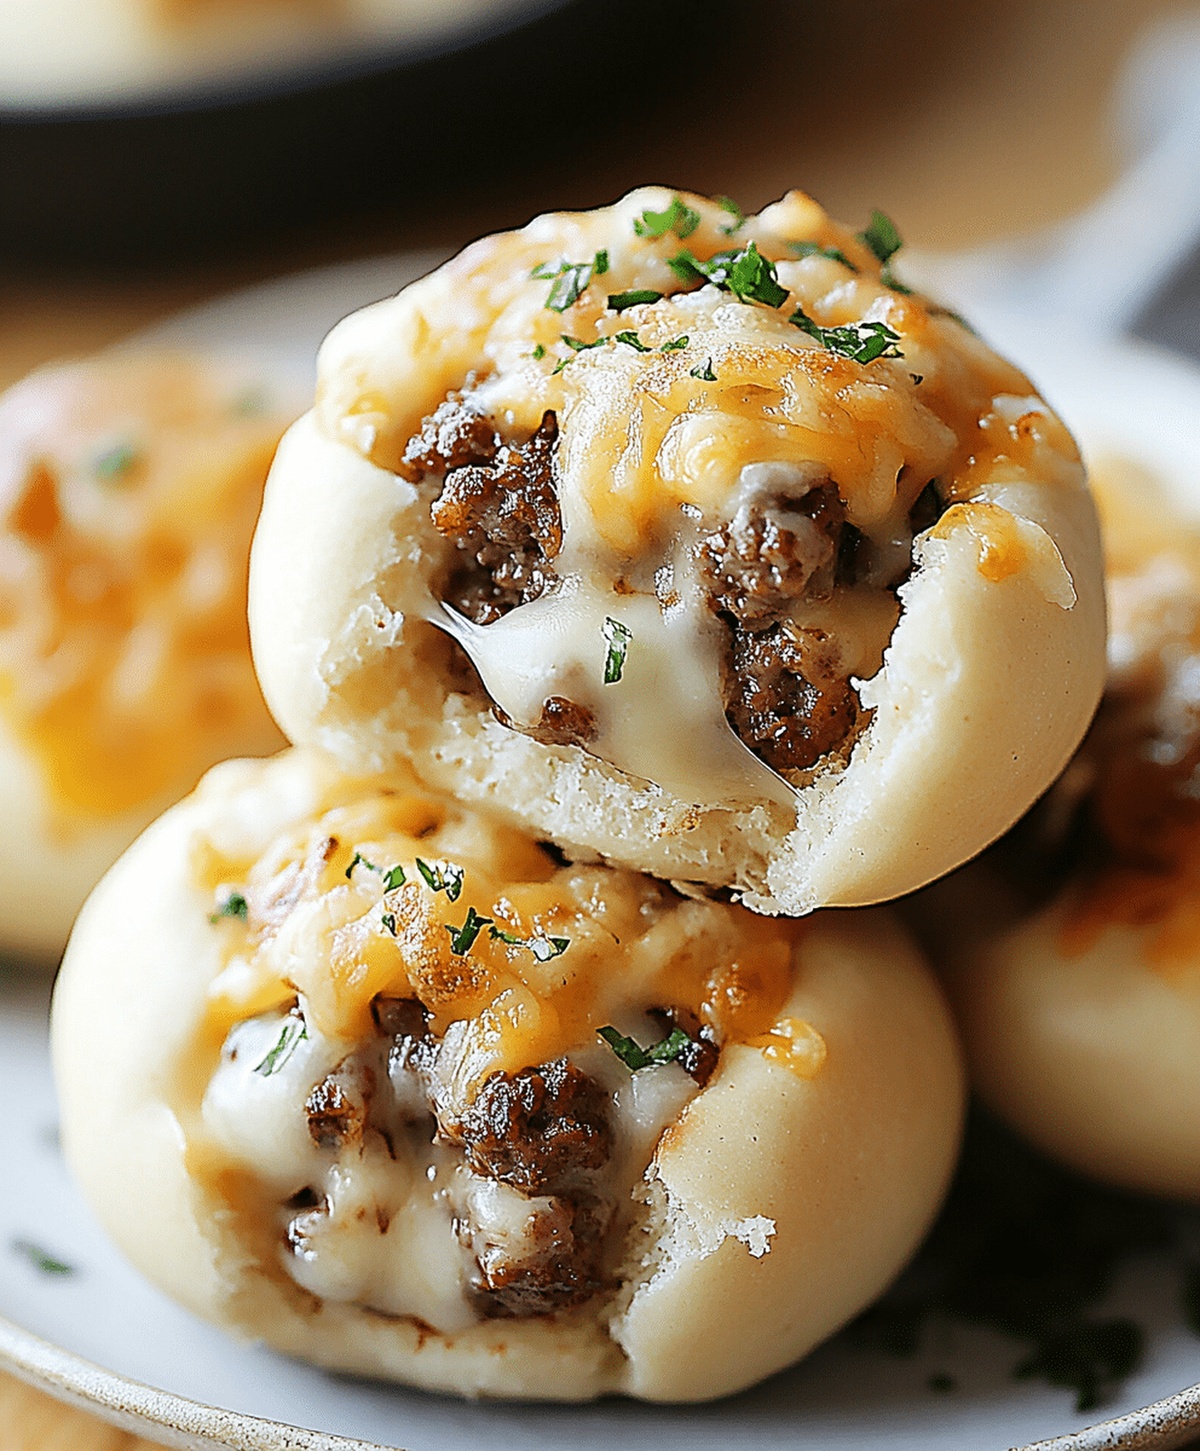
Juicy ground beef wrapped in a crispy garlic parmesan cheeseburger bombs shell promises pure comfort food magic.
Melted cheese oozes through each delectable bite, creating an irresistible explosion of flavor.
Weeknight dinners never looked so tempting or simple to prepare.
Savory ingredients blend seamlessly, promising a meal that satisfies deep hunger pangs.
Quick assembly means you can have these delightful parcels ready in minutes.
Compact and packed with bold taste, these bombs will become your new favorite crowd-pleasing recipe.
Garlic Parmesan Cheeseburger Bombs – Flavor Bursts
All You Need For Cheeseburger Bombs
Meat Protein:Cheese Components:Dough and Coating Ingredients:Seasoning and Garnish:Cheeseburger Bombs Simple Stepwise Prep
Step 1: Prepare the Oven
Crank up your oven to a toasty 375°F (190°C).
Get ready for some seriously delicious bites.
Step 2: Brown the Beef
Sizzle ground beef in a skillet, seasoning with a pinch of salt and pepper.
Drain away any extra grease to keep things light and tasty.
Step 3: Create the Filling
Fold shredded cheddar cheese into the warm beef.
Let the mixture cool down just a bit so it’s easy to handle.
Step 4: Wrap the Bombs
Gently stretch out each biscuit dough.
Plop a generous spoonful of the beef and cheese mixture right in the center.
Carefully wrap the dough around the filling, pinching the edges to seal completely.
Make sure no tasty bits can escape!
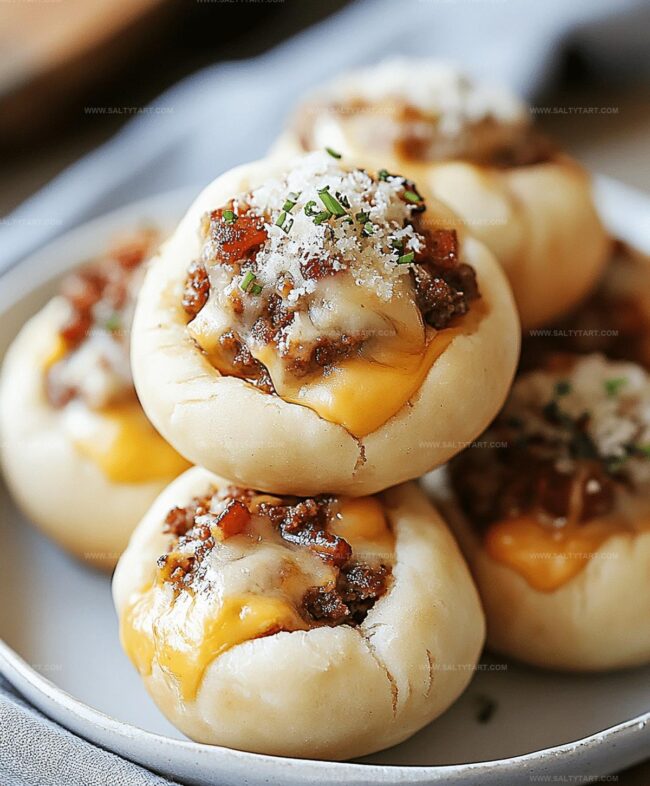
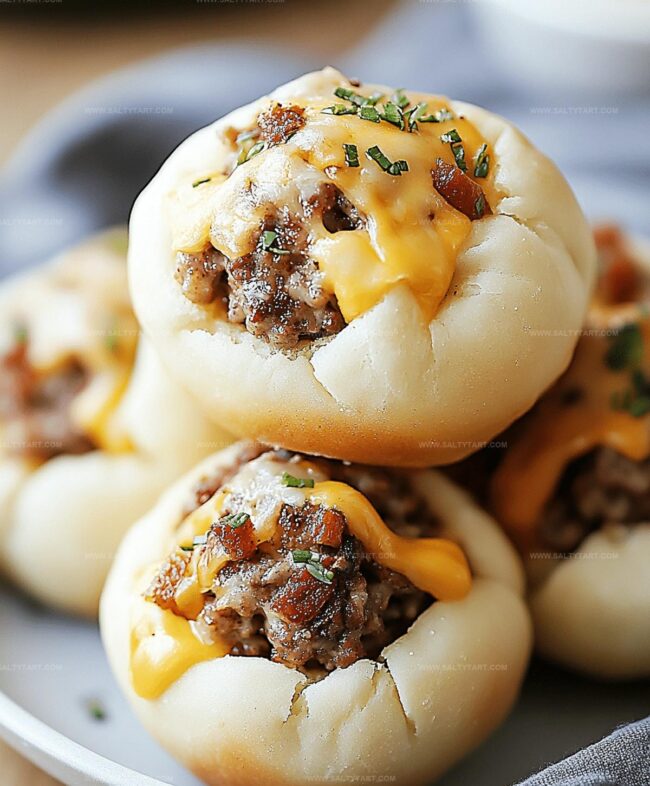
Step 5: Arrange on Baking Sheet
Place the wrapped bombs seam-side down on a baking sheet.
Give them a little space to breathe.
Step 6: Add Flavor Boost
Whisk together:Lovingly brush this magical mixture over each bomb.
Shower the tops with a snowfall of Parmesan cheese.
Step 7: Bake to Perfection
Pop the baking sheet into the oven.
Bake for 15-18 minutes until they turn a gorgeous golden brown.
Optional: Sprinkle some fresh parsley on top for a pop of color.
Serve these bad boys while they’re warm and watch them disappear!
Top Tips For Cheesy, Savory Bombs
Cheeseburger Bombs – Ideas For Twists
How To Serve Cheeseburger Bombs Creatively
Storage Tricks For Cheeseburger Bombs Leftovers
FAQs
These are delicious handheld pastries filled with seasoned ground beef and cheese, wrapped in biscuit dough, then baked with a garlic butter and Parmesan cheese topping.
Yes, you can substitute ground beef with ground turkey, chicken, or pork depending on your preference or dietary needs.
Absolutely! These cheeseburger bombs are easy to eat, have familiar flavors, and are perfect for children who enjoy handheld, cheesy meals.
Print
Garlic Parmesan Cheeseburger Bombs Recipe
- Total Time: 40 minutes
- Yield: 8 1x
Description
Garlic parmesan cheeseburger bombs explode with flavor, blending juicy ground beef and melted cheese in a crispy, golden-brown exterior. Packed with savory goodness, you’ll savor each bite of this irresistible comfort classic that elevates burger night to a whole new level.
Ingredients
Main Protein and Cheese:
- 1 pound (454 grams) ground beef
- 1 cup (113 grams) shredded cheddar cheese
- 2 tablespoons (30 grams) grated Parmesan cheese
Dough and Seasoning:
- 1 can refrigerated biscuit dough
- 2 teaspoons minced garlic
- 1 teaspoon parsley (optional)
- Salt and pepper to taste
Binding and Finishing:
- 3 tablespoons (45 milliliters) butter, melted
Instructions
- Prepare a preheated oven at 375F (190C) to ensure optimal cooking temperature.
- In a skillet, thoroughly cook ground beef, carefully seasoning with salt and pepper. Completely drain any excess fat to prevent sogginess.
- Incorporate shredded cheddar cheese into the cooked beef mixture, allowing it to cool slightly for easier handling.
- Gently flatten each biscuit dough, creating a wide surface. Carefully place a generous spoonful of the beef and cheese mixture in the center of each dough circle.
- Carefully fold the dough edges over the filling, creating a complete seal to prevent leakage during baking.
- Arrange the filled dough bombs with the sealed side facing downward on a clean baking sheet.
- Create a flavorful topping by combining melted butter with finely minced garlic. Generously brush this mixture over the surface of each bomb.
- Sprinkle a liberal amount of Parmesan cheese across the top of each prepared bomb, ensuring even coverage.
- Bake in the preheated oven for 15-18 minutes, watching for a rich golden-brown color that indicates perfect doneness.
- Optional: Garnish with freshly chopped parsley for added color and flavor. Serve immediately while warm for the best taste and texture.
Notes
- Experiment with lean ground beef or turkey to reduce fat content while maintaining delicious flavor.
- Create vegetarian versions by substituting meat with black beans, lentils, or plant-based crumbles for protein-rich alternatives.
- Prevent filling from leaking by ensuring biscuit edges are completely sealed and pressed firmly when folding.
- Make ahead and freeze unbaked bombs for convenient meal prep, storing in airtight containers up to 2 months.
- Prep Time: 20 minutes
- Cook Time: 20 minutes
- Category: Lunch, Dinner, Appetizer, Snacks
- Method: Baking
- Cuisine: American
Nutrition
- Serving Size: 8
- Calories: 390 kcal
- Sugar: 1 g
- Sodium: 620 mg
- Fat: 30 g
- Saturated Fat: 13 g
- Unsaturated Fat: 14 g
- Trans Fat: 0.5 g
- Carbohydrates: 12 g
- Fiber: 1 g
- Protein: 18 g
- Cholesterol: 75 mg
Jess Martinez
Contributing Recipe Writer & Nutrition Consultant
Expertise
Southwestern and Latin American cooking, Nutritional analysis and healthy recipe planning, Cultural food traditions, Modifying traditional dishes for better health
Education
Santa Fe Community College
Certificate in Culinary Arts
Focused on mastering the flavors and cooking methods of traditional Southwestern cuisine.
Jess’s love for bold, homegrown flavors led her straight into the world of Southwestern cooking and cultural nutrition.
After completing her Certificate in Culinary Arts at Santa Fe Community College, she made it her mission to show that good-for-you food can still taste incredible.
At saltytart.com, Jess shares vibrant, health-conscious recipes with roots in tradition but a fresh, modern twist. When she’s not testing new recipes, you’ll find her at local growers’ markets, tending her herb garden, or digging into food history books.