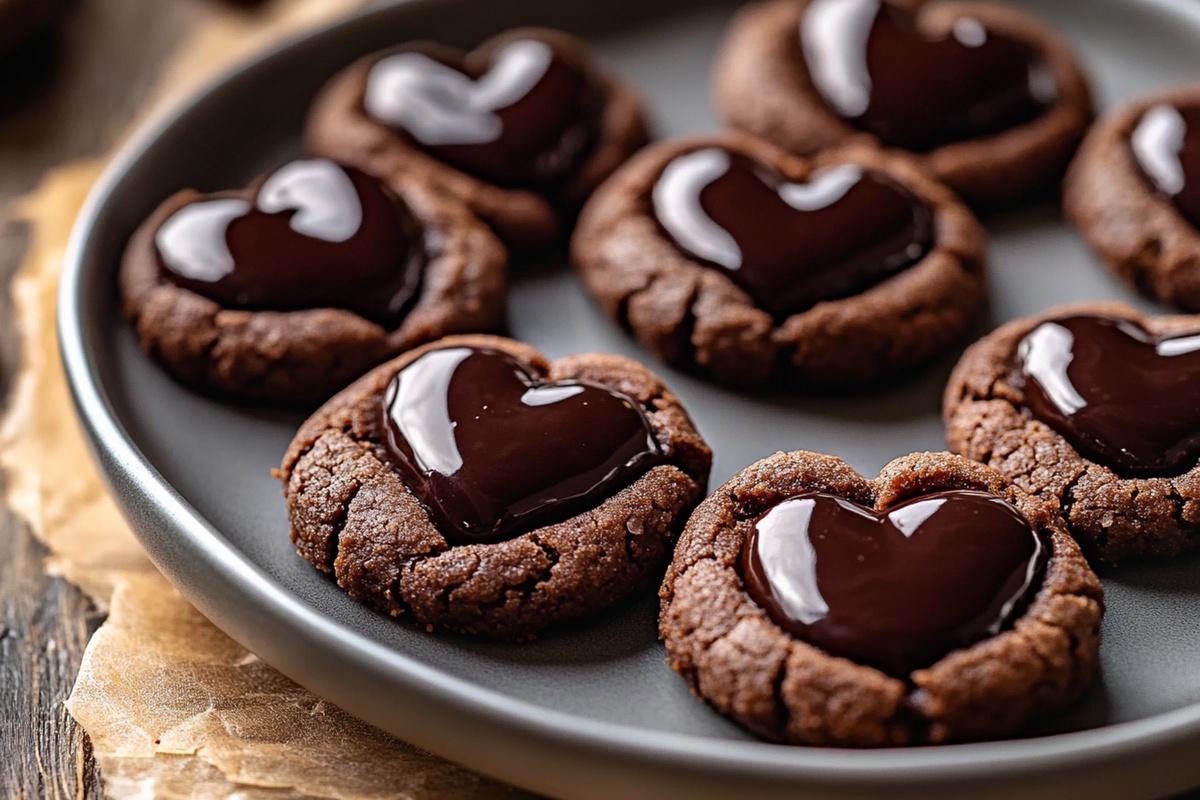
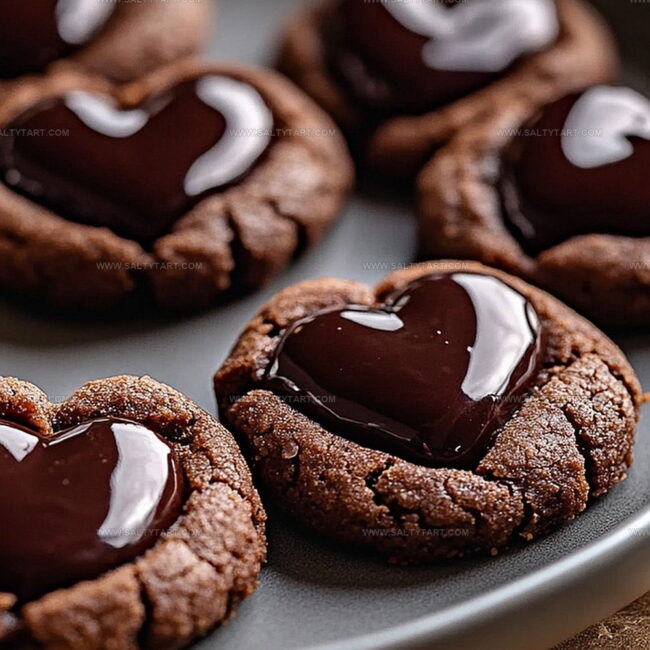
Lovely Heart-Shaped Chocolate Thumbprint Cookies Recipe
Baking these delightful heart-shaped chocolate thumbprint cookies can spark instant joy in any kitchen.
Sweet aromas will dance around you as soft dough comes together.
Romantic and playful, these treats make perfect gifts for special moments.
chocolate centers glisten like little jewels nestled in buttery cookie landscapes.
Crisp edges and tender middles create a delicious textural symphony.
Each bite promises a delectable blend of rich cocoa and tender crumb.
You’ll want to share these charming cookies with someone who makes your heart smile.
Heart-Shaped Chocolate Thumbprint Cookies Overview
Ingredients for Heart-Shaped Thumbprint Cookies
Base Ingredients:Dry Ingredients:Chocolate Filling Ingredients:Baking Preparation:How to Bake Thumbprint Cookies

Step 1: Prepare Creamy Base
In a spacious mixing bowl, blend softened butter and sugar together until the mixture becomes airy and pale, creating a smooth, fluffy texture.
Step 2: Add Moisture Elements
Incorporate egg yolk and vanilla extract, stirring thoroughly until all ingredients are perfectly combined and integrated.
Step 3: Form Cookie Dough
Gradually introduce flour and salt into the wet mixture, gently mixing until a cohesive dough emerges. The consistency should be soft yet manageable.
Step 4: Roll and Shape Cookies
Sprinkle a clean surface with flour. Roll out the dough to a thin, even layer.
Use heart-shaped cookie cutters to create delicate cookie shapes, ensuring each piece is uniform.
Step 5: Prepare Baking Surface
Transfer heart-shaped cookies onto a parchment-lined baking sheet, spacing them evenly to allow proper heat circulation.
Step 6: Create Chocolate Wells
Using your thumb or the back of a small spoon, gently press a small indentation into the center of each cookie. This pocket will hold the rich chocolate filling.
Step 7: Bake to Golden Perfection
Warm the oven to 350°F. Slide the baking sheet inside and bake for 10-12 minutes until the cookie edges turn a delicate golden brown.
Step 8: Cool Cookie Bases
Allow cookies to rest on the baking sheet for 5 minutes, then carefully transfer to a wire cooling rack to reach room temperature.
Step 9: Craft Chocolate Filling
In a small saucepan, heat heavy cream until it reaches a gentle simmer.
Remove from heat and pour over chocolate chips. Let sit briefly, then stir until achieving a silky, smooth consistency.
Step 10: Enhance Chocolate Flavor
Mix in vanilla extract to elevate the chocolate’s richness and depth.
Step 11: Fill Cookie Centers
Carefully spoon or pipe the luxurious chocolate mixture into the center indentations of each cooled cookie.
Step 12: Allow Chocolate to Set
Let the chocolate filling firm up for 15-20 minutes, ensuring a perfect, glossy finish before serving.
Tips for Soft and Chewy Thumbprint Cookies

Variations on Chocolate Thumbprint Cookies
Foods That Pair Well with Thumbprint Cookies
Storage Instructions for Thumbprint Cookies
FAQs
Yes, you can use milk, dark, or white chocolate chips based on your preference. Just ensure they melt smoothly and complement the cookie’s flavor.
Chill the cut-out cookie dough for 15-20 minutes before baking. This helps maintain their heart shape and prevents excessive spreading.
The egg yolk adds richness and helps bind the dough together, creating a tender texture. If you want to substitute, use 2 tablespoons of milk or a commercial egg replacement.
Print
Heart-Shaped Chocolate Thumbprint Cookies Recipe
- Total Time: 42 minutes
- Yield: 24 1x
Description
Sweet romance meets classic baking with these heart-shaped chocolate thumbprint cookies that promise pure deliciousness. Irresistible chocolate centers nestled in buttery cookie dough will make you fall in love with every delightful bite.
Ingredients
Primary Ingredients:
- 2 1/4 cups all-purpose flour
- 1 cup unsalted butter, softened
- 3/4 cup granulated sugar
Binding and Flavor Ingredients:
- 1 large egg yolk
- 2 teaspoons pure vanilla extract
Seasoning Ingredients:
- 1/4 teaspoon salt
Instructions
- Whip butter and sugar in a spacious mixing bowl until the mixture becomes airy and pale, creating a smooth base for the cookies.
- Incorporate egg yolk and vanilla extract, blending thoroughly to ensure even distribution of moisture and flavor.
- Gradually fold in flour and salt, gently kneading until a cohesive dough forms with a uniform texture.
- Dust work surface with flour and roll out dough to a thin, even layer approximately 1/8-inch thick.
- Craft heart-shaped cookies using specialized cutters or carefully molding by hand for a personalized touch.
- Arrange cookie hearts on a parchment-lined baking sheet, leaving slight spacing between each piece.
- Create gentle indentations in the center of each cookie using your thumb or the rounded back of a small spoon, preparing space for chocolate filling.
- Heat oven to 350°F (175°C) and position rack in the middle for consistent baking.
- Bake cookies for 10-12 minutes until edges turn a delicate golden hue, indicating perfect doneness.
- Rest cookies on baking sheet for 5 minutes to stabilize, then transfer to a wire cooling rack.
- Warm heavy cream in a small saucepan until it reaches a gentle simmer, avoiding boiling.
- Pour hot cream over chocolate chips, allowing mixture to rest briefly before stirring into a silky ganache.
- Enhance ganache with a splash of vanilla extract for deeper flavor complexity.
- Carefully fill cookie indentations with smooth chocolate, using a spoon or piping bag for precision.
- Allow chocolate to set at room temperature for 15-20 minutes before serving these delicate treats.
Notes
- Chill the dough for 30 minutes before rolling to prevent sticking and make shaping easier.
- Use room temperature ingredients for smoother cookie dough and better texture.
- Experiment with different chocolate types like dark, milk, or white chocolate for varied flavor profiles.
- For gluten-free option, substitute all-purpose flour with almond or gluten-free flour blend.
- Prep Time: 30 minutes
- Cook Time: 12 minutes
- Category: Snacks, Desserts
- Method: Baking
- Cuisine: American
Nutrition
- Serving Size: 24
- Calories: 132 kcal
- Sugar: 5 g
- Sodium: 23 mg
- Fat: 7 g
- Saturated Fat: 4 g
- Unsaturated Fat: 3 g
- Trans Fat: 0 g
- Carbohydrates: 17 g
- Fiber: 0.3 g
- Protein: 1.5 g
- Cholesterol: 29 mg
Mike Reynolds
Founder & Recipe Developer
Expertise
Farm-to-table cuisine, Seasonal recipe development, Sustainable cooking techniques, Food photography
Education
Asheville-Buncombe Technical Community College (A-B Tech)
Associate Degree in Culinary Arts
Mike studied culinary arts with a strong focus on farm-to-table principles and sustainable cooking. His training emphasized the importance of fresh, local ingredients and environmentally responsible practices in the kitchen.
Mike’s food journey began deep in the Blue Ridge Mountains, where weekends at farmers’ markets and home-cooked meals sparked a lifelong obsession with simple, seasonal eating.
After earning his Associate Degree in Culinary Arts from Asheville-Buncombe Technical Community College, he set out to bring farm-to-table cooking into everyday kitchens, without the fuss.
Mike’s philosophy is all about keeping it fresh, unfussy, and full of heart. When he’s not crafting new single-serving recipes, he’s hiking mountain trails, chatting with local farmers, or experimenting with wild ingredients in his backyard kitchen.