Fruity Paradise: Homemade Apricot Jam Chocolate Fruit And Nut Bars Recipe
Sweet summer memories bloom in these delectable homemade apricot jam chocolate fruit and nut bars that blend rich cocoa with tangy stone fruit.
The combination creates a delightful harmony of textures and flavors sure to delight dessert enthusiasts.
Melted chocolate swirls through chopped nuts and bright apricot preserves, crafting an irresistible treat.
Each bite carries the warmth of handcrafted goodness and nostalgic comfort.
Layers of complex tastes meld together seamlessly in this simple yet elegant recipe.
Nutty crunch meets smooth chocolate and vibrant fruit in a perfectly balanced dessert.
You’ll fall in love with this decadent and surprisingly easy bar that transforms ordinary ingredients into an extraordinary experience.
Apricot Jam Chocolate Fruit and Nut Bars Magic
Ingredient List for Apricot Chocolate Nut Bars
Fruit Ingredients:Sugar and Acid Ingredients:Canning and Preparation Ingredients:Directions for Apricot Jam Nut Bars
Step 1: Clean and Prep Canning Gear
Thoroughly wash jars, lids, and bands with hot, soapy water. Rinse completely and let them air dry.
Slide 2-3 small plates into the freezer for jam testing later. If canning, set up your water bath with a rack and fill with enough water to cover jars by 2 inches.
Step 2: Prepare Fruit and Juice
Gently wash and dry apricots. Slice each fruit in half and remove the pit.
Squeeze fresh lemons to extract their tangy juice.
Step 3: Create Jam Base
Grab a large stainless steel saucepan and combine:Heat the mixture over medium temperature, stirring continuously until sugar dissolves completely.
Step 4: Boil and Thicken
Keep the jam bubbling for 25-30 minutes. Stir constantly to prevent scorching.
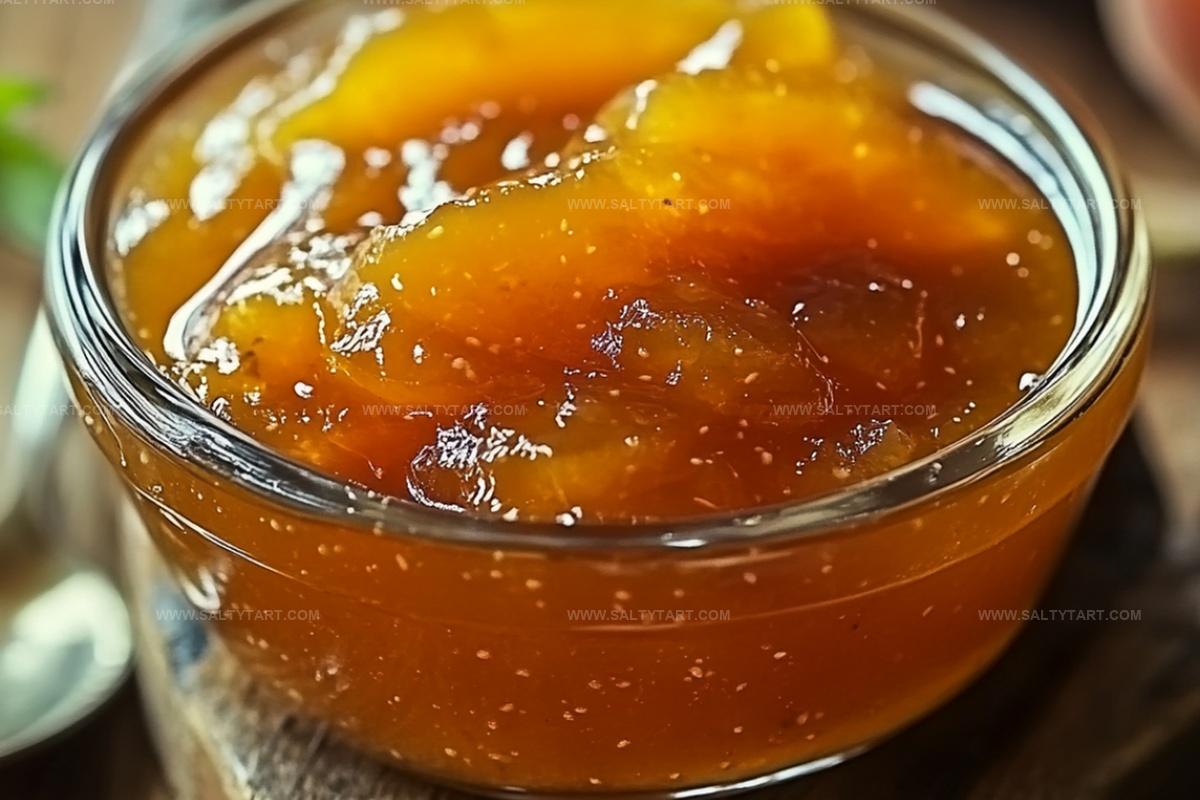
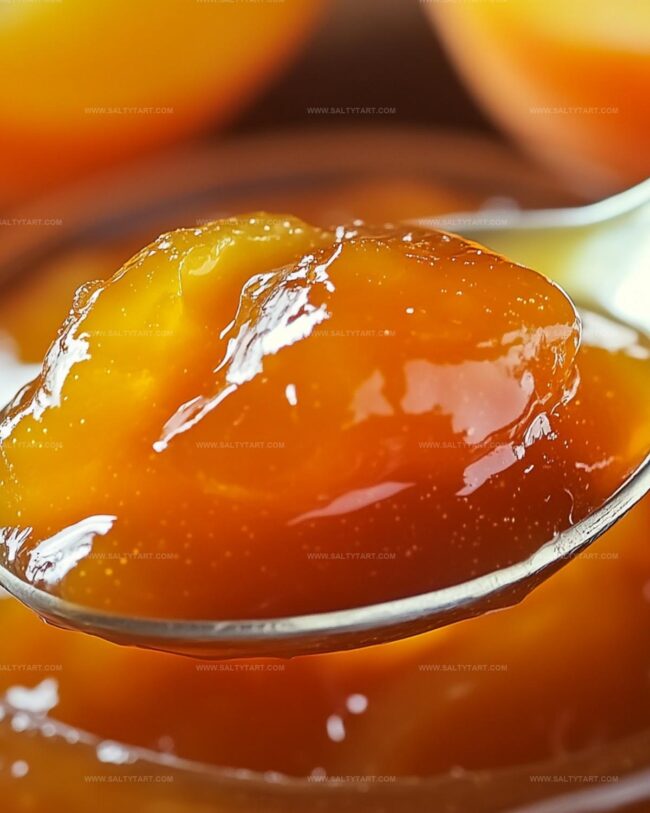
Skim off any foam that appears. The mixture should transform into a thick, spoon-coating consistency.
Step 5: Check Jam Readiness
Use two methods to test jam doneness:
Candy Thermometer Method: Ensure the jam reaches 220°F (104°C)
Frozen Plate Method: Drop a teaspoon of jam on a chilled plate. After one minute, press the edge – it should wrinkle and hold its shape
Step 6: Prepare Jars
Warm jars in a water bath or oven to prevent cracking when adding hot jam.
Step 7: Fill and Seal Jars
Carefully ladle hot jam into jars, leaving 1/4 inch headspace. Tap jars to remove air bubbles.
Wipe jar rims clean with a towel. Secure lids and bands.
Step 8: Process Jam (Optional Canning)
Submerge filled jars in boiling water bath. Cover and process for 10 minutes.
Adjust time for altitude if needed.
Step 9: Cool and Store
Remove jars and let them cool for 24 hours.
Check seals by pressing lid – it should not move. Store sealed jars in a cool, dark place for up to one year.
Helpful Notes for Baking Nut Bars Well
New Mix-Ins for Chocolate Apricot Nut Bars
Good Pairings for Fruit and Nut Bars
Storing Apricot Nut Bars For Fresh Flavor
FAQs
You’ll need a large stainless steel saucepan, candy thermometer (optional), frozen plates for testing, clean jars, canning tongs, and a water bath canner if you plan to preserve the jam long-term.
Lemon juice helps activate pectin, which helps the jam set properly, adds a bright flavor, and increases the acidity to prevent bacterial growth during preservation.
Use two methods: either check with a candy thermometer (220°F/104°C) or use the frozen plate test by placing a small amount of jam on a cold plate and seeing if it wrinkles when you push it with your finger.
Print
Homemade Apricot Jam Chocolate Fruit And Nut Bars Recipe
- Total Time: 1 hour 5 minutes
- Yield: 24 1x
Description
Irresistible homemade apricot jam chocolate fruit and nut bars blend sweet and nutty flavors in a delightful Mediterranean-inspired treat. Rich chocolate and tangy apricot create a perfect harmony that will satisfy cravings and bring joy to dessert lovers.
Ingredients
Fruit:
- 4.8 pounds (2.2 kilograms) apricots
- 1/3 cup lemon juice
Sugar:
- 3.3 pounds (1.5 kilograms) sugar
Additional Ingredients:
- No additional ingredients listed in the original recipe
Instructions
- Thoroughly wash and dry glass jars, lids, and bands in hot, soapy water to sterilize.
- Chill 2-3 small plates in the freezer for jam consistency testing later.
- Prepare water bath canner by adding rack and filling with water deep enough to cover jars by 2 inches.
- Carefully slice apricots in half, removing pits, and extract fresh lemon juice.
- Combine prepared apricots, lemon juice, and sugar in a heavy stainless steel saucepan over medium heat.
- Stir mixture constantly until sugar dissolves and bring to a rolling boil, approximately 5-7 minutes.
- Continue boiling for 25-30 minutes, stirring frequently to prevent scorching and skimming off foam.
- Check jam consistency using candy thermometer – target temperature is 220°F (104°C).
- Alternatively, test jam by placing a small amount on frozen plate; if it wrinkles when touched, it’s ready.
- Warm jars in canner or oven to prevent thermal shock when adding hot jam.
- Carefully ladle hot jam into prepared jars, leaving 1/4 inch headspace.
- Remove air bubbles by gently tapping jars and wipe rim edges clean.
- Seal jars with lids, tightening bands until fingertip-tight.
- Submerge sealed jars in boiling water bath, ensuring 1 inch water coverage.
- Process jars for 10 minutes, adjusting time for altitude if necessary.
- Allow jars to rest in canner for 5 minutes after processing.
- Transfer jars to towel and let cool completely for 24 hours.
- Verify seal by pressing lid – it should not move up or down.
- Store unsealed jars in refrigerator or reprocess immediately.
- Refrigerate opened jam and consume within one month.
Notes
- Choose ripe, slightly soft apricots for maximum flavor and natural sweetness, ensuring your jam has a rich, deep taste.
- Skim foam consistently during cooking to maintain a clear, glossy jam texture and prevent cloudiness.
- Use a wide, heavy-bottomed pan to distribute heat evenly and prevent burning, helping the jam cook smoothly and consistently.
- Try adding spices like cinnamon or cardamom for a unique twist on traditional apricot jam, enhancing its complexity and depth of flavor.
- Prep Time: 30 minutes
- Cook Time: 35 minutes
- Category: Snacks, Desserts
- Method: Boiling
- Cuisine: American
Nutrition
- Serving Size: 24
- Calories: 177
- Sugar: 42 g
- Sodium: 0 mg
- Fat: 0 g
- Saturated Fat: 0 g
- Unsaturated Fat: 0 g
- Trans Fat: 0 g
- Carbohydrates: 46 g
- Fiber: 1 g
- Protein: 0 g
- Cholesterol: 0 mg
Jess Martinez
Contributing Recipe Writer & Nutrition Consultant
Expertise
Southwestern and Latin American cooking, Nutritional analysis and healthy recipe planning, Cultural food traditions, Modifying traditional dishes for better health
Education
Santa Fe Community College
Certificate in Culinary Arts
Focused on mastering the flavors and cooking methods of traditional Southwestern cuisine.
Jess’s love for bold, homegrown flavors led her straight into the world of Southwestern cooking and cultural nutrition.
After completing her Certificate in Culinary Arts at Santa Fe Community College, she made it her mission to show that good-for-you food can still taste incredible.
At saltytart.com, Jess shares vibrant, health-conscious recipes with roots in tradition but a fresh, modern twist. When she’s not testing new recipes, you’ll find her at local growers’ markets, tending her herb garden, or digging into food history books.