Irresistibly Crunchy Homemade Chocolate Fruit And Nut Bars Recipe
Crafting delectable chocolate fruit and nut bars at home opens a world of sweet, wholesome indulgence.
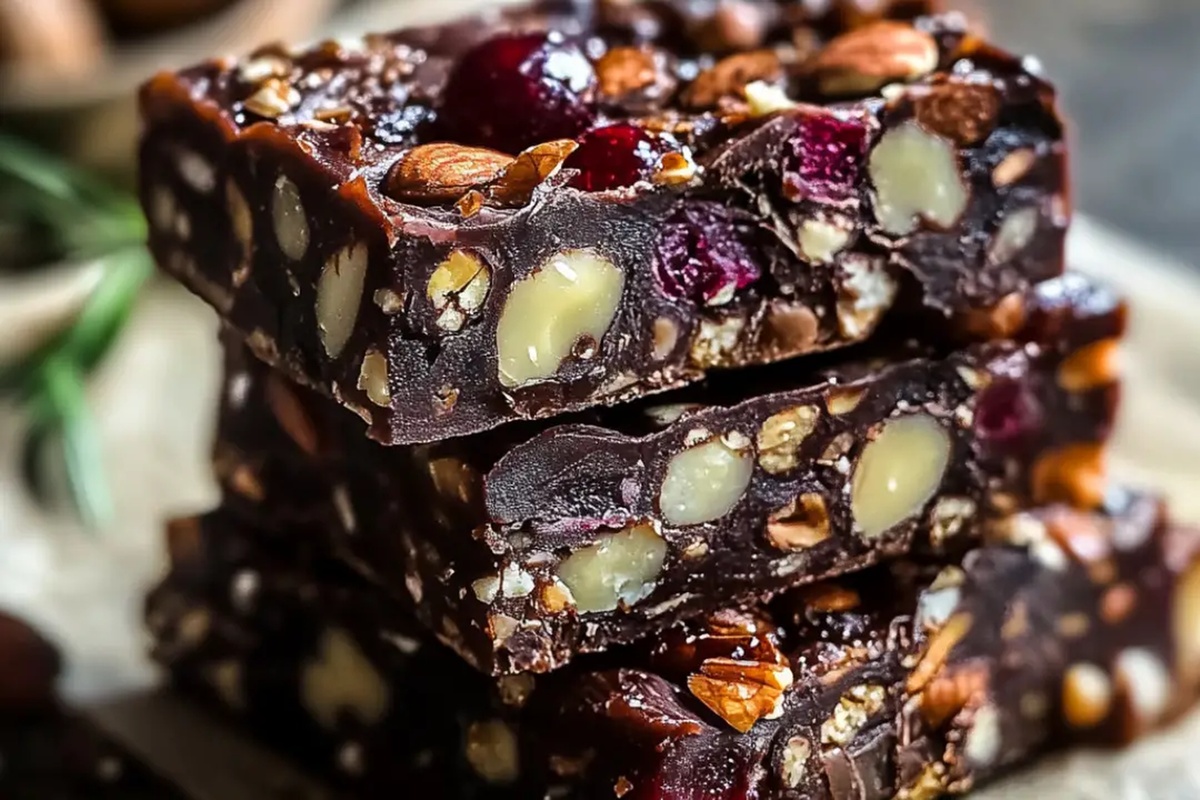
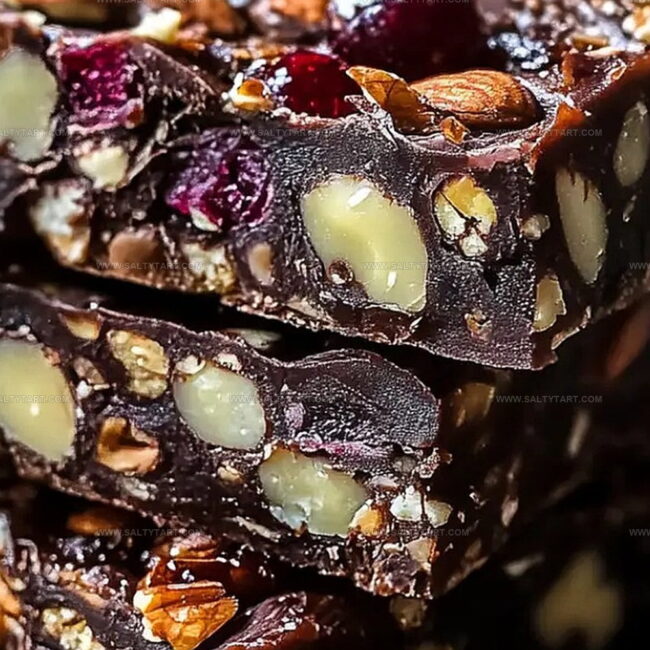
These homemade chocolate fruit and nut bars deliver a perfect blend of rich, velvety chocolate with crunchy nuts and chewy dried fruits.
Each bite brings a symphony of textures and flavors that commercial snacks simply cannot match.
Packed with natural ingredients and free from unnecessary preservatives, these bars offer a healthier alternative to store-bought treats.
The simple preparation process means you can whip up a batch in under an hour, creating a delightful snack for any occasion.
Customize the ingredients to suit your taste preferences, mixing different nuts and fruits for a unique culinary experience.
Dive into this delicious recipe and treat yourself to a homemade snack that beats any packaged bar.
Chocolate Fruit and Nut Bars for Sweet Snacking
Ingredients You’ll Need for Chocolate Nut Bars
Nuts and Fruits:Seeds:Chocolate and Binding Ingredients:Optional Flavor Enhancers:Steps for Making Chocolate Fruit Nut Bars
Step 1: Prepare Fruit and Nuts
Grab your cutting board and sharp knife. Chop almonds, apricots, and figs into tiny bite-sized pieces.
For a softer texture, pulse the ingredients in a food processor until they form a rough, chunky mixture. The goal is to create a blend that will hold together nicely.
Step 2: Set Up Workspace
Grab a baking tray and line it with parchment paper. If you prefer individual bars, a silicone mold works perfectly.
Ensure the surface is smooth and completely covered to prevent sticking.
Step 3: Create Fruit and Nut Blend
In a large mixing bowl, combine:Stir everything together until the ingredients are evenly distributed throughout the mixture.
Step 4: Shape the Bars
Press the mixture firmly into the prepared tray. Use the bottom of a glass or your hands to compact the ingredients.
Create an even layer about half an inch thick. For thicker bars, concentrate the mixture on one side of the tray.
Step 5: Chill and Set
Place the tray in the freezer for 30 minutes. This helps the bars firm up and makes cutting easier.
The cold temperature will help the ingredients stick together.
Step 6: Melt Chocolate
Select dark chocolate for coating.
Melt the chocolate using a double boiler or microwave. If using the microwave, heat in 15-second intervals, stirring between each burst.
Continue until the chocolate is completely smooth and glossy.
Step 7: Coat and Decorate
Remove the tray from the freezer and slice into bar-sized pieces.
Drizzle or pour melted chocolate over each bar, ensuring complete coverage. Let the chocolate set at room temperature or quickly in the refrigerator.
Step 8: Store and Enjoy
Transfer bars to an airtight container. They can be stored at room temperature for up to a week or refrigerated for two weeks.
Enjoy as a quick snack or energy boost during the day.
Handy Details for Fruit and Nut Bar Success
Fillings to Try in Your Nut Bars Next
What Matches with Chocolate Fruit Nut Bars
Best Way to Store Chocolate Nut Bars
FAQs
Firmly press the mixture into the tray using a flat object like a glass bottom. Compact the ingredients tightly to help them bind together and prevent crumbling.
Absolutely! You can swap almonds for walnuts, pistachios, or pecans. Replace apricots and figs with dried cranberries, raisins, or dates to suit your taste preferences.
Dark chocolate with 70% cocoa content provides the best flavor and smoothest coating. However, you can also use milk or semi-sweet chocolate based on your preference.
Print
Homemade Chocolate Fruit And Nut Bars Recipe
- Total Time: 40 minutes
- Yield: 6 1x
Description
Rich chocolate Fruit and Nut Bars bring Mediterranean sweetness to classic snacking adventures. Packed with wholesome ingredients and simple preparation, these bars offer delightful energy for chocolate enthusiasts seeking natural indulgence.
Ingredients
Main Ingredients:
- 1/2 cup dark chocolate (for melting and coating)
- 1/4 cup almonds (raw)
- 3 dried apricots
- 2 dried figs
Dried Fruits and Berries:
- 1/4 cup barberries (dried, or goji berries or soft cranberries)
Seeds:
- 1 tablespoon raw sunflower seeds
- 1 tablespoon raw pumpkin seeds
Instructions
- Finely dice almonds, apricots, and figs into uniform small pieces, creating a textured base mixture that ensures consistent flavor in every bite.
- Prepare a baking tray by lining it with parchment paper or select a silicone mold for precise bar shaping.
- Thoroughly blend chopped nuts, dried fruits, and seeds in a mixing bowl, ensuring even distribution of ingredients for balanced taste.
- Compress the ingredient mixture firmly into the prepared tray, using a flat utensil to create a compact, dense layer with uniform thickness.
- Refrigerate the pressed mixture for 30 minutes at 0°C to solidify and facilitate clean cutting.
- Melt dark chocolate using a double boiler method, heating gently until smooth and glossy, stirring consistently to prevent burning.
- Remove chilled mixture from refrigerator and slice into rectangular bars of consistent size and shape.
- Generously drizzle or coat each bar with melted chocolate, allowing the chocolate to set completely at room temperature.
- Transfer chocolate-covered bars to an airtight container, storing in a cool, dry place or refrigerator to maintain texture and prevent melting.
Notes
- Customize texture by adjusting chopping techniques, from rough chunks to fine blends for different mouthfeel experiences.
- Try alternative nuts like pistachios or cashews to create unique flavor profiles that match personal taste preferences.
- Consider using sugar-free dark chocolate for low-carb diets or replacing chocolate with raw cacao for enhanced nutritional benefits.
- Keep bars fresh by wrapping individually in parchment paper and storing in cool, dry places to maintain optimal texture and prevent moisture absorption.
- Prep Time: 25 minutes
- Cook Time: 15 minutes
- Category: Snacks, Desserts
- Method: Blending
- Cuisine: American
Nutrition
- Serving Size: 6
- Calories: 169 kcal
- Sugar: 15 g
- Sodium: 1 mg
- Fat: 10 g
- Saturated Fat: 4 g
- Unsaturated Fat: 6 g
- Trans Fat: 0 g
- Carbohydrates: 18 g
- Fiber: 3 g
- Protein: 3 g
- Cholesterol: 0 mg
Jess Martinez
Contributing Recipe Writer & Nutrition Consultant
Expertise
Southwestern and Latin American cooking, Nutritional analysis and healthy recipe planning, Cultural food traditions, Modifying traditional dishes for better health
Education
Santa Fe Community College
Certificate in Culinary Arts
Focused on mastering the flavors and cooking methods of traditional Southwestern cuisine.
Jess’s love for bold, homegrown flavors led her straight into the world of Southwestern cooking and cultural nutrition.
After completing her Certificate in Culinary Arts at Santa Fe Community College, she made it her mission to show that good-for-you food can still taste incredible.
At saltytart.com, Jess shares vibrant, health-conscious recipes with roots in tradition but a fresh, modern twist. When she’s not testing new recipes, you’ll find her at local growers’ markets, tending her herb garden, or digging into food history books.