
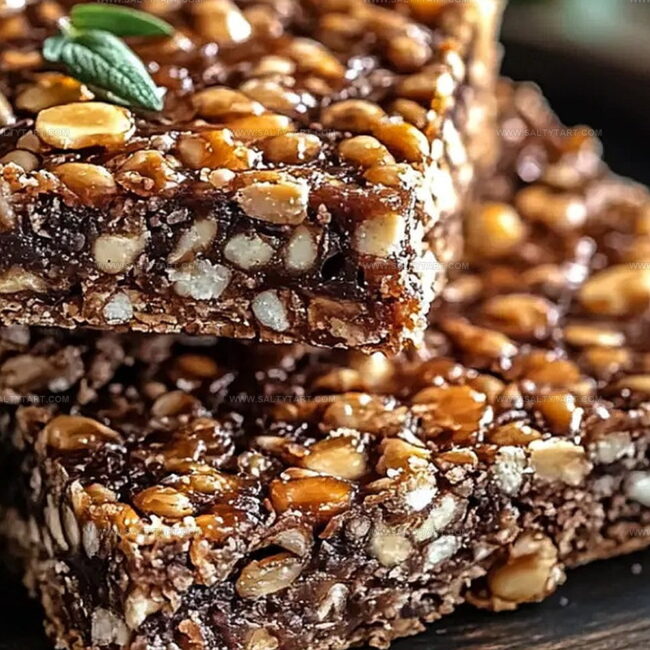
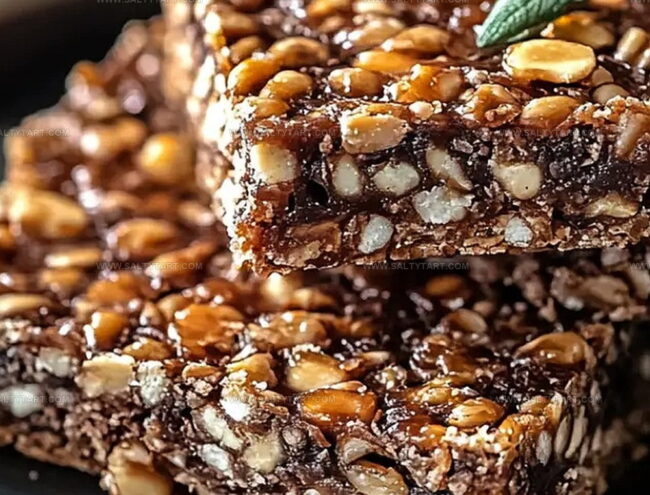
The Sweetest Homemade Crunch Bars Recipe for Chocolaty Bliss
Chocolate lovers crave something special when sweet tooth strikes, and this homemade crunch bars recipe delivers pure delight.
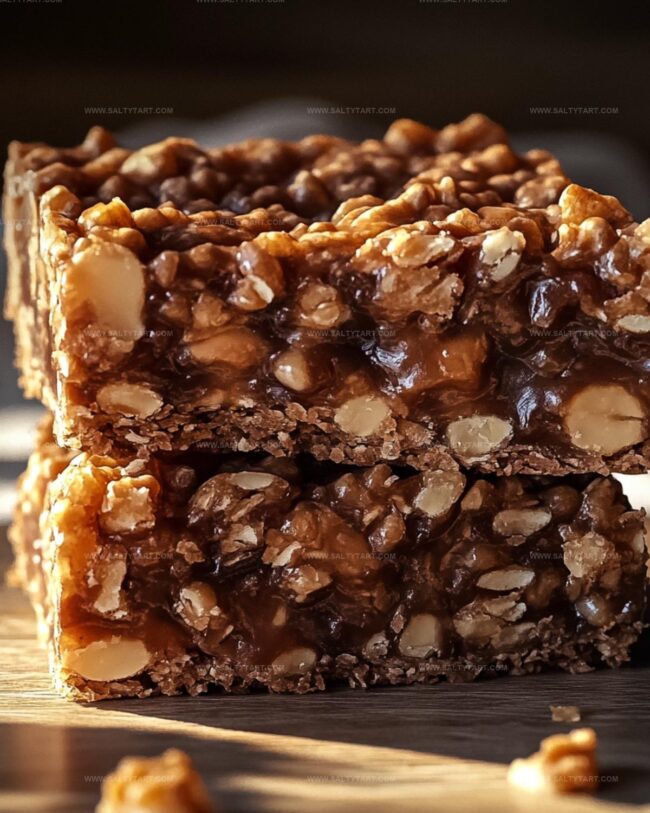
Crispy, golden layers of chocolate create a magical treat that melts in your mouth.
Crafting these delectable bars at home means you control every delicious ingredient.
No store-bought version compares to the rich, satisfying crunch of this homemade delight.
Simple ingredients and minimal effort combine to produce an irresistible snack that beats any packaged alternative.
Each bite promises a perfect balance of smooth chocolate and crisp texture.
You’ll want to make extra to share – or maybe keep them all for yourself.
Homemade Crunch Bars That Are Simply Addictive
Ingredients That Build Homemade Crunch Bars
Chocolate Group:Binding Group:Crunch Group:Step-by-Step Guide to Homemade Crunch Bars
Step 1: Prepare Baking Surface
Grab a square baking pan and line it completely with parchment paper, allowing some overhang for easy lifting later. The parchment will help you remove the treats smoothly without any sticky mess.
Step 2: Create Chocolate Mixture
Grab a microwave-safe bowl and combine:Zap the ingredients in short 30-second bursts, stirring gently between each interval. Keep mixing until the blend transforms into a silky, glossy liquid with no lumps.
Step 3: Introduce Crispy Element
Pour the crunchy rice cereal into the melted chocolate mixture. Stir gently and thoroughly, ensuring every single crisp gets a beautiful chocolate coating.
Mix with love and patience.
Step 4: Shape Your Treats
Transfer the chocolatey mixture into the prepared pan.
Use a spatula to spread it evenly, creating a smooth, consistent layer. For an extra flavor twist, sprinkle some flaky sea salt across the top.
Step 5: Chill and Set
Pop the pan into the freezer for about 15 minutes. The treats will firm up quickly, becoming a delightful crispy chocolate sensation.
Once set, lift out the parchment and slice into delectable bars.
Tips for Crunchy and Delicious Homemade Crunch Bars
Creative Twists on Homemade Crunch Bars to Try
Great Pairings for Homemade Crunch Bars
How to Keep Homemade Crunch Bars Fresh
FAQs
Use 30-second microwave intervals and stir between each interval to ensure smooth melting and avoid scorching the chocolate.
Yes, you can substitute milk chocolate, dark chocolate, or semi-sweet chocolate chips based on your preference.
Sea salt is optional but adds a delicious sweet and salty contrast to the chocolate and enhances the overall flavor of the crunch bars.
Store the bars in an airtight container in the refrigerator for up to 1 week, or freeze for up to 2 months for longer preservation.
Print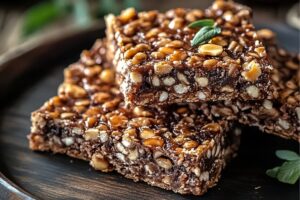
Homemade Crunch Bars Recipe
- Total Time: 10 minutes
- Yield: 12 1x
Description
Chocolate lovers rejoice with this homemade crunch bars recipe that brings crispy, sweet indulgence straight to your kitchen. Silky chocolate and crisp rice cereal combine for a nostalgic treat you’ll crave again and again.
Ingredients
Chocolate and Main Ingredients:
- 1 1/2 cups chocolate chips
- 1/3 cup peanut butter
Crunchy Ingredient:
- 1 cup rice krispies
Garnish:
- Flaked sea salt (optional)
Instructions
- Prepare a parchment-lined 8×8 inch baking dish, ensuring complete coverage for effortless bar removal.
- Combine chocolate chips and peanut butter in a microwave-safe bowl, heating in 30-second increments and stirring thoroughly until achieving a glossy, uniform consistency.
- Gently fold rice krispies into the molten chocolate-peanut butter mixture, ensuring every crisp morsel receives a luxurious chocolate coating.
- Transfer the chocolatey mixture into the prepared pan, using a spatula to distribute evenly and create a smooth surface.
- Optional: Sprinkle flaky sea salt across the top for a sophisticated flavor enhancement.
- Chill in the freezer for approximately 15 minutes until the bars achieve a solid, break-able texture.
- Remove from freezer and slice into 8 equal rectangles using a sharp knife, ensuring clean cuts through the crisp chocolate base.
- Serve immediately or store in an airtight container in the refrigerator for later enjoyment.
Notes
- Choose a high-quality chocolate with at least 60% cocoa for richer flavor and better melting consistency.
- Swap traditional rice krispies with gluten-free or organic options to accommodate dietary restrictions.
- For a vegan version, use dairy-free chocolate chips and almond butter instead of traditional peanut butter.
- Try additional mix-ins like chopped nuts, coconut flakes, or dried fruit to create unique texture variations.
- Prep Time: 10 minutes
- Cook Time: 0 minutes
- Category: Snacks, Desserts
- Method: Freezing
- Cuisine: American
Nutrition
- Serving Size: 12
- Calories: 150 kcal
- Sugar: 10 g
- Sodium: 30 mg
- Fat: 8 g
- Saturated Fat: 3.5 g
- Unsaturated Fat: 4 g
- Trans Fat: 0 g
- Carbohydrates: 18 g
- Fiber: 1 g
- Protein: 3 g
- Cholesterol: 0 mg
Jess Martinez
Contributing Recipe Writer & Nutrition Consultant
Expertise
Southwestern and Latin American cooking, Nutritional analysis and healthy recipe planning, Cultural food traditions, Modifying traditional dishes for better health
Education
Santa Fe Community College
Certificate in Culinary Arts
Focused on mastering the flavors and cooking methods of traditional Southwestern cuisine.
Jess’s love for bold, homegrown flavors led her straight into the world of Southwestern cooking and cultural nutrition.
After completing her Certificate in Culinary Arts at Santa Fe Community College, she made it her mission to show that good-for-you food can still taste incredible.
At saltytart.com, Jess shares vibrant, health-conscious recipes with roots in tradition but a fresh, modern twist. When she’s not testing new recipes, you’ll find her at local growers’ markets, tending her herb garden, or digging into food history books.