Refreshingly Sweet Homemade Peppermint Patties Recipe
Crafting delectable homemade peppermint patties sparks pure joy in my kitchen every single time.
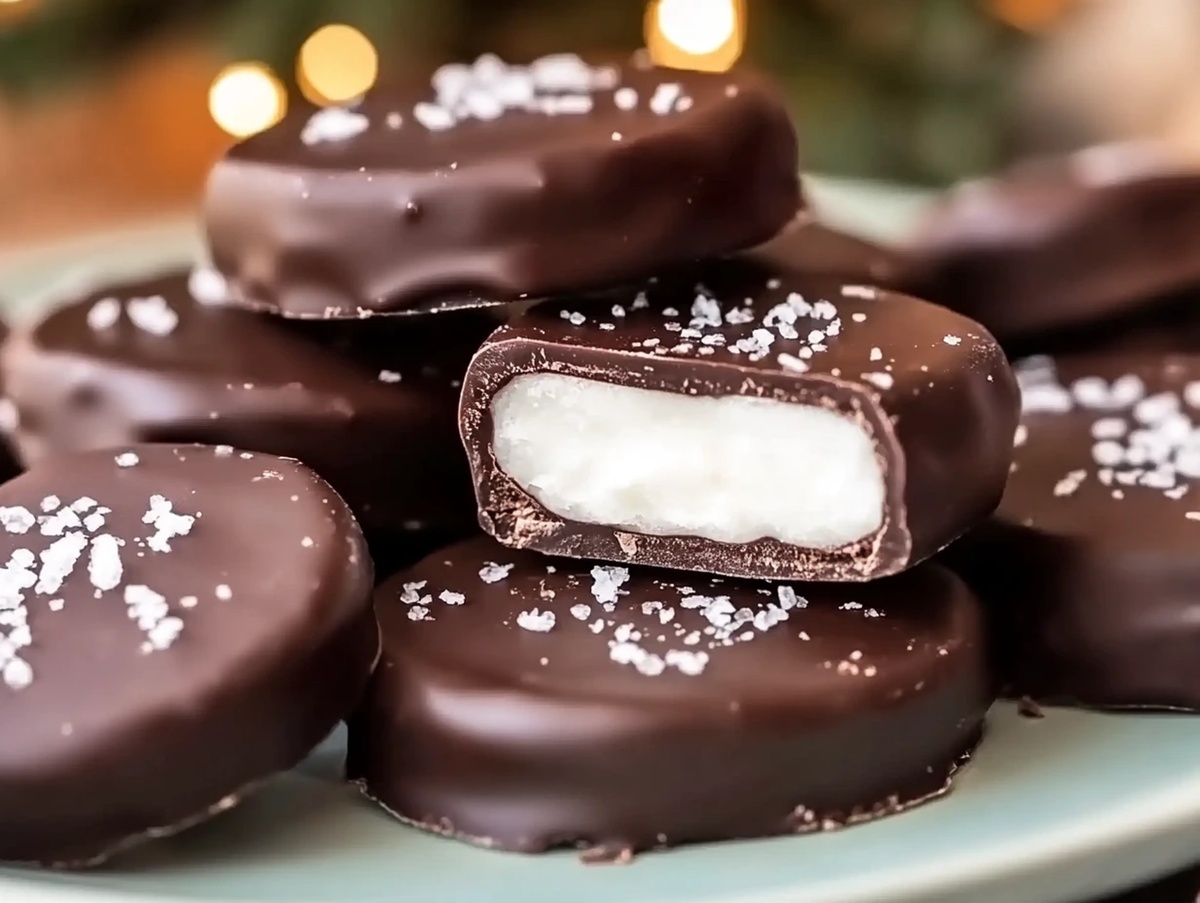
Cool mint and rich chocolate create an irresistible dance of flavors.
Sweet memories of childhood treats flood back with each creamy bite.
Simple ingredients become magical when mixed with care and creativity.
Mixing these delightful confections requires minimal effort but delivers maximum satisfaction.
We can whip up a batch that rivals any store-bought version.
Trust me, these little rounds of bliss will become your new favorite dessert sensation.
Ingredients Needed For Homemade Peppermint Patties
Peppermint Filling Ingredients:Chocolate Coating Ingredients:Preparation Ingredients:Step-By-Step Instructions For Homemade Peppermint Patties
Step 1: Create Smooth Peppermint Filling
In a mixing bowl, blend powdered sugar, softened butter, heavy cream, and peppermint extract. Work the ingredients until they transform into a silky, easy-to-handle dough.
If the mixture feels too sticky, sprinkle in extra powdered sugar, one tablespoon at a time, until the dough becomes manageable.
Step 2: Craft Perfectly Sized Discs
Gently roll the peppermint mixture into bite-sized balls, each about the size of a small marble.
Using your fingertips or the back of a spoon, press each ball into a flat, uniform disc. Arrange these delicate rounds on a parchment-lined baking sheet.
Pop the tray into the refrigerator and let them chill for one hour until they become firm and solid.
Step 3: Melt Decadent Chocolate Coating
Select a microwave-safe bowl and combine chocolate chips with coconut oil.
Warm the mixture in short 30-second bursts, stirring between each interval until the chocolate transforms into a smooth, glossy liquid. For a more traditional approach, you can also use a double boiler to achieve the perfect melted consistency.
Step 4: Dunk and Coat Peppermint Bases
Remove the chilled peppermint discs from the refrigerator. Using a fork, carefully immerse each disc into the molten chocolate, ensuring complete and even coverage.
Allow excess chocolate to drip off before gently placing the coated patties back onto the parchment-lined baking sheet.
Step 5: Finalize and Solidify
Return the chocolate-covered patties to the refrigerator.
Let them rest for 30 minutes, allowing the chocolate shell to completely set and become firm. Once hardened, your homemade peppermint patties are ready to delight and impress.
Tips To Nail Homemade Peppermint Patties Every Time
Flavor Variations To Refresh Homemade Peppermint Patties
Pairings To Enjoy With Homemade Peppermint Patties
Dark roast coffee intensifies the rich chocolate flavor, creating a luxurious sensory experience that complements the peppermint’s cool undertones.
Vanilla bean ice cream provides a smooth, cold contrast to the chocolate-coated patty, enhancing the dessert’s refreshing mint profile.
Peppermint schnapps or a chilled Irish cream liqueur adds an adult twist, amplifying the mint’s crispness while matching the dessert’s decadent texture.
Mint tea offers a light, aromatic companion that echoes the peppermint’s essence, creating a harmonious palate-cleansing finale.
Storage Advice To Keep Peppermint Patties Fresh
FAQs
Yes, you can substitute peppermint extract with other flavors like vanilla or almond extract, but this will change the classic peppermint patty taste.
Refrigerating helps the filling firm up, making it easier to dip in chocolate without falling apart. Chilling for an hour ensures better handling and prevents the filling from melting.
Dark or semi-sweet chocolate chips work great. Milk chocolate can be used, but it might make the patties sweeter. Ensure the chocolate melts smoothly for a clean coating.
Homemade Peppermint Patties Minty And Chocolaty Holiday Treat
Craft Homemade Delights: Discover why these peppermint patties are a game-changer in your kitchen.
Print
Homemade Peppermint Patties Recipe
- Total Time: 20 minutes
- Yield: 24 1x
Description
Cool Homemade Peppermint Patties bring refreshing minty magic to classic chocolate-covered treats. Crisp peppermint centers dipped in rich dark chocolate create an irresistible dessert you’ll crave again and again.
Ingredients
Chocolate Coating:
- 1 1/2 cups semisweet or dark chocolate chips
- 1 tablespoon coconut oil (or vegetable shortening)
Filling Base:
- 2 1/2 cups powdered sugar, sifted
- 3 tablespoons unsalted butter, softened
- 1/4 cup heavy cream (or milk)
Flavoring:
- 1 1/2 teaspoons peppermint extract
Instructions
- Craft a luxurious peppermint filling by blending powdered sugar, butter, heavy cream, and peppermint extract into a silky, uniform mixture. Adjust consistency by incorporating additional powdered sugar if the dough appears excessively tacky.
- Transform the smooth peppermint mixture into compact spheres, approximately one inch in diameter. Delicately press each orb into elegant, uniform discs using fingertips or a utensil’s reverse side.
- Arrange the peppermint discs on a parchment-lined tray, ensuring adequate spacing. Refrigerate for 60 minutes until the discs achieve a firm, robust texture.
- Melt chocolate chips and coconut oil using microwave technique or double boiler method, stirring periodically to create a glossy, homogeneous coating. Maintain gentle heat to prevent chocolate from seizing.
- Retrieve chilled peppermint discs and immerse each one completely in molten chocolate using a fork, allowing excess chocolate to cascade back into the bowl.
- Carefully position chocolate-enrobed patties onto the parchment-lined tray, maintaining a neat arrangement. Return to refrigerator for 30 minutes until chocolate solidifies and develops a pristine, gleaming finish.
Notes
- Chill the dough thoroughly to prevent sticking and make shaping easier, ensuring a smooth, professional-looking patty.
- Use high-quality peppermint extract for a more intense, authentic flavor that elevates the entire dessert.
- Create dairy-free alternatives by substituting butter with coconut oil and using dairy-free chocolate chips for a vegan-friendly version.
- Control chocolate coating thickness by using a dipping fork and allowing excess chocolate to drip off, resulting in a clean, glossy finish.
- Prep Time: 20 minutes
- Cook Time: 0 minutes
- Category: Desserts, Snacks
- Method: Blending
- Cuisine: American
Nutrition
- Serving Size: 24
- Calories: 117
- Sugar: 14 g
- Sodium: 11 mg
- Fat: 7 g
- Saturated Fat: 4 g
- Unsaturated Fat: 3 g
- Trans Fat: 0 g
- Carbohydrates: 15 g
- Fiber: 1 g
- Protein: 1 g
- Cholesterol: 8 mg
Mike Reynolds
Founder & Recipe Developer
Expertise
Farm-to-table cuisine, Seasonal recipe development, Sustainable cooking techniques, Food photography
Education
Asheville-Buncombe Technical Community College (A-B Tech)
Associate Degree in Culinary Arts
Mike studied culinary arts with a strong focus on farm-to-table principles and sustainable cooking. His training emphasized the importance of fresh, local ingredients and environmentally responsible practices in the kitchen.
Mike’s food journey began deep in the Blue Ridge Mountains, where weekends at farmers’ markets and home-cooked meals sparked a lifelong obsession with simple, seasonal eating.
After earning his Associate Degree in Culinary Arts from Asheville-Buncombe Technical Community College, he set out to bring farm-to-table cooking into everyday kitchens, without the fuss.
Mike’s philosophy is all about keeping it fresh, unfussy, and full of heart. When he’s not crafting new single-serving recipes, he’s hiking mountain trails, chatting with local farmers, or experimenting with wild ingredients in his backyard kitchen.