
Heavenly Italian Cream Cake Recipe: A Dreamy Homemade Treat
Baking an authentic italian cream cake transports you to a world of delightful sweetness and creamy indulgence.
Soft layers whisper tales of rich culinary traditions passed through generations.
Velvety textures promise a decadent experience that melts effortlessly on your tongue.
Delicate ingredients blend harmoniously, creating a dessert that feels like a warm embrace from italy.
Subtle notes of vanilla and cream dance together, promising pure comfort in every bite.
Unexpected hints of coconut add a surprising twist to this classic treat.
You’ll fall in love with this simple yet extraordinary cake that turns ordinary moments into memorable celebrations.
Step-by-Step Italian Cream Cake Instructions

Step 1: Separate and Warm Eggs
Carefully divide egg yolks from egg whites. Let both rest and reach room temperature naturally.
Step 2: Prepare Baking Station
Line three 8-inch cake pans with parchment paper circles. Generously grease pan sides, paying extra attention to corners.
Heat oven to 350°F.
Step 3: Mix Dry Ingredients
Combine in a bowl:Set mixture aside.
Step 4: Create Creamy Base
In a large mixing bowl, blend:Whip until mixture becomes light and fluffy, about 3-4 minutes.
Step 5: Incorporate Egg Yolks
Add egg yolks one at a time, ensuring each is well integrated before adding the next.
Step 6: Alternate Dry and Wet Ingredients
Gradually mix dry ingredients and buttermilk into the batter. Alternate thirds of dry mix with buttermilk.
Mix thoroughly but avoid overmixing.
Step 7: Whip Egg Whites
Beat egg whites until stiff peaks form.
Be careful not to overwhip.
Step 8: Fold in Add-ins
Gently fold into batter:Incorporate remaining egg whites carefully.
Step 9: Bake Cake Layers
Distribute batter evenly among prepared pans. Bake 25-30 minutes until a testing skewer comes out clean.
Step 10: Cool Cake Layers
Let cakes rest briefly in pans, then transfer to cooling racks.
Step 11: Prepare Cream Cheese Mixture
Cream cheese until smooth and silky.
Step 12: Whip Cream Frosting
In a separate bowl, whip together:Whip until stiff peaks form.
Step 13: Combine Frosting
Fold whipped cream into cream cheese in thirds, ensuring complete integration.
Step 14: Level Cake Layers
Trim cake tops to create flat surfaces.
Step 15: First Layer Assembly
Place first cake layer on serving plate.
Spread one cup of frosting evenly.
Step 16: Second Layer
Add second cake layer and repeat frosting process.
Step 17: Final Layer Placement
Position final cake layer. Smooth out any exposed frosting edges.
Refrigerate 15-20 minutes.
Step 18: Complete Exterior Frosting
Frost entire cake exterior.
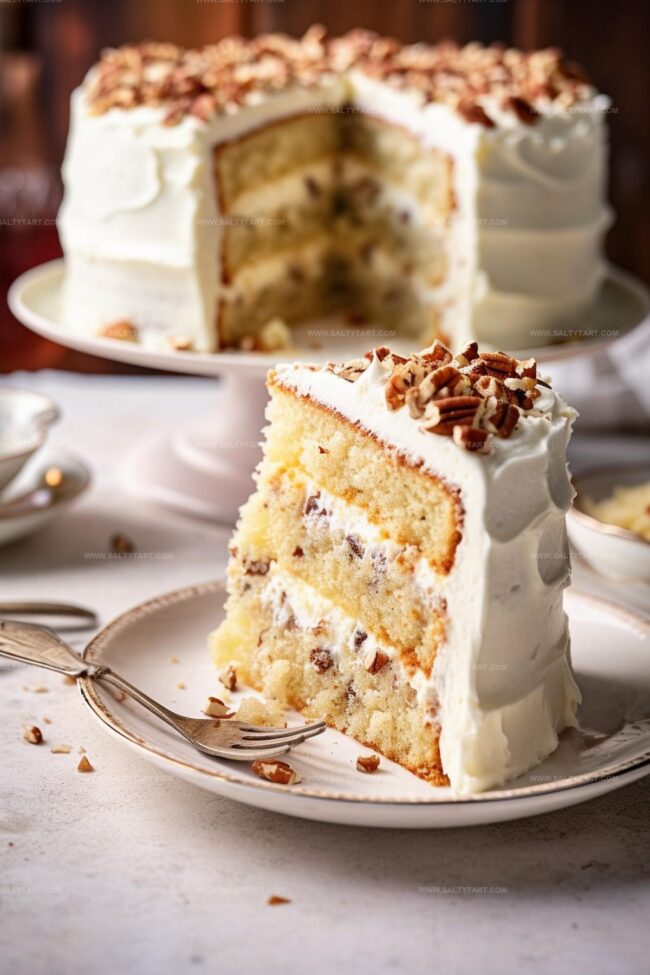
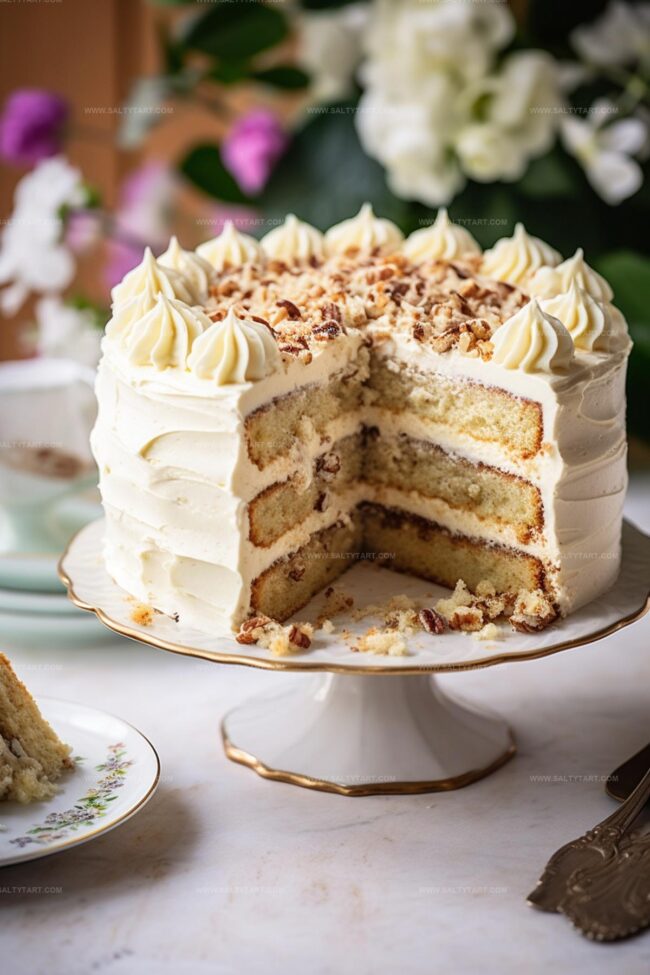
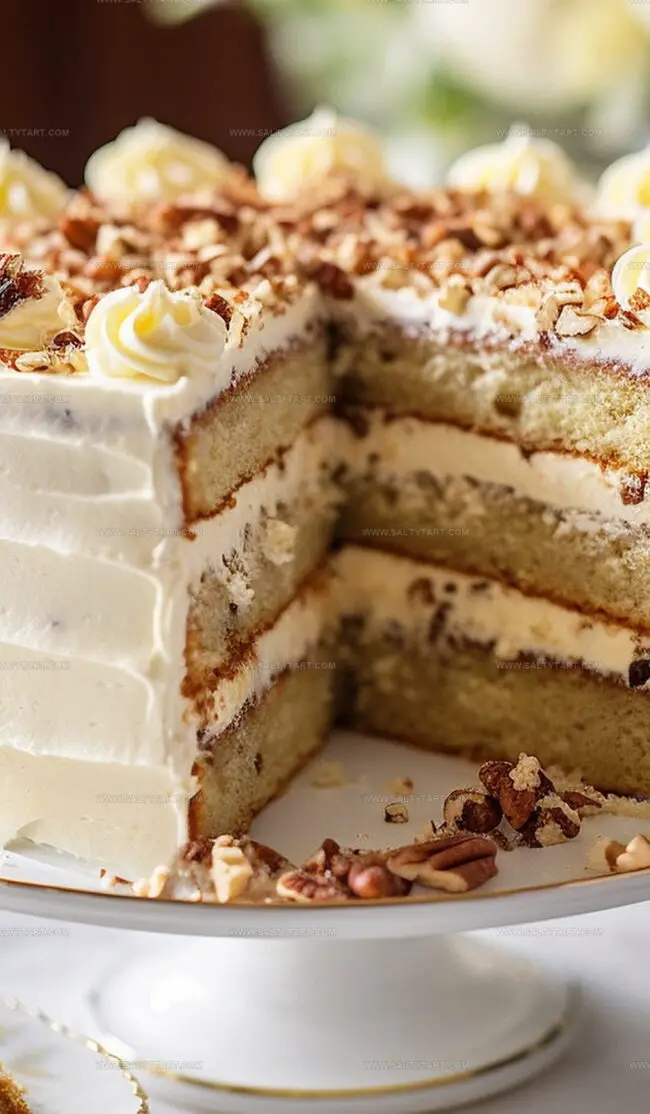
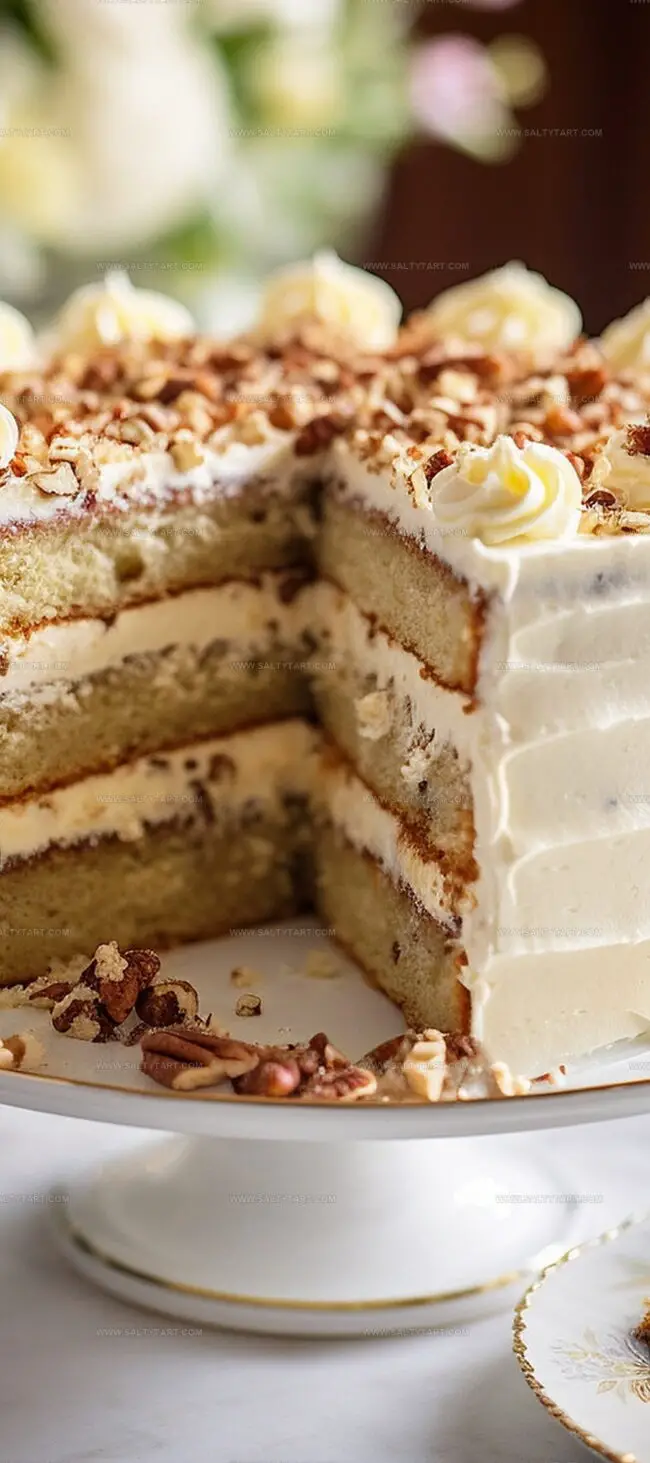
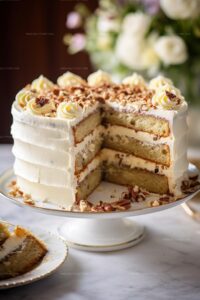
Press toasted coconut onto sides for elegant finish.
Step 19: Decorate Top
Pipe remaining frosting along cake’s top edge.
Sprinkle with pecan crumbs.
Step 20: Serve and Store
Refrigerate cake until serving.
Remove 1-2 hours before serving to reach room temperature.
Helpful Tips for Italian Cream Cake

Variations of Italian Cream Cake to Try
Pairings to Enjoy with Italian Cream Cake
Best Storage Tips for Italian Cream Cake

FAQs
Separating egg whites allows for creating a lighter, airier cake texture. Whipping egg whites introduces more volume and helps the cake rise beautifully, resulting in a softer, more delicate crumb.
Overmixing causes gluten development, making the cake dense and tough. Stop mixing when ingredients are just combined, and no flour streaks remain visible. Gentle folding preserves the cake’s light structure.
Alternating prevents flour clumping and ensures even moisture distribution. This technique creates a smoother batter with consistent texture, helping the cake bake more evenly and maintaining its delicate structure.
Italian Cream Cake Highlights

Ingredients for Italian Cream Cake
Italian Cream Cake Recipe
- Total Time: 1 hour 15 minutes
- Yield: 12 1x
Description
Creamy Italian cream cake delights dessert enthusiasts with its rich, luxurious layers of pure indulgence. Southern hospitality meets European elegance in this classic confection that promises pure bliss for you.
Ingredients
- 5 large eggs
- 2 cups (260g) all-purpose flour
- 1 tsp baking soda
- 1/4 tsp salt
- 1/2 cup (112g) unsalted butter
- 1/2 cup (95g) shortening
- 2 cups (414g) sugar
- 1 tbsp pure vanilla extract
- 1/4 tsp almond extract
- 1 cup (240ml) buttermilk
- 1 1/4 cups (91g) sweetened shredded coconut
- 1 cup (106g) toasted pecan pieces
- 20 oz (565g) cream cheese
- 2 cups (480ml) cold heavy whipping cream
- 1 1/2 cups (173g) powdered sugar
- 1 tbsp pure vanilla extract
- 2 cups (148g) toasted sweetened shredded coconut
- Pecan crumbs
Instructions
- Separate egg yolks and whites, letting them reach room temperature for optimal mixing consistency.
- Prepare three 8-inch cake pans by lining with parchment paper and greasing sides thoroughly. Heat oven to 350°F.
- Sift together flour, baking soda, and salt in a medium bowl, creating the dry ingredient base.
- Cream butter, shortening, sugar, and extracts in a large bowl until light and fluffy, approximately 3-4 minutes.
- Add egg yolks one at a time, fully incorporating each before introducing the next.
- Alternate adding dry ingredients and buttermilk in thirds, mixing until just combined to maintain batter’s delicate texture.
- Whip egg whites to stiff, glossy peaks, being careful not to overwork the mixture.
- Gently fold egg whites, coconut, and toasted pecans into the batter, maintaining its airiness.
- Distribute batter evenly among prepared pans, smoothing tops for uniform baking.
- Bake for 25-30 minutes, or until a inserted skewer comes out clean.
- Cool cakes in pans for 10 minutes, then transfer to wire racks to cool completely.
- Whip cream cheese until smooth and creamy.
- Prepare frosting by whipping heavy cream, powdered sugar, and vanilla to stiff peaks.
- Carefully fold whipped cream into cream cheese, creating a light, airy frosting.
- Level cake layers by trimming any domed tops for a professional finish.
- Place first cake layer on serving plate, spreading a generous layer of frosting.
- Add second layer and repeat frosting process, ensuring even coverage.
- Position final layer, then apply a thin crumb coat of frosting and refrigerate for 15 minutes.
- Frost entire cake, covering sides and top smoothly.
- Press toasted coconut onto sides and decorate top with pecan crumbs.
- Refrigerate cake until serving, allowing it to sit at room temperature for 1-2 hours before slicing.
Notes
- Room temperature eggs separate more easily and whip better, creating a lighter, fluffier cake texture.
- Use a non-stick cooking spray with flour for an extra-reliable cake release and clean edges.
- Alternate dry ingredients and buttermilk slowly to prevent overmixing, which can make the cake dense and tough.
- Whip whites to stiff peaks carefully, stopping just before they become grainy or start to separate.
- This cake freezes beautifully for up to a month when wrapped tightly in plastic wrap and stored in an airtight container.
- Swap regular flour for gluten-free flour blend and use dairy-free alternatives for a gluten-free and vegan-friendly version.
- Prep Time: 45 minutes
- Cook Time: 30 minutes
- Category: Desserts
- Method: Baking
- Cuisine: American
Nutrition
- Serving Size: 12
- Calories: 547
- Sugar: 44 g
- Sodium: 142 mg
- Fat: 39 g
- Saturated Fat: 17 g
- Unsaturated Fat: 21 g
- Trans Fat: 0.5 g
- Carbohydrates: 45 g
- Fiber: 2 g
- Protein: 6 g
- Cholesterol: 80 mg
Mike Reynolds
Founder & Recipe Developer
Expertise
Farm-to-table cuisine, Seasonal recipe development, Sustainable cooking techniques, Food photography
Education
Asheville-Buncombe Technical Community College (A-B Tech)
Associate Degree in Culinary Arts
Mike studied culinary arts with a strong focus on farm-to-table principles and sustainable cooking. His training emphasized the importance of fresh, local ingredients and environmentally responsible practices in the kitchen.
Mike’s food journey began deep in the Blue Ridge Mountains, where weekends at farmers’ markets and home-cooked meals sparked a lifelong obsession with simple, seasonal eating.
After earning his Associate Degree in Culinary Arts from Asheville-Buncombe Technical Community College, he set out to bring farm-to-table cooking into everyday kitchens, without the fuss.
Mike’s philosophy is all about keeping it fresh, unfussy, and full of heart. When he’s not crafting new single-serving recipes, he’s hiking mountain trails, chatting with local farmers, or experimenting with wild ingredients in his backyard kitchen.