Irresistible Jam Thumbprint Cookies Recipe for Sweet Smiles
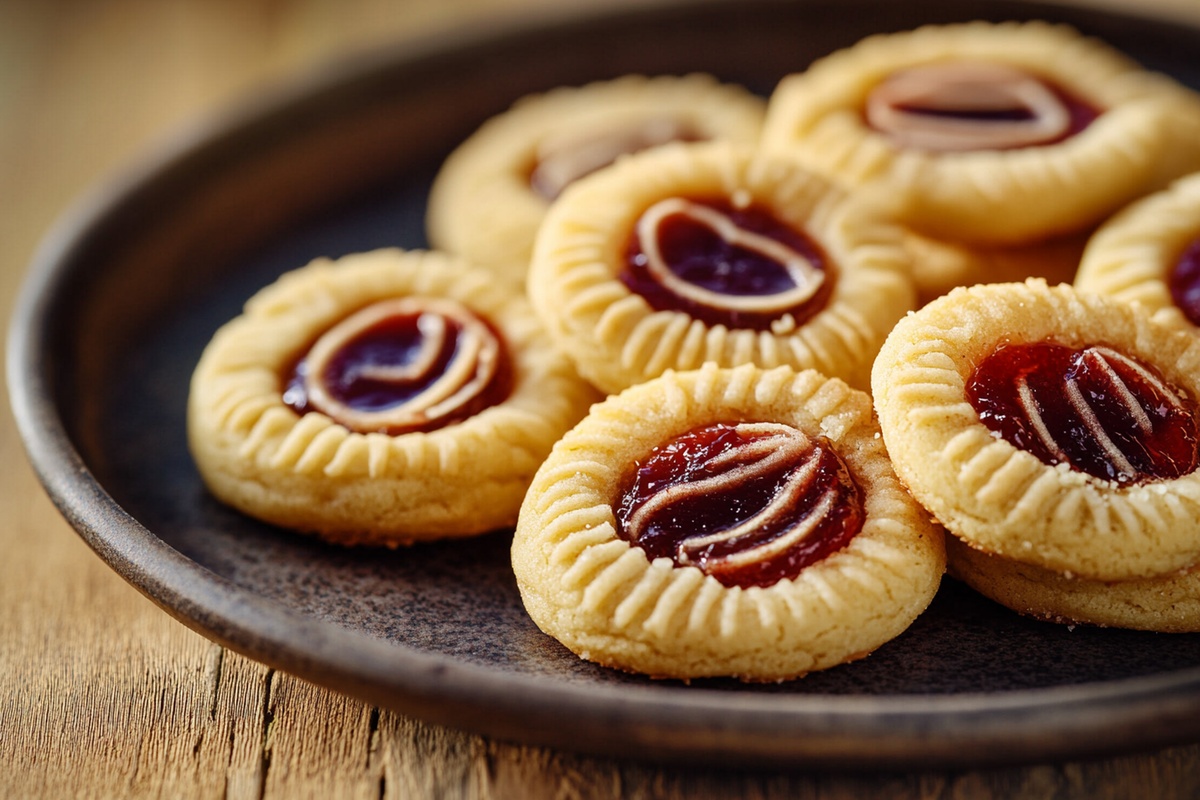
Soft, buttery jam thumbprint cookies bring pure delight to every sweet-loving baker.
Crumbly edges and tender centers make these treats irresistible.
My grandma shared her secret recipe decades ago, passing down a cherished family tradition.
Gentle pressing of your thumb creates perfect little wells for vibrant fruit preserves.
Colorful jam nestled in each cookie looks like edible jewels waiting to be savored.
Perfectly balanced between crisp shortbread and fruity filling, these cookies promise a delightful afternoon treat.
You’ll fall in love with this simple yet elegant dessert that transforms ordinary ingredients into something magical.
Why Jam Thumbprint Cookies Are So Sweet and Charming
Must-Have Ingredients for Jam Thumbprint Cookies Success
Cookie Base:Dry Ingredients:Filling:How to Bake Jam Thumbprint Cookies Like a Pro
Step 1: Warm Up the Oven
Crank your oven to a toasty 350F (175C). Grab a baking sheet and line it with parchment paper for easy cleanup.
Step 2: Whip Up the Butter Base
Grab a large mixing bowl and blend softened butter with granulated sugar. Beat them together until the mixture looks fluffy and light, almost like a cloud.
Step 3: Add Rich Flavor Enhancers
Incorporate the egg yolk and vanilla extract into your butter mixture. Stir until everything is smoothly combined and looks silky.
Step 4: Create the Dough
Slowly fold in flour and salt. Mix gently until a soft, tender dough forms.
The texture should feel smooth and slightly springy.
Step 5: Shape the Cookie Balls
Roll the dough into small, adorable balls using your hands.
Place each ball on the prepared baking sheet, leaving about 2 inches between them.
Step 6: Make Jammy Indentations
Use your thumb or the back of a small spoon to create a gentle well in the center of each cookie ball.
Press softly to avoid breaking the dough.
Step 7: Fill with Fruity Goodness
Carefully spoon your favorite jam into each little indentation.
Choose a flavor that makes your taste buds dance.
Step 8: Bake to Golden Perfection
Slide the baking sheet into the preheated oven.
Bake for 12-15 minutes until the cookie edges turn a light, delicate golden color.
Step 9: Cool and Enjoy
Remove the cookies from the oven.
Let them rest on the baking sheet for 5 minutes, then transfer to a wire rack. Allow them to cool completely before devouring.
Handy Tips for Jam Thumbprint Cookies Every Time
Creative Twists on Jam Thumbprint Cookies to Try
Best Pairings for Jam Thumbprint Cookies Moments
Brew a refreshing glass of cold sweet tea to complement the sugary, buttery cookie. The light, crisp beverage cuts through the richness of the jam thumbprint cookies.
Serve a warm vanilla latte alongside these cookies for a delightful afternoon treat. The creamy, smooth coffee balances the sweet jam and creates a cozy flavor combination.
Create a delightful dessert by serving a scoop of vanilla ice cream next to the warm jam thumbprint cookies. The cold, creamy texture contrasts beautifully with the soft, crumbly cookie.
Steep a fragrant chai tea to pair with these cookies. The spicy, warming notes of cinnamon and cardamom in the tea bring out the sweetness of the jam and butter.
How to Keep Jam Thumbprint Cookies Fresh and Soft
FAQs
Yes, you can use any flavor of jam you like, such as strawberry, raspberry, apricot, or even marmalade. Choose your favorite or mix and match for variety.
Make sure the thumbprint well is not too deep and the jam is just lightly filled. Avoid overfilling, which can cause the jam to bubble and spread.
If the dough feels dry, add a small amount of milk or softened butter to help bind the ingredients together. Mix gently until the dough comes together.
Print
Jam Thumbprint Cookies Recipe
- Total Time: 35 minutes
- Yield: 24 1x
Description
Delightful jam thumbprint cookies bring nostalgic sweetness from grandma’s kitchen, blending buttery shortbread with fruity preserves. Compact crumbly treats promise delicious moments that spark joy with each delectable bite.
Ingredients
Main Ingredients:
- 2 cups all-purpose flour
- 1 cup unsalted butter, softened
- 1/2 cup fruit jam (such as raspberry or strawberry)
Sweeteners and Binding Agents:
- 2/3 cup granulated sugar
- 1 large egg yolk
Flavor Enhancers:
- 1 teaspoon vanilla extract
- 1/4 teaspoon salt
Instructions
- Prepare the oven at 350°F (175°C) and line a baking sheet with parchment paper for optimal cookie baking.
- In a mixing bowl, whip softened butter and granulated sugar together until the mixture becomes airy and pale, creating a smooth base for the cookies.
- Incorporate egg yolk and vanilla extract, blending thoroughly to ensure a uniform flavor profile throughout the dough.
- Sift flour and salt into the wet ingredients, gently folding until a cohesive, tender dough emerges.
- Shape the dough into uniform tablespoon-sized spheres, arranging them evenly on the prepared baking sheet with sufficient spacing.
- Create a delicate indentation in the center of each dough ball using your thumb or the rounded back of a small spoon, forming a perfect jam reservoir.
- Carefully spoon your selected jam into the center of each cookie, ensuring a precise and generous filling.
- Slide the baking sheet into the preheated oven and bake for 12-15 minutes, watching for a subtle golden edge that indicates perfect doneness.
- After removing from the oven, allow cookies to rest on the baking sheet for 5 minutes to stabilize, then transfer to a wire cooling rack for complete cooling and texture setting.
Notes
- Choose jam with vibrant flavors like raspberry, apricot, or strawberry to create stunning visual and taste contrasts with the buttery cookie base.
- Keep butter at room temperature for easier creaming and smoother dough consistency, ensuring tender cookie texture.
- Make indent gently with dampened thumb or the back of a small measuring spoon to prevent cookie cracking and create uniform wells for jam.
- Store cooled cookies in an airtight container between layers of parchment paper to maintain their delicate shape and prevent sticking.
- Prep Time: 20 minutes
- Cook Time: 15 minutes
- Category: Snacks, Desserts
- Method: Baking
- Cuisine: American
Nutrition
- Serving Size: 24
- Calories: 120
- Sugar: 6 g
- Sodium: 40 mg
- Fat: 7 g
- Saturated Fat: 4.5 g
- Unsaturated Fat: 2.3 g
- Trans Fat: 0.1 g
- Carbohydrates: 14 g
- Fiber: 0.3 g
- Protein: 1.2 g
- Cholesterol: 20 mg
Jess Martinez
Contributing Recipe Writer & Nutrition Consultant
Expertise
Southwestern and Latin American cooking, Nutritional analysis and healthy recipe planning, Cultural food traditions, Modifying traditional dishes for better health
Education
Santa Fe Community College
Certificate in Culinary Arts
Focused on mastering the flavors and cooking methods of traditional Southwestern cuisine.
Jess’s love for bold, homegrown flavors led her straight into the world of Southwestern cooking and cultural nutrition.
After completing her Certificate in Culinary Arts at Santa Fe Community College, she made it her mission to show that good-for-you food can still taste incredible.
At saltytart.com, Jess shares vibrant, health-conscious recipes with roots in tradition but a fresh, modern twist. When she’s not testing new recipes, you’ll find her at local growers’ markets, tending her herb garden, or digging into food history books.