The Best Lunch Lady Pizza Recipe: School Cafeteria Magic at Home
School cafeterias hold nostalgic memories for many, especially when it comes to the beloved lunch lady pizza that captured our hearts during midday breaks.
This classic comfort food brings back waves of childhood excitement with its simple yet irresistible flavors.
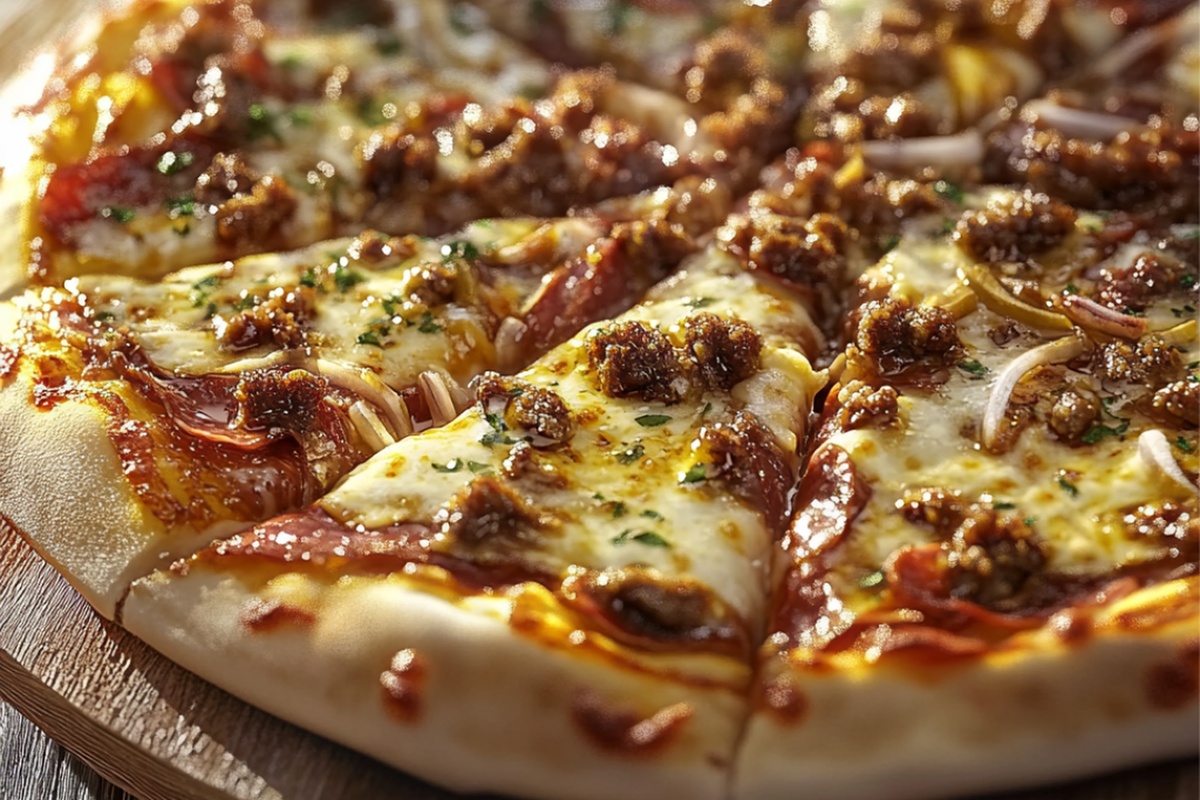
Crispy edges, melted cheese, and perfectly seasoned sauce define this iconic dish that generations have enjoyed.
Memories of lunchroom trays filled with steaming slices transport you back to carefree school days.
The aroma of freshly baked pizza would drift through hallways, making every student eagerly anticipate mealtime.
Each bite promises a delicious journey down memory lane that celebrates the unpretentious charm of cafeteria cooking.
Prepare to recreate this timeless favorite that turns an ordinary meal into a celebration of comfort and simplicity.
Lunch Lady Pizza That Brings Back Memories
Ingredients Behind Classic Lunch Lady Pizza
Crust Ingredients:Liquid Ingredients:Topping Ingredients:How to Make Lunch Lady Pizza at Home
Step 1: Create the Magical Crust
Fire up your oven to a blazing 475F. Grab a baking sheet and give it a generous olive oil massage, then sprinkle cornmeal like fairy dust to prevent sticking.
In your mixer, dance together flour, dry milk, salt, sugar, and yeast. Drizzle in olive oil and warm water, mixing until the batter looks like thick pancake magic.
Pour the mixture into the prepared pan, spreading it evenly like a smooth blanket. Let it rest for 10 minutes, then bake on the lower oven rack until it turns a gorgeous golden color.
Step 2: Sizzle the Meaty Goodness
While the crust is becoming beautiful, heat up a skillet and transform your ground beef and Italian sausage into delicious crumbles. Cook until no pink remains, then rest the meat on a paper towel to drain excess moisture.
Step 3: Build Your Pizza Masterpiece
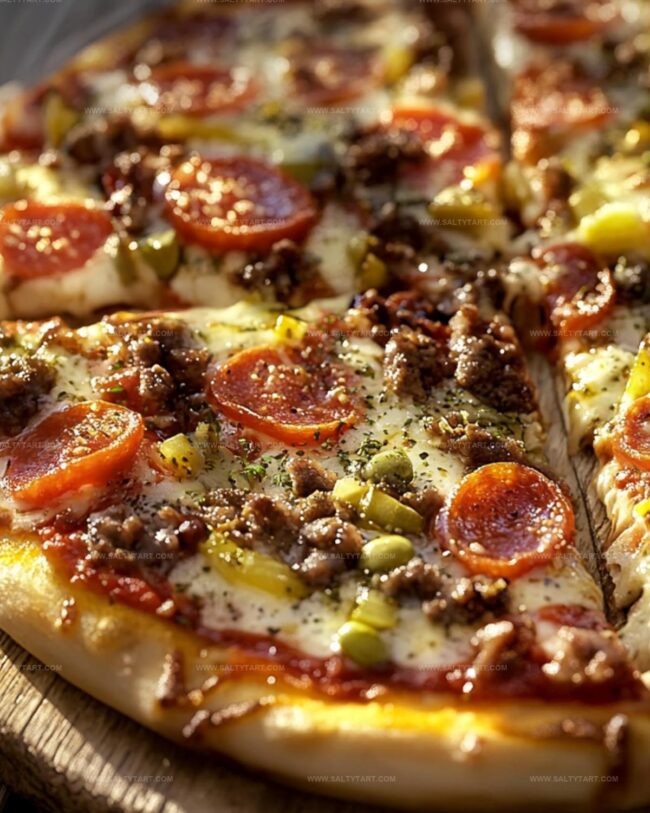
Spread pizza sauce across the golden crust like a painter’s first stroke. Shower the sauce with a blanket of mozzarella cheese.
Scatter the cooked meat across the cheesy landscape. Add another cheese avalanche on top, then sprinkle Italian seasoning for that extra flavor punch.
Step 4: Final Baking Brilliance
Return the pizza to the oven and bake until the cheese turns into a bubbling, melty wonderland. After 10-12 minutes, pull out your creation and slice into 12 rectangular pieces of pure deliciousness.
Enjoy your homemade Lunch Lady Pizza!
Tips for Baking Perfect Lunch Lady Pizza
Variations to Mix Up Lunch Lady Pizza Flavors
What to Serve Alongside Lunch Lady Pizza
How to Store Lunch Lady Pizza for Later
FAQs
This crust is more like a batter, using a pourable consistency similar to thick pancake batter. It’s spread directly in the baking sheet and requires less kneading compared to traditional pizza dough.
Yes, you can use a hand mixer or mix the ingredients by hand. Just ensure you mix thoroughly to incorporate all ingredients and achieve a smooth batter with minimal lumps.
Cornmeal helps prevent the pizza crust from sticking to the baking sheet and adds a slight crunch and texture to the bottom of the crust. It also makes removing the pizza easier after baking.
Print
Lunch Lady Pizza Recipe
- Total Time: 45 minutes
- Yield: 12 1x
Description
Nostalgic Lunch Lady Pizza brings classic cafeteria comfort straight to home kitchens, reviving memories of school lunch trays. Hearty cheese, golden crust, and simple ingredients combine for a quick, satisfying meal that connects generations through one delicious slice.
Ingredients
- 2¾ cups unbleached all-purpose flour
- ¾ cup instant nonfat dry milk powder
- 2 tsp salt
- 2 cups warm (105°F) water
- 2½ tbsp granulated sugar
- 0.25 ounce packet (2½ teaspoons) rapid-rise yeast (instant yeast)
- 4 tbsp extra virgin olive oil, divided
- 2 tbsp yellow cornmeal
- ½ pound lean ground beef
- ½ pound mild Italian sausage
- 1¾ cup pizza sauce
- 4 cups freshly shredded mozzarella cheese
- 1 tsp dried Italian seasoning
Instructions
- Position the oven rack to the lower third and heat to 475F (245C), creating an optimal environment for crispy crust development.
- Prepare a rimmed baking sheet by generously coating the surface with extra virgin olive oil and dusting with yellow cornmeal to ensure effortless pizza removal.
- In a stand mixer fitted with a paddle attachment, combine dry ingredients including flour, dry milk, salt, sugar, and rapid-rise yeast.
- Incorporate olive oil and gradually introduce warm water, adjusting liquid to achieve a thick, pourable batter consistency similar to pancake mix.
- Mix the dough on low speed for 2-3 minutes until smooth with minimal lumps, creating a light and airy texture.
- Transfer the batter to the prepared baking sheet, spreading evenly to cover the entire surface, and allow the dough to rest for 10 minutes.
- Bake the crust on the lower oven rack for 10-12 minutes until a golden hue develops, indicating initial cooking stages.
- Meanwhile, utilize a 10-inch skillet over medium-high heat to cook ground beef and Italian sausage, thoroughly breaking down the meat and eliminating any pink portions.
- Drain the cooked meat on a paper towel-lined plate to remove excess grease.
- Once the crust is pre-baked, layer pizza sauce uniformly across the surface.
- Distribute the first layer of mozzarella cheese over the sauce, creating a creamy foundation.
- Evenly scatter the prepared meat mixture across the cheese layer.
- Top with remaining mozzarella cheese and sprinkle dried Italian seasoning for enhanced flavor profile.
- Return the pizza to the 475F oven and bake an additional 10-12 minutes until cheese becomes melted and slightly bubbly.
- Remove from oven, allow brief cooling, then slice into 12 rectangular pieces for serving.
Notes
- Try cornmeal alternatives like semolina or breadcrumbs for added texture and crunch on the pizza base.
- Control moisture by draining cooked meat thoroughly to prevent a soggy crust and ensure a crispy bottom.
- Adjust cheese ratio for lighter versions by using part-skim mozzarella or reducing total cheese quantity for a healthier option.
- Enhance flavor by incorporating fresh herbs like basil or oregano instead of dried Italian seasoning for a more vibrant taste profile.
- Prep Time: 20 minutes
- Cook Time: 25 minutes
- Category: Lunch, Dinner, Snacks
- Method: Baking
- Cuisine: American
Nutrition
- Serving Size: 12
- Calories: 430
- Sugar: 5.6 g
- Sodium: 680 mg
- Fat: 24.8 g
- Saturated Fat: 10.3 g
- Unsaturated Fat: 13.9 g
- Trans Fat: 0.4 g
- Carbohydrates: 31.9 g
- Fiber: 1.8 g
- Protein: 20.2 g
- Cholesterol: 52 mg
Jess Martinez
Contributing Recipe Writer & Nutrition Consultant
Expertise
Southwestern and Latin American cooking, Nutritional analysis and healthy recipe planning, Cultural food traditions, Modifying traditional dishes for better health
Education
Santa Fe Community College
Certificate in Culinary Arts
Focused on mastering the flavors and cooking methods of traditional Southwestern cuisine.
Jess’s love for bold, homegrown flavors led her straight into the world of Southwestern cooking and cultural nutrition.
After completing her Certificate in Culinary Arts at Santa Fe Community College, she made it her mission to show that good-for-you food can still taste incredible.
At saltytart.com, Jess shares vibrant, health-conscious recipes with roots in tradition but a fresh, modern twist. When she’s not testing new recipes, you’ll find her at local growers’ markets, tending her herb garden, or digging into food history books.