Irresistibly Crispy Mexican Fried Ice Cream Recipe
Crisp and golden, this Mexican fried ice cream recipe delivers a dessert that dances between hot and cold with delightful contrast.
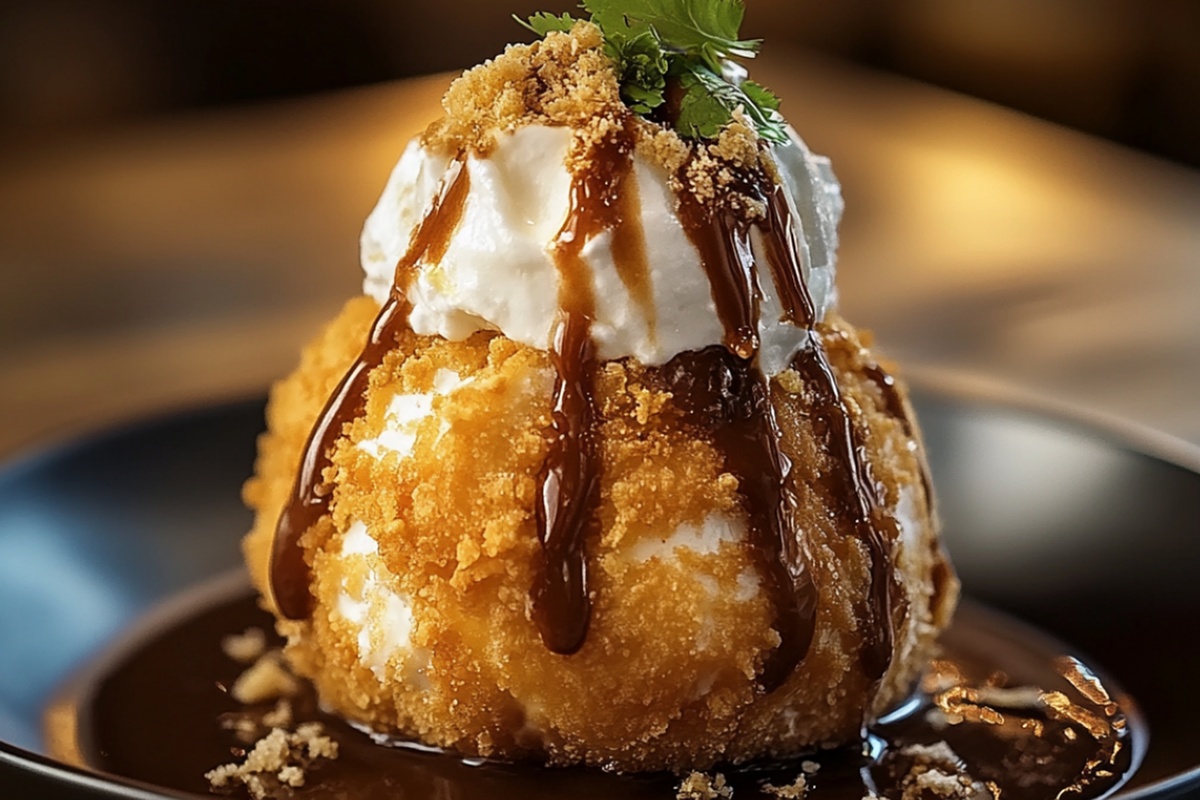
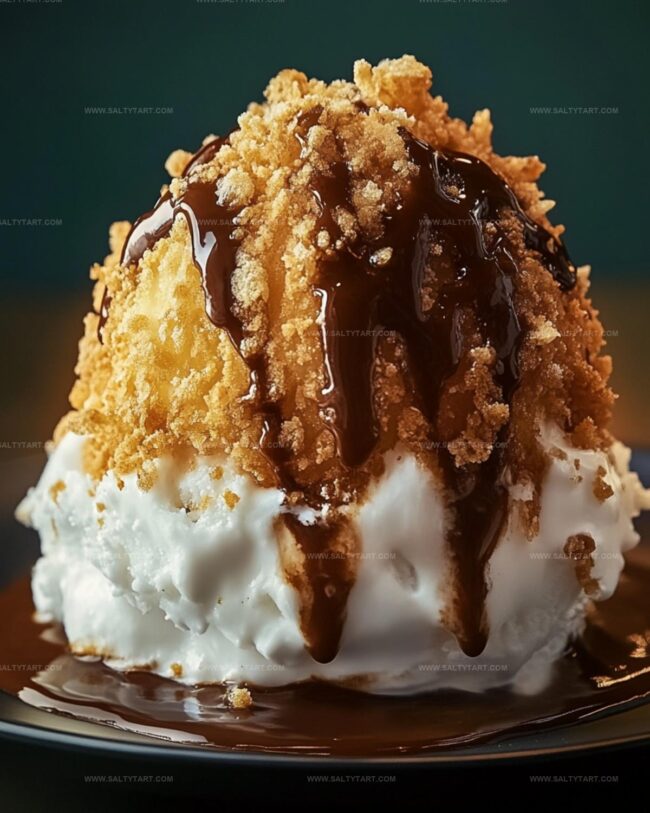
Creamy vanilla ice cream gets a crunchy coating that shatters beautifully when you dig in.
Cornflakes and cinnamon create a magical exterior that locks in the frozen core.
Traditional Mexican restaurants have long served this beloved treat that tantalizes taste buds with every bite.
A simple technique turns ordinary ingredients into an extraordinary dessert experience.
The secret lies in perfectly freezing the ice cream before its quick, hot bath in oil.
You’ll want to serve this spectacular dessert immediately after frying for maximum crunch and temperature drama.
Storage Tips for Mexican Fried Ice Cream
FAQs
Keep the ice cream frozen solid by working quickly and returning scoops to the freezer between coatings. Pre-freeze the baking sheet and work in a cool environment.
Yes, you can prepare the coated ice cream balls up to 24 hours in advance. Keep them tightly covered in the freezer and add toppings just before serving.
You can substitute with crushed graham crackers, cornflakes, or sweetened coconut flakes. Add ground cinnamon to enhance the flavor profile.
What Sets Mexican Fried Ice Cream Apart
Necessary Ingredients for Mexican Fried Ice Cream
Main Ingredients:Coating and Garnish:Preparation Accessories:Instructions for Preparing Mexican Fried Ice Cream
Step 1: Prepare Freezing Surface
Line a baking sheet with parchment paper to create a smooth, non-stick surface for your ice cream scoops.
Step 2: Create Initial Ice Cream Mounds
Scoop generous rounds of vanilla ice cream onto the prepared baking sheet, forming four distinct mounds.
Step 3: Initial Freezing Process
Place the ice cream scoops in the freezer and allow them to firm up for approximately one hour, ensuring they maintain their shape.
Step 4: Craft Crispy Coating Mixture
Combine crushed frosted flakes with ground cinnamon in a mixing bowl, blending the ingredients until they create a uniform, fragrant mixture.
Step 5: Coat Ice Cream Scoops
Remove the chilled ice cream from the freezer and carefully roll each scoop in the cinnamon-frosted flakes mixture, completely encasing the ice cream and shaping it into a perfect sphere.
Step 6: Secondary Freezing
Return the coated ice cream balls to the parchment-lined baking sheet and place back in the freezer for an additional two hours to solidify the coating.
Step 7: Final Decoration and Serving
Just before serving, artfully drizzle honey over each ice cream ball, crown with a dollop of whipped topping, zigzag chocolate syrup across the surface, and top with a vibrant maraschino cherry for a stunning presentation.
Helpful Suggestions When Making Mexican Fried Ice Cream
Ways to Customize Mexican Fried Ice Cream
Pairings That Go Well with Mexican Fried Ice Cream
Print
Mexican Fried Ice Cream Recipe
- Total Time: 20 minutes
- Yield: 4 1x
Description
Crispy golden cornflake coating embraces cool, creamy Mexican Fried Ice Cream, delivering a delightful contrast of temperatures and textures. Cinnamon-spiced sweetness and crunchy exterior make this dessert a perfect finale for dinner with friends.
Ingredients
Main Ingredients:
- 4 scoops (1 cup) vanilla ice cream
- 3 cups crushed frosted cornflakes
- 1 teaspoon ground cinnamon
Toppings and Drizzles:
- 3 tablespoons honey
- Canned whipped topping
- Chocolate syrup
Garnish:
- 4 maraschino cherries
Instructions
- Prepare a parchment-lined baking sheet and place it in the freezer to chill.
- Create four uniform scoops of vanilla ice cream and transfer them onto the cold baking sheet.
- Allow ice cream scoops to firm up in the freezer for 60 minutes.
- Mix ground cinnamon into crushed frosted flakes, ensuring even distribution of spice.
- Remove hardened ice cream scoops from freezer and quickly roll each one in the cinnamon-flake mixture.
- Carefully shape each scoop into a compact, evenly coated sphere while preventing melting.
- Return coated ice cream balls to the parchment-lined baking sheet.
- Refreeze the prepared dessert for an additional 120 minutes until completely solid.
- Moments before serving, artfully drizzle honey over each frosty sphere.
- Crown each dessert with a cloud of whipped topping.
- Elegantly stream chocolate syrup across the surface.
- Garnish with a vibrant maraschino cherry and serve immediately to preserve the crisp exterior.
Notes
- Ensure ice cream is rock-solid before coating to prevent melting during the breading process.
- Use crushed corn flakes as a gluten-free alternative to frosted flakes for those with dietary restrictions.
- Keep coated ice cream balls in the freezer until the absolute last moment before serving to maintain crisp texture and prevent rapid melting.
- Try different ice cream flavors like chocolate or strawberry for unique taste variations that still capture the classic Mexican fried ice cream essence.
- Prep Time: 20 minutes
- Cook Time: 0 minutes
- Category: Desserts
- Method: Freezing
- Cuisine: Mexican
Nutrition
- Serving Size: 4
- Calories: 390 kcal
- Sugar: 37 g
- Sodium: 150 mg
- Fat: 16 g
- Saturated Fat: 10 g
- Unsaturated Fat: 5 g
- Trans Fat: 0.2 g
- Carbohydrates: 53 g
- Fiber: 1.5 g
- Protein: 4 g
- Cholesterol: 40 mg
Jess Martinez
Contributing Recipe Writer & Nutrition Consultant
Expertise
Southwestern and Latin American cooking, Nutritional analysis and healthy recipe planning, Cultural food traditions, Modifying traditional dishes for better health
Education
Santa Fe Community College
Certificate in Culinary Arts
Focused on mastering the flavors and cooking methods of traditional Southwestern cuisine.
Jess’s love for bold, homegrown flavors led her straight into the world of Southwestern cooking and cultural nutrition.
After completing her Certificate in Culinary Arts at Santa Fe Community College, she made it her mission to show that good-for-you food can still taste incredible.
At saltytart.com, Jess shares vibrant, health-conscious recipes with roots in tradition but a fresh, modern twist. When she’s not testing new recipes, you’ll find her at local growers’ markets, tending her herb garden, or digging into food history books.