Quick & Crispy Monster Cookie Balls Recipe You’ll Love
Sweet memories of childhood baking collide with monster cookie balls in a delightful twist that promises pure joy.
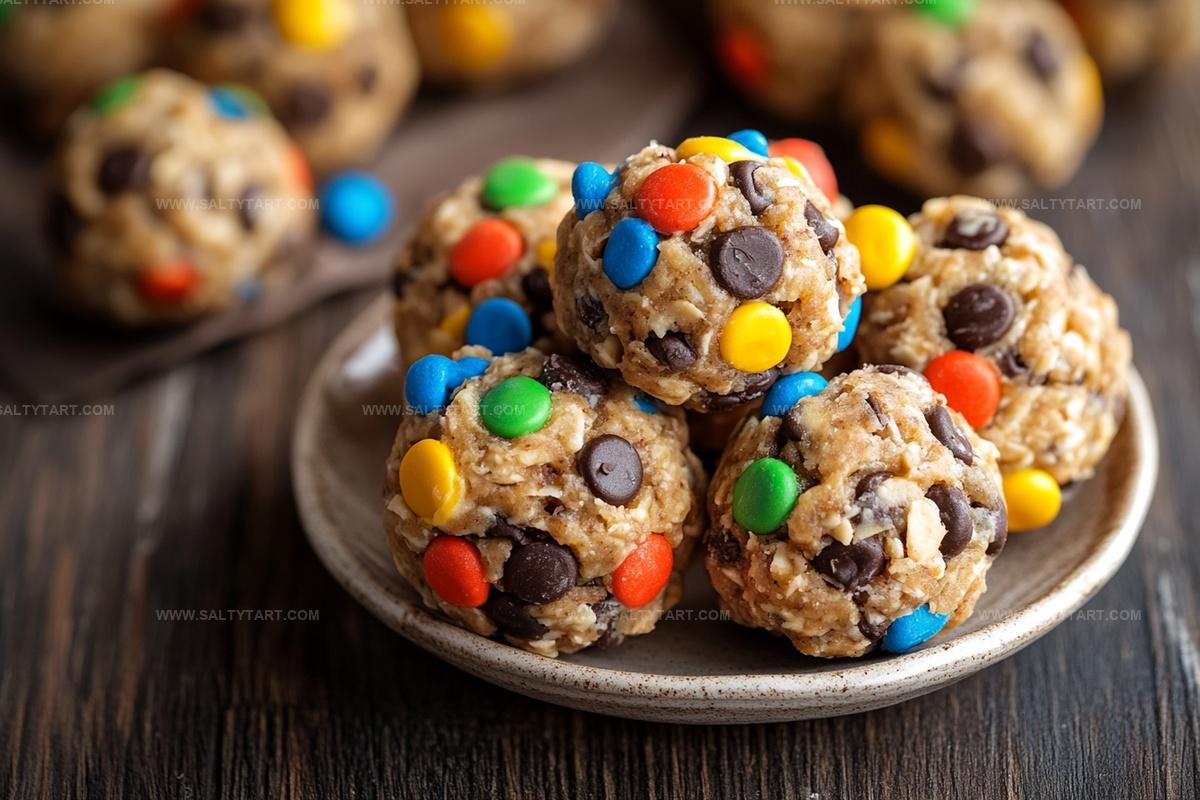
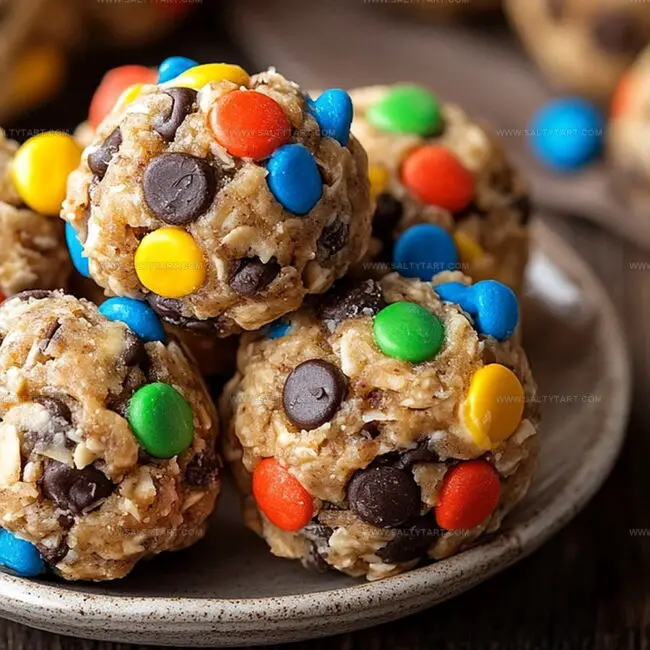
Peanut butter, oats, and colorful candies dance together to create an irresistible treat.
Nostalgic flavors blend seamlessly in these bite-sized delights that spark instant happiness.
Kids and adults alike will fall in love with these playful, no-bake confections.
Each morsel carries a burst of chocolate, peanut butter, and M&M crunch that feels like a celebration.
Packed with simple ingredients and zero complicated techniques, you can whip up these delectable balls in minutes.
Prepare to embark on a delicious adventure that will make your taste buds cheer with excitement.
Why Monster Cookie Balls Are a Crowd Favorite
Key Ingredients for Monster Cookie Balls Success
Base Ingredients:Binding Ingredients:Optional Add-Ins:Seasoning:How to Make Monster Cookie Balls Perfectly Every Time

Step 1: Crush and Mix Dry Ingredients
Grab a big mixing bowl and crumble graham crackers into fine pieces. Add rolled oats, mini chocolate chips, and chopped walnuts.
Sprinkle a tiny pinch of salt to enhance the overall flavor. Stir everything together until well combined.
Step 2: Create Sticky Binding Liquid
Warm up peanut butter in the microwave for about 30-45 seconds until it becomes silky smooth. Add honey and vanilla extract to the melted peanut butter.
Whisk the liquid ingredients until they create a glossy, uniform mixture.
Step 3: Combine Wet and Dry Components
Pour the warm liquid mixture over the dry ingredients.
Use a spatula or wooden spoon to blend everything thoroughly. Make sure all dry ingredients are completely coated with the sticky binding liquid.
Step 4: Chill and Solidify Mixture
Cover the bowl with plastic wrap and place in the refrigerator. Let the mixture rest and firm up for approximately one hour.
Chilling helps the cookie balls hold their shape and intensifies the flavors.
Step 5: Shape Cookie Balls
Remove the chilled mixture from the refrigerator.
Use a tablespoon to scoop out portions. Roll each portion between your palms to create smooth, round balls.
Work quickly to prevent the mixture from getting too soft.
Step 6: Add Optional Coating
If desired, roll the cookie balls in additional mini chocolate chips or dust with cocoa powder.
This step adds extra texture and visual appeal to the treats.
Step 7: Store and Enjoy
Transfer the cookie balls to an airtight container.
Place in the refrigerator, where they will stay fresh for up to one week. Enjoy as a quick snack or sweet treat anytime.
Handy Tips for Monster Cookie Balls Greatness

Creative Twists on Monster Cookie Balls to Try
Best Pairings to Enjoy with Monster Cookie Balls
Creamy, chocolate-forward beer complements the rich, nutty flavors of monster cookie balls with its smooth, dessert-like profile.
Warm coffee drink enhances the cookie’s sweetness while adding depth through its caramel and roasted notes.
Classic dairy beverage provides cool, clean contrast to the dense, chewy texture of the cookie balls, creating a perfect balanced bite.
Smooth, elegant Italian ice cream rounds out the dessert’s intense flavors with its delicate, pure sweetness and creamy consistency.
How to Keep Monster Cookie Balls Fresh and Soft
FAQs
These monster cookie balls offer some nutritional benefits with oats providing fiber, nuts adding protein, and minimal added sugar compared to traditional cookies.
Yes, you can easily omit the walnuts or substitute with seeds like sunflower or pumpkin seeds for a similar crunch.
No special equipment is required – just a mixing bowl, microwave, and your hands to roll the balls are all you need.
Absolutely! These cookie balls are perfect for quick energy bites, pre-workout snacks, or grab-and-go breakfast options.
Print
Monster Cookie Balls Recipe
- Total Time: 1 hour 20 minutes
- Yield: 20 1x
Description
Indulgent monster cookie balls combine irresistible peanut butter, chocolate chips, and M&Ms in a no-bake sweet treat. Sweet nostalgia meets playful flavor, inviting you to savor each delightful, colorful bite of childhood comfort.
Ingredients
Base Ingredients:
- 2 cups chocolate chip cookies (finely crushed, about 20 cookies)
- 1 cup quick oats (lightly processed if using rolled oats)
- 1/2 cup mini chocolate chips (plus extra for rolling, if desired)
Binding Ingredients:
- 1/2 cup creamy peanut butter
- 1/4 cup honey
- 1/4 cup chopped walnuts (optional)
Flavor Enhancers:
- 1 teaspoon vanilla extract
- 1 pinch salt
Instructions
- Pulverize cookies into fine crumbs, ensuring a uniform texture that will help bind the mixture effectively.
- Mix crushed cookies with rolled oats, mini chocolate chips, chopped walnuts, and a light sprinkle of salt in a spacious mixing bowl.
- Warm peanut butter, honey, and vanilla extract in the microwave for 30-45 seconds, stirring until the blend becomes silky and fluid.
- Pour the heated liquid ingredients over the dry components, thoroughly incorporating all elements until a cohesive mixture forms.
- Shield the bowl with plastic wrap and refrigerate for 60 minutes, allowing the mixture to solidify and develop a more manageable consistency.
- After chilling, utilize a spoon or small scoop to portion out uniform balls, gently rolling them between palms to create smooth spheres.
- For added texture and visual appeal, optionally coat the cookie balls by rolling them in additional mini chocolate chips or dusting with cocoa powder.
- Transfer the completed monster cookie balls to an airtight container and store in the refrigerator, maintaining freshness for up to one week.
Notes
- Boost protein content by adding a scoop of your favorite protein powder to the dry ingredients for a post-workout snack.
- Create gluten-free version by using gluten-free oats and graham crackers, ensuring all ingredients are certified gluten-free.
- Customize texture by adjusting the amount of peanut butter – less for firmer balls, more for softer, creamier consistency.
- Experiment with alternative nut butters like almond or cashew butter for different flavor profiles and dietary needs.
- Prep Time: 20 minutes
- Cook Time: 1 hour
- Category: Snacks, Desserts
- Method: Chilling
- Cuisine: American
Nutrition
- Serving Size: 20
- Calories: 148
- Sugar: 11 g
- Sodium: 56 mg
- Fat: 7 g
- Saturated Fat: 1.5 g
- Unsaturated Fat: 5 g
- Trans Fat: 0 g
- Carbohydrates: 19 g
- Fiber: 1.5 g
- Protein: 3.5 g
- Cholesterol: 0 mg
Jess Martinez
Contributing Recipe Writer & Nutrition Consultant
Expertise
Southwestern and Latin American cooking, Nutritional analysis and healthy recipe planning, Cultural food traditions, Modifying traditional dishes for better health
Education
Santa Fe Community College
Certificate in Culinary Arts
Focused on mastering the flavors and cooking methods of traditional Southwestern cuisine.
Jess’s love for bold, homegrown flavors led her straight into the world of Southwestern cooking and cultural nutrition.
After completing her Certificate in Culinary Arts at Santa Fe Community College, she made it her mission to show that good-for-you food can still taste incredible.
At saltytart.com, Jess shares vibrant, health-conscious recipes with roots in tradition but a fresh, modern twist. When she’s not testing new recipes, you’ll find her at local growers’ markets, tending her herb garden, or digging into food history books.