
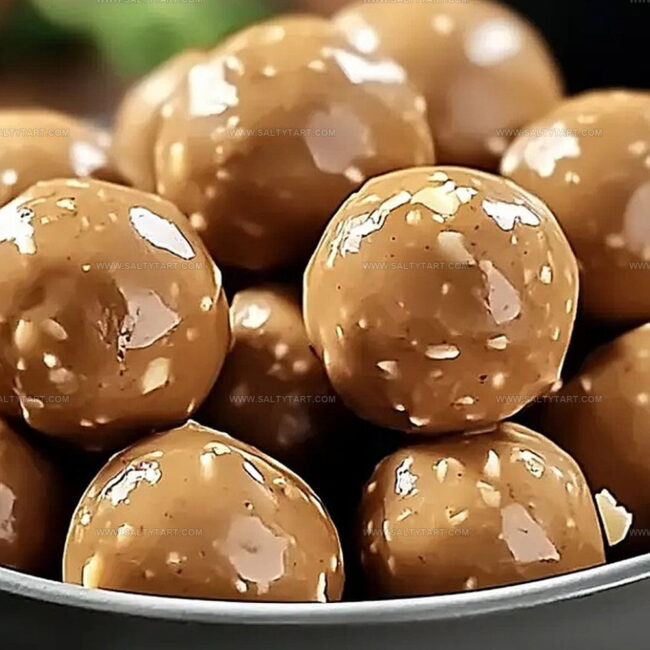
The Perfect No-Bake Peanut Butter Balls Recipe for Sweet Lovers
Delectable no-bake peanut butter balls dance between sweet indulgence and simple preparation.
These irresistible treats blend creamy peanut butter with just a few pantry staples.
Chocolate chips add a luxurious touch to the classic recipe.
Kids and adults alike go crazy for these no-fuss energy bites that require zero oven time.
Rolling these delightful spheres becomes a fun kitchen activity you can enjoy with loved ones.
Each bite delivers a perfect balance of rich, nutty flavor and gentle sweetness.
These protein-packed morsels promise to become your new favorite quick dessert.
Why No-Bake Peanut Butter Balls Are a Treat
Everything Needed for Easy Peanut Butter Balls
Base Ingredients:Sweetening Agents:Coating Ingredients:Optional Garnish:Steps to Make No-Bake Peanut Butter Balls

Step 1: Whip Up Creamy Peanut Butter Base
In a spacious mixing bowl, blend peanut butter, softened butter, and vanilla extract. Stir and mix until the texture becomes silky smooth and perfectly combined.
The mixture should look glossy and have a consistent creamy appearance.
Step 2: Create Dough-Like Consistency
Gradually sprinkle powdered sugar into the peanut butter mixture.
Gently fold and mix until the ingredients transform into a moldable dough. The mixture should hold together easily and not feel too sticky or too dry.
Step 3: Shape Delightful Bite-Sized Treats
Use your hands to roll the mixture into small round balls. Each ball should be roughly the size of a ping pong ball.
Carefully place these delectable spheres onto a parchment-lined baking sheet, ensuring they don’t touch each other.
Step 4: Melt Chocolate Coating
Select a microwave-safe bowl and add chocolate chips.
Melt the chocolate in short 30-second bursts, stirring between each interval. Continue until the chocolate becomes completely smooth and glossy with no lumps.
Step 5: Dunk and Coat Peanut Butter Balls
Use a fork or skewer to carefully dip each peanut butter ball into the melted chocolate. Ensure complete and even coverage, allowing excess chocolate to drip off.
Gently place the chocolate-coated balls back onto the parchment-lined sheet.
Step 6: Chill and Set
Transfer the baking sheet to the refrigerator.
Let the chocolate-covered balls cool and solidify for at least 30 minutes. The chocolate should become firm and develop a beautiful glossy finish.
Notes for Perfect No-Bake Treats Every Time
Tasty Mix-Ins for Peanut Butter Ball Lovers
What to Serve With Peanut Butter Balls
Keeping No-Bake Peanut Butter Balls Fresh
FAQs
While delicious, they’re a treat high in sugar and calories. Enjoy in moderation as an occasional dessert.
Yes, but you might need to add more powdered sugar to help the mixture hold together since natural peanut butter is often runnier.
Store in the refrigerator for up to a week in an airtight container. They’ll maintain their texture and taste best when chilled.
Semi-sweet or milk chocolate chips melt smoothly. You can also use dark chocolate for a richer flavor profile.
Print
No-Bake Peanut Butter Balls Recipe
- Total Time: 50 minutes
- Yield: 24 1x
Description
Irresistible no-bake peanut butter balls deliver a quick, sweet escape from ordinary desserts. Chocolate-drizzled and packed with nutty goodness, these treats promise delightful moments of pure indulgence you’ll savor with every single bite.
Ingredients
Main Ingredients:
- 1 cup creamy peanut butter
- 1/2 cup (113 grams) unsalted butter, softened
- 3 cups powdered sugar
Flavor Enhancers:
- 1 teaspoon vanilla extract
Coating:
- 2 cups (340 grams) chocolate chips (milk or semi-sweet)
Instructions
- Blend peanut butter, softened butter, and vanilla extract in a mixing bowl until silky and uniform.
- Incorporate powdered sugar gradually, stirring until the mixture transforms into a cohesive, moldable dough.
- Shape the mixture into compact, bite-sized spheres approximately one inch in diameter.
- Arrange the spheres on a parchment-lined baking sheet, ensuring they are not touching.
- Prepare the chocolate coating by microwaving chocolate chips in 30-second increments, stirring between each interval until completely liquefied and smooth.
- Carefully submerge each peanut butter sphere into the molten chocolate, using a fork or skewer to ensure thorough, even coverage.
- Gently return the chocolate-enrobed spheres to the parchment-lined sheet, allowing excess chocolate to drip off.
- Chill in the refrigerator for a minimum of 30 minutes, or until the chocolate hardens completely and develops a glossy finish.
Notes
- Opt for natural peanut butter with no added sugar for a healthier version that still delivers rich, creamy flavor.
- Adjust chocolate coating thickness by using dark, milk, or white chocolate to suit different taste preferences and dietary needs.
- Try texture by adding crispy rice cereal or chopped nuts for extra crunch and interesting mouthfeel.
- Store these delightful treats in an airtight container in the refrigerator for up to a week, ensuring they maintain their perfect consistency and freshness.
- Prep Time: 20 minutes
- Cook Time: 30 minutes
- Category: Snacks, Desserts
- Method: Blending
- Cuisine: American
Nutrition
- Serving Size: 24
- Calories: 196
- Sugar: 18 g
- Sodium: 46 mg
- Fat: 13 g
- Saturated Fat: 4 g
- Unsaturated Fat: 8 g
- Trans Fat: 0 g
- Carbohydrates: 20 g
- Fiber: 1 g
- Protein: 4 g
- Cholesterol: 10 mg
Jess Martinez
Contributing Recipe Writer & Nutrition Consultant
Expertise
Southwestern and Latin American cooking, Nutritional analysis and healthy recipe planning, Cultural food traditions, Modifying traditional dishes for better health
Education
Santa Fe Community College
Certificate in Culinary Arts
Focused on mastering the flavors and cooking methods of traditional Southwestern cuisine.
Jess’s love for bold, homegrown flavors led her straight into the world of Southwestern cooking and cultural nutrition.
After completing her Certificate in Culinary Arts at Santa Fe Community College, she made it her mission to show that good-for-you food can still taste incredible.
At saltytart.com, Jess shares vibrant, health-conscious recipes with roots in tradition but a fresh, modern twist. When she’s not testing new recipes, you’ll find her at local growers’ markets, tending her herb garden, or digging into food history books.