The Best Orange Dreamsicle Fudge Recipe for Sweet Summer Treats
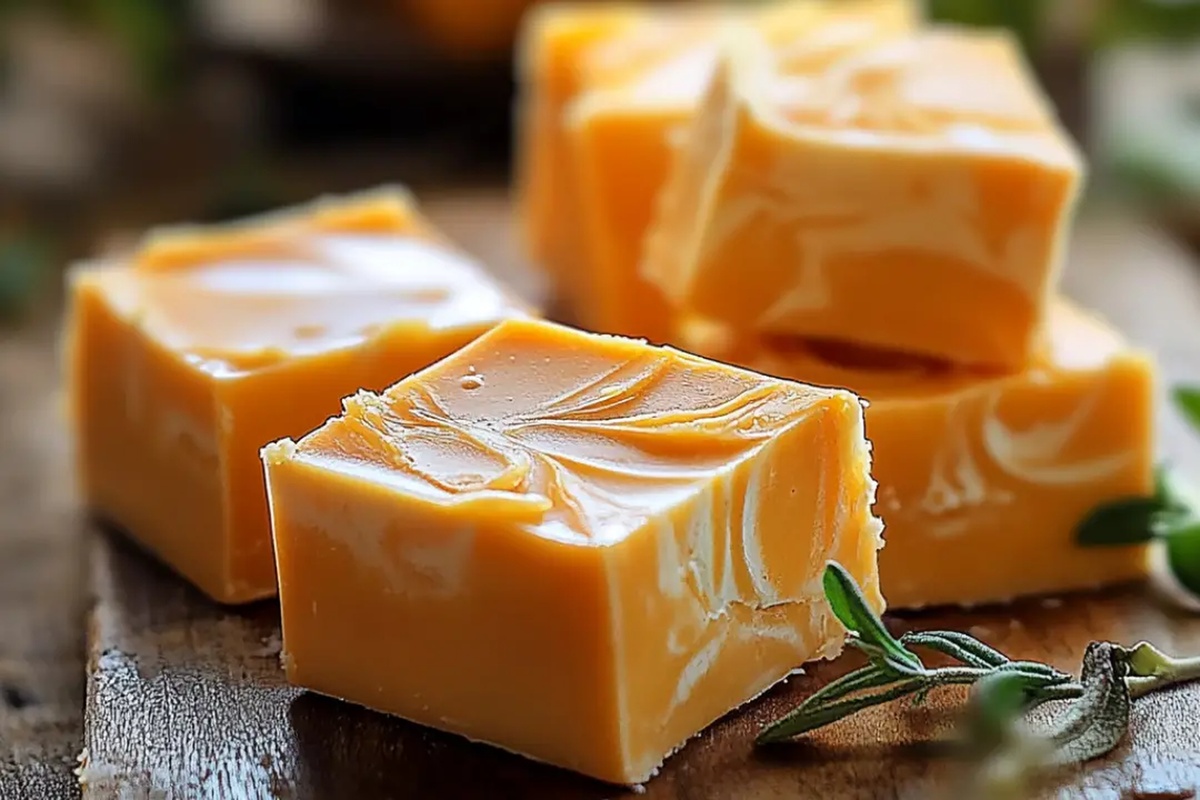
Sweet memories dance through kitchens when orange dreamsicle fudge emerges as a creamy childhood treat.
Cool nostalgia swirls with tangy citrus and smooth vanilla notes.
Childhood summers suddenly feel closer with each delectable bite.
Soft, melt-in-your-mouth textures promise pure indulgence without complicated techniques.
Compact ingredients create magic in mere minutes.
Simple steps lead to remarkable dessert perfection.
You’ll fall in love with this effortless confection that captures sunshine in every square.
Orange Dreamsicle Fudge Details
Ingredients for Orange Dreamsicle Fudge
Main Ingredients:Flavor Enhancers:Preparation Ingredients:How to Make Orange Dreamsicle Fudge
Step 1: Prepare Baking Surface
Line an 8×8-inch pan with parchment paper, ensuring edges are completely covered. This helps with easy removal and clean cutting of the fudge later.
Step 2: Create Creamy Fudge Base
In a medium saucepan, combine:Heat the mixture over medium temperature, stirring continuously. Allow the blend to bubble and cook for 5 minutes, watching carefully to prevent burning.
The ingredients should transform into a smooth, glossy liquid.
Step 3: Infuse Orange Flavor
Remove saucepan from heat and quickly stir in:Mix thoroughly until the mixture becomes uniform in color and texture.
Step 4: Melt Chocolate
Add white chocolate chips to the warm mixture. Stir until chips completely dissolve, creating a silky, bright mixture that looks creamy and inviting.
Step 5: Pour and Smooth
Transfer the fudge mixture into the prepared pan. Use a spatula to spread evenly, gently tapping the pan to eliminate any air bubbles and create a perfectly smooth surface.
Step 6: Chill and Set
Let the fudge cool at room temperature for one hour. Then transfer to refrigerator and chill for 2-3 hours until completely firm and solid.
Step 7: Slice and Enjoy
Remove fudge from refrigerator and cut into bite-sized squares. Serve and savor the dreamy orange dreamsicle flavor.
Tips for Creamy Orange Dreamsicle Fudge
Variations for Orange Dreamsicle Fudge
Pairing Ideas for Orange Dreamsicle Fudge
Mix a chilled orange vodka martini to complement the fudge’s sweet and tangy profile, enhancing the dreamsicle flavor with a sophisticated adult twist.
Serve alongside a scoop of vanilla bean ice cream, creating a harmonious blend of cool, smooth textures that echo the fudge’s creamsicle inspiration.
Offer a small plate of candied orange peels as a garnish, providing a bright, slightly bitter contrast to the fudge’s sugary sweetness and adding visual appeal.
Prepare a light orange sorbet to serve between bites, cutting through the richness and refreshing the taste buds with a clean, citrusy finish.
Proper Storage for Orange Dreamsicle Fudge
FAQs
No, it’s super easy! Even beginner bakers can follow the simple steps. The recipe requires basic ingredients and straightforward cooking techniques that anyone can master.
Absolutely! The orange food coloring is optional and only adds visual appeal. The taste will remain the same delicious orange dreamsicle flavor even without the orange color.
Use high-quality white chocolate chips or white chocolate baking bars. Avoid chocolate melts or candy coating as they might affect the smooth, creamy texture of the fudge.
Print
Orange Dreamsicle Fudge Recipe
- Total Time: 20 minutes
- Yield: 24 1x
Description
Creamy orange dreamsicle fudge melts memories of summer afternoons into a sweet, nostalgic treat. Silky white chocolate and tangy orange zest combine effortlessly, inviting you to savor each blissful bite of childhood joy.
Ingredients
Main Ingredients (Sweeteners and Base):
- 3 cups granulated sugar
- 2 cups white chocolate chips
- 7 ounces (198 grams) marshmallow cream
Dairy Components:
- 3/4 cup (170 grams) unsalted butter
- 2/3 cup (158 milliliters) heavy cream
Flavor and Coloring:
- 3 teaspoons orange extract
- 10 drops orange food coloring
Instructions
- Prepare a square baking pan by lining with parchment paper, ensuring edges are covered for easy removal later.
- In a medium saucepan, combine butter, sugar, and heavy cream over medium heat, stirring continuously until ingredients fully integrate and mixture begins bubbling.
- Maintain a steady boil for precisely 5 minutes, monitoring temperature and stirring periodically to prevent scorching or sticking.
- Remove pan from heat source and immediately incorporate marshmallow cream, vibrant orange extract, and food coloring, whisking until achieving a uniform tangerine-hued consistency.
- Gradually fold white chocolate chips into the warm mixture, stirring until chips melt completely and create a silky, glossy texture.
- Transfer fudge mixture into prepared pan, using a spatula to distribute evenly and eliminate potential air pockets by gently tapping pan against countertop.
- Allow fudge to stabilize at room temperature for approximately 60 minutes, creating an initial settling period.
- Transition pan to refrigerator, chilling for 2-3 hours until fudge reaches a solid, compact state with a firm structural integrity.
- Once fully set, extract fudge from refrigerator and slice into precise, bite-sized geometric portions using a sharp knife.
- Serve chilled, presenting a creamy, vibrant orange-infused confection that captures the essence of a classic dreamsicle.
Notes
- Select high-quality white chocolate chips for the smoothest, most luxurious texture in your fudge.
- Use pure orange extract for a more intense and authentic citrus flavor that enhances the dreamsicle experience.
- Experiment with different food coloring intensities to achieve your desired vibrant orange shade, from soft pastel to bright tangerine.
- For a dietary variation, substitute heavy cream with coconut cream and use dairy-free white chocolate chips to create a vegan-friendly version of this sweet treat.
- Prep Time: 15 minutes
- Cook Time: 5 minutes
- Category: Desserts, Snacks
- Method: Boiling
- Cuisine: American
Nutrition
- Serving Size: 24
- Calories: 188
- Sugar: 24 g
- Sodium: 26 mg
- Fat: 9 g
- Saturated Fat: 5 g
- Unsaturated Fat: 4 g
- Trans Fat: 0.2 g
- Carbohydrates: 27 g
- Fiber: 0.1 g
- Protein: 1 g
- Cholesterol: 22 mg
Mike Reynolds
Founder & Recipe Developer
Expertise
Farm-to-table cuisine, Seasonal recipe development, Sustainable cooking techniques, Food photography
Education
Asheville-Buncombe Technical Community College (A-B Tech)
Associate Degree in Culinary Arts
Mike studied culinary arts with a strong focus on farm-to-table principles and sustainable cooking. His training emphasized the importance of fresh, local ingredients and environmentally responsible practices in the kitchen.
Mike’s food journey began deep in the Blue Ridge Mountains, where weekends at farmers’ markets and home-cooked meals sparked a lifelong obsession with simple, seasonal eating.
After earning his Associate Degree in Culinary Arts from Asheville-Buncombe Technical Community College, he set out to bring farm-to-table cooking into everyday kitchens, without the fuss.
Mike’s philosophy is all about keeping it fresh, unfussy, and full of heart. When he’s not crafting new single-serving recipes, he’s hiking mountain trails, chatting with local farmers, or experimenting with wild ingredients in his backyard kitchen.