
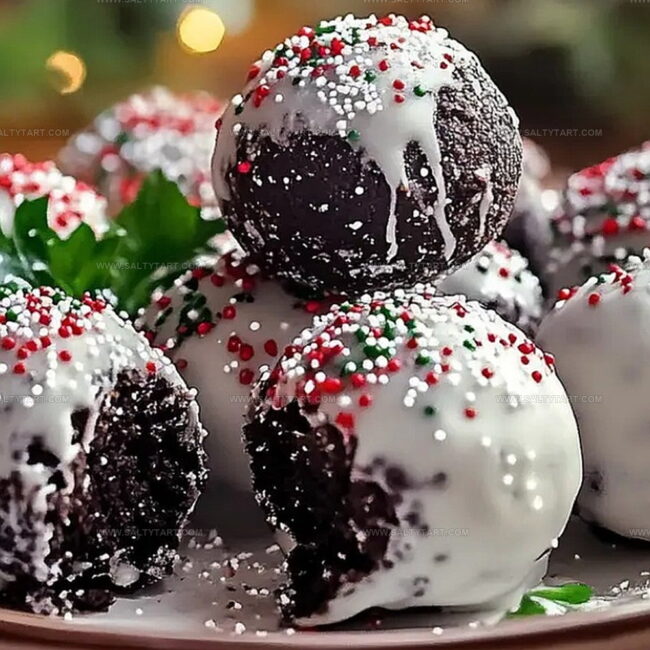
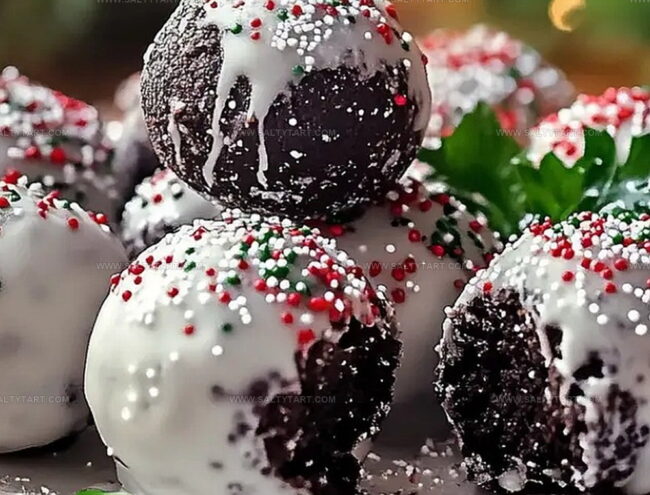
Festive Oreo Balls for Christmas Recipe: Jolly Holiday Treats
Crafting sweet holiday memories starts with these delectable Oreo balls for Christmas that melt in your mouth and spark joy.
Creamy, chocolatey, and irresistibly simple, this dessert brings festive cheer to any gathering.
No baking required means less stress and more celebration.
Everyone loves these bite-sized treats that combine classic cookies with rich cream cheese.
The smooth chocolate coating adds a luxurious touch to each perfectly round morsel.
Kids and adults alike will devour these festive delights faster than Santa slides down the chimney.
Prepare to become the star of your holiday party with these crowd-pleasing Oreo balls.
Why Oreo Balls for Christmas Are a Hit
Ingredients for Christmas Oreo Ball Treats
Base Ingredients:Coating Ingredients:Decoration Ingredients:Steps to Make Festive Christmas Oreo Balls
Step 1: Pulverize Oreo Cookies
Grab your food processor or a sturdy resealable bag. Crush the Oreo cookies into fine, delicate crumbs.
If using a bag, roll a rolling pin firmly over the cookies until they transform into a powdery texture.
Step 2: Create Creamy Mixture
Combine the Oreo crumbs with softened cream cheese in a mixing bowl.
Stir and blend until the mixture becomes a smooth, uniform dough that holds together perfectly.
Step 3: Shape Delightful Spheres
Roll the mixture into small, bite-sized balls using your hands.
Arrange these adorable spheres on a parchment-lined baking sheet. Pop the tray into the freezer for about 30 minutes to help them firm up.
Step 4: Melt Chocolate Coating
Select a microwave-safe bowl and place your chocolate chips inside. Melt the chocolate in short 30-second bursts, stirring between each interval until the chocolate becomes silky and completely smooth.
Step 5: Dunk and Coat
Remove the frozen balls from the freezer. Using a fork or toothpick, carefully dip each ball into the melted chocolate.
Ensure every inch gets a luxurious chocolate bath. Gently place the coated balls back on the parchment-lined sheet.
Step 6: Add Festive Flair
While the chocolate is still wet, sprinkle holiday-themed decorations over each ball. This is your chance to make them look extra magical and celebratory.
Step 7: Let Chocolate Set
Allow the chocolate-covered balls to set at room temperature or speed up the process by placing them in the refrigerator. Wait until the chocolate becomes firm and glossy.
Notes for Making Perfect Oreo Ball Bites
Creative Swaps for Holiday Oreo Ball Fans
Pairings for Christmas Oreo Ball Platters
Storing Oreo Balls for Holiday Parties
FAQs
No, traditional Oreo Balls are not gluten-free since Oreo cookies contain wheat flour. You’ll need to use gluten-free Oreo-style cookies to make a gluten-free version.
Yes, you can prepare Oreo Balls up to a week in advance. Store them in an airtight container in the refrigerator until you’re ready to serve.
Ensure the Oreo balls are completely frozen before dipping, and let them sit at room temperature for a minute after coating to prevent rapid temperature changes that cause cracking.
Candy melts or chocolate almond bark work best because they melt smoothly and harden quickly.
Print
Oreo Balls For Christmas Recipe
- Total Time: 50 minutes
- Yield: 24 1x
Description
Sweet holiday magic shines through these Oreo balls, blending creamy chocolate and crushed cookies into delightful bite-sized treats. Christmas dessert lovers will savor these easy, no-bake delights that bring festive cheer to any gathering.
Ingredients
Main Ingredients:
- 1 package (14.3 ounces / 406 grams) Oreo cookies
- 8 ounces (226 grams) cream cheese, softened
Coating Ingredients:
- 12 ounces (340 grams) semi-sweet or white chocolate chips
Decorative Ingredients:
- Holiday sprinkles for decorating
Instructions
- Pulverize Oreo cookies into fine, uniform crumbs using a food processor or by placing them in a sealed bag and crushing with a rolling pin.
- Blend the cookie crumbs with softened cream cheese in a mixing bowl until a cohesive dough forms, ensuring no dry crumbs remain.
- Shape the mixture into compact, bite-sized spheres approximately 1-inch in diameter, arranging them on a parchment-covered baking sheet.
- Chill the formed balls in the freezer for 30 minutes to stabilize their structure and prepare for chocolate coating.
- Melt chocolate chips in a microwave-safe container, heating in 30-second increments and stirring between intervals until completely smooth and glossy.
- Carefully immerse each frozen ball into the melted chocolate using a fork or dipping tool, ensuring complete and even coverage.
- Return chocolate-coated balls to the parchment-lined sheet, immediately adorning them with festive holiday sprinkles before the chocolate solidifies.
- Allow the Oreo balls to set at room temperature or expedite the process by refrigerating until the chocolate coating becomes firm and crisp.
Notes
- Ensure cream cheese is at room temperature for easier mixing and smoother texture.
- Use a cookie scoop or small spoon to create uniform-sized Oreo balls for consistent appearance.
- Crush Oreos finely to prevent lumpy or uneven coating when dipping in chocolate.
- Refrigerate before serving to enhance flavor and create a firmer, more enjoyable texture.
- Prep Time: 20 minutes
- Cook Time: 30 minutes
- Category: Snacks, Desserts
- Method: Blending
- Cuisine: American
Nutrition
- Serving Size: 24
- Calories: 168
- Sugar: 14 g
- Sodium: 71 mg
- Fat: 9 g
- Saturated Fat: 5 g
- Unsaturated Fat: 3 g
- Trans Fat: 0.1 g
- Carbohydrates: 19 g
- Fiber: 1 g
- Protein: 2 g
- Cholesterol: 10 mg
Jess Martinez
Contributing Recipe Writer & Nutrition Consultant
Expertise
Southwestern and Latin American cooking, Nutritional analysis and healthy recipe planning, Cultural food traditions, Modifying traditional dishes for better health
Education
Santa Fe Community College
Certificate in Culinary Arts
Focused on mastering the flavors and cooking methods of traditional Southwestern cuisine.
Jess’s love for bold, homegrown flavors led her straight into the world of Southwestern cooking and cultural nutrition.
After completing her Certificate in Culinary Arts at Santa Fe Community College, she made it her mission to show that good-for-you food can still taste incredible.
At saltytart.com, Jess shares vibrant, health-conscious recipes with roots in tradition but a fresh, modern twist. When she’s not testing new recipes, you’ll find her at local growers’ markets, tending her herb garden, or digging into food history books.