The Fluffiest Peanut Butter Cookies Recipe for Sweet Bliss
Crispy, soft peanut butter cookies have been my secret comfort food since childhood.
My grandmother shared her classic recipe during lazy summer afternoons.
Buttery dough mixed with rich, creamy peanut spread creates a nostalgic treat.
Sweet aromas fill the kitchen while these delectable morsels bake to golden perfection.
Crumbly edges and chewy centers make each bite absolutely irresistible.
Memories of shared laughter and warm conversations flood back with every delightful morsel.
You can recreate this cherished family favorite in just a few simple steps.
Bake a batch and watch smiles spread across eager faces.
Ingredients Required To Make Peanut Butter Cookies
Base Ingredients:Baking Essentials:Optional Garnish:Easy Instructions To Bake Perfect Peanut Butter Cookies
Step 1: Warm Up the Oven
Get your oven ready by heating it to 350F (175C). Grab a baking sheet and cover it with parchment paper or a silicone mat to prevent sticking and make cleanup a breeze.
Step 2: Create the Cookie Mixture
Grab a medium mixing bowl and combine:Blend everything together until the mixture looks smooth and consistent. The dough will feel thick and slightly tacky to the touch.
Step 3: Craft the Cookie Shapes
Scoop out small portions of dough and roll them into cute little balls. Place these balls on your prepared baking sheet, giving each cookie enough space to breathe – about 2 inches apart.
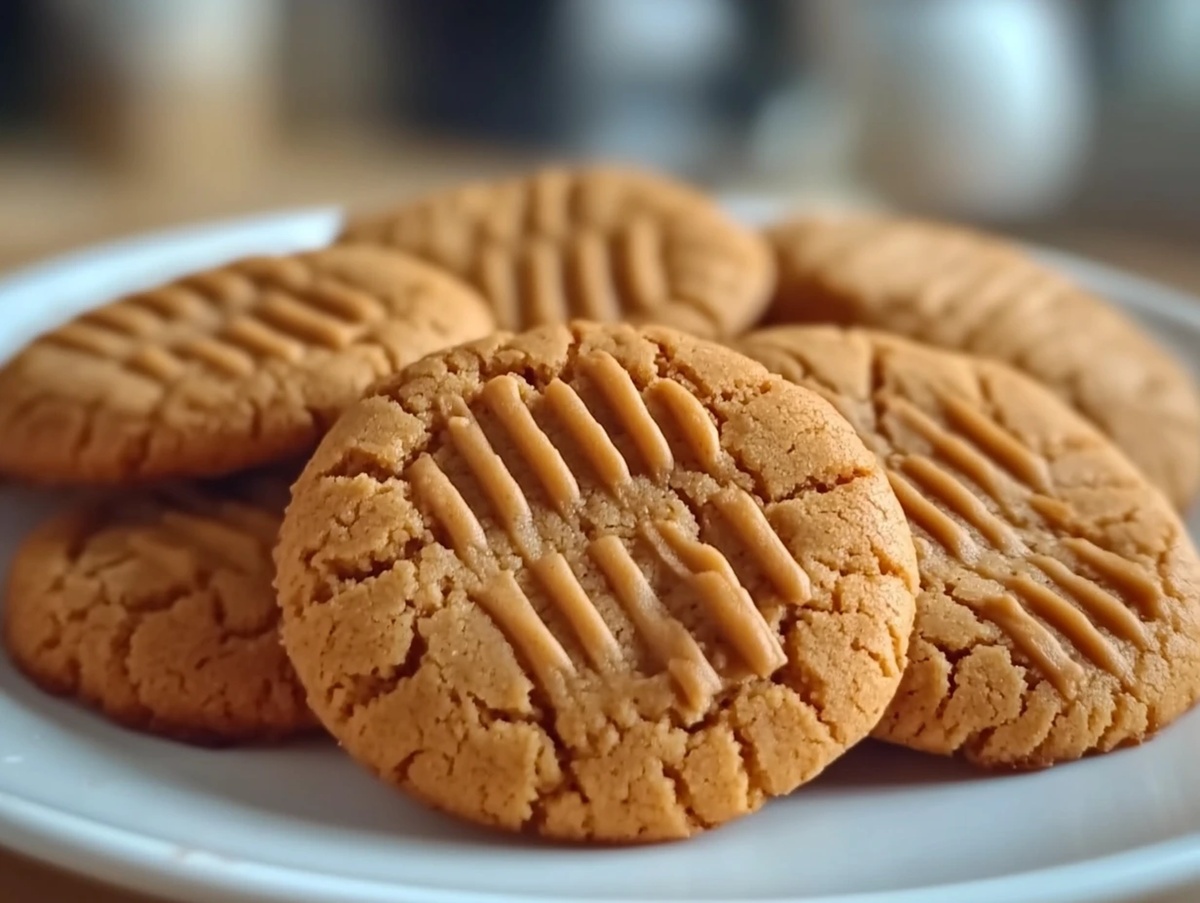
Take a fork and gently press down on each ball, creating those classic crisscross marks that make peanut butter cookies so recognizable.
Step 4: Bake to Perfection
Slide the baking sheet into the preheated oven.
Bake for 8-10 minutes until the cookie edges look set and slightly golden. Don’t worry if the centers seem a bit soft – they’ll firm up as they cool down.
Step 5: Cool and Savor
Let the cookies rest on the baking sheet for about 5 minutes. This helps them set and makes transferring easier.
Move them to a wire rack to cool completely. Enjoy them warm with a glass of milk or store in an airtight container for later snacking.
Tips To Improve Peanut Butter Cookies Every Time
Fun Swaps To Try With Peanut Butter Cookies
Pairings That Go Well With Peanut Butter Cookies
Creamy chocolate milk perfectly complements the nutty, sweet flavor of these peanut butter cookies, creating a nostalgic and comforting taste experience.
Serve warm cookies alongside a scoop of smooth vanilla ice cream for a delightful contrast between hot, crispy cookies and cold, creamy dessert.
A small, intense espresso shot cuts through the richness of the cookies, providing a bold flavor counterpoint and enhancing the overall dessert enjoyment.
Add a light caramel drizzle over the cookies to amplify their sweetness and create a more complex, indulgent flavor profile that elevates the classic treat.
How To Store Peanut Butter Cookies So They Last
FAQs
Yes, the basic recipe uses only peanut butter, sugar, egg, and vanilla extract, which are naturally gluten-free. However, always check your ingredient labels to ensure no gluten-containing additives.
Creamy peanut butter works best for consistent texture. Natural peanut butter might make the cookies more crumbly, so stick with standard smooth peanut butter for the best results.
The fork creates the classic crisscross pattern and helps the cookies spread evenly during baking. It’s also a traditional way to make peanut butter cookies look distinctive and appealing.
Peanut Butter Cookies Everyone Will Love To Munch
Print
Peanut Butter Cookies Recipe
- Total Time: 25 minutes
- Yield: 12 1x
Description
Irresistible Peanut Butter Cookies bring classic comfort straight from grandma’s kitchen, melding rich nutty flavors with sweet simplicity. Crisp edges and chewy centers promise delightful moments of pure homemade happiness you’ll savor with each delicious bite.
Ingredients
Main Ingredients:
- 1 cup peanut butter
- 1 cup sugar
- 1 egg
Flavor Enhancers:
- 1 teaspoon vanilla extract
Instructions
- Prepare the oven environment by heating to 350F (175C) and lining a baking sheet with parchment paper or silicone mat to prevent sticking.
- Combine peanut butter, sugar, egg, and vanilla extract in a medium bowl, mixing thoroughly until the dough becomes a uniform, thick consistency with a slightly tacky texture.
- Create uniform cookie portions by scooping tablespoon-sized dough and gently rolling into compact balls.
- Arrange dough balls on the prepared baking sheet, spacing them approximately 2 inches apart to allow proper spreading during baking.
- Flatten each dough ball using a fork, creating the traditional crisscross pattern that gives peanut butter cookies their distinctive appearance.
- Place the baking sheet in the preheated oven and bake for 8-10 minutes, watching for edges to set while centers remain slightly soft.
- Remove cookies from oven and allow them to rest on the baking sheet for 5 minutes, enabling them to firm up and become more stable.
- Transfer cookies to a wire cooling rack to complete the cooling process, ensuring they reach room temperature.
- Store completely cooled cookies in an airtight container or serve immediately while still warm for maximum enjoyment.
Notes
- Swap traditional sugar with coconut sugar or monk fruit sweetener for a lower glycemic index option.
- Add chocolate chips or chopped nuts into the dough for extra texture and flavor complexity.
- Ensure peanut butter is at room temperature to create smoother, more evenly mixed cookie dough.
- For gluten-sensitive individuals, confirm your peanut butter is certified gluten-free before baking.
- Prep Time: 15 minutes
- Cook Time: 10 minutes
- Category: Desserts, Snacks
- Method: Baking
- Cuisine: American
Nutrition
- Serving Size: 12
- Calories: 171 kcal
- Sugar: 14 g
- Sodium: 86 mg
- Fat: 12 g
- Saturated Fat: 2 g
- Unsaturated Fat: 8 g
- Trans Fat: 0 g
- Carbohydrates: 13 g
- Fiber: 1.5 g
- Protein: 6 g
- Cholesterol: 18 mg
Mike Reynolds
Founder & Recipe Developer
Expertise
Farm-to-table cuisine, Seasonal recipe development, Sustainable cooking techniques, Food photography
Education
Asheville-Buncombe Technical Community College (A-B Tech)
Associate Degree in Culinary Arts
Mike studied culinary arts with a strong focus on farm-to-table principles and sustainable cooking. His training emphasized the importance of fresh, local ingredients and environmentally responsible practices in the kitchen.
Mike’s food journey began deep in the Blue Ridge Mountains, where weekends at farmers’ markets and home-cooked meals sparked a lifelong obsession with simple, seasonal eating.
After earning his Associate Degree in Culinary Arts from Asheville-Buncombe Technical Community College, he set out to bring farm-to-table cooking into everyday kitchens, without the fuss.
Mike’s philosophy is all about keeping it fresh, unfussy, and full of heart. When he’s not crafting new single-serving recipes, he’s hiking mountain trails, chatting with local farmers, or experimenting with wild ingredients in his backyard kitchen.