Irresistible Peanut Butter Cup Dump Cake Recipe for Sweet Fans
Crafting a delectable peanut butter cup dump cake might just be the most effortless dessert adventure you’ll embark on this week.
Chocolate and peanut butter create a magical combination that dances across taste buds.
Simplicity reigns supreme in this decadent treat, requiring minimal preparation and maximum flavor.
Minimal ingredients converge to produce a rich, gooey masterpiece that melts in your mouth.
Layers of creamy peanut butter intermingle with chocolate chunks, creating a dessert that screams indulgence.
Each bite promises a symphony of textures and sweet, nutty notes.
Let this recipe become your secret weapon for instant dessert success.
Peanut Butter Cup Dump Cake Overview
Ingredients for Peanut Butter Dump Cake
Main Ingredients:Chocolate and Nut Toppings:Optional Serving Companions:Step-by-Step for Peanut Butter Cup Dump Cake
Step 1: Prepare Oven and Baking Dish
Heat the oven to 350F (175C). Coat a 9×13-inch baking dish with cooking spray or butter to prevent sticking.
Step 2: Create Pudding Base
Whisk together pudding mix and milk in a mixing bowl until completely smooth. Allow the mixture to sit and thicken for a few minutes.
Step 3: Layer Pudding in Dish
Spread the prepared pudding evenly across the bottom of the greased baking dish.
Step 4: Add Cake Mix Topping
Sprinkle the dry cake mix uniformly over the pudding layer, ensuring complete coverage.
Step 5: Drizzle Melted Goodness
Pour melted butter and peanut butter over the top. Use a spoon or knife to create a gentle swirling pattern across the surface.
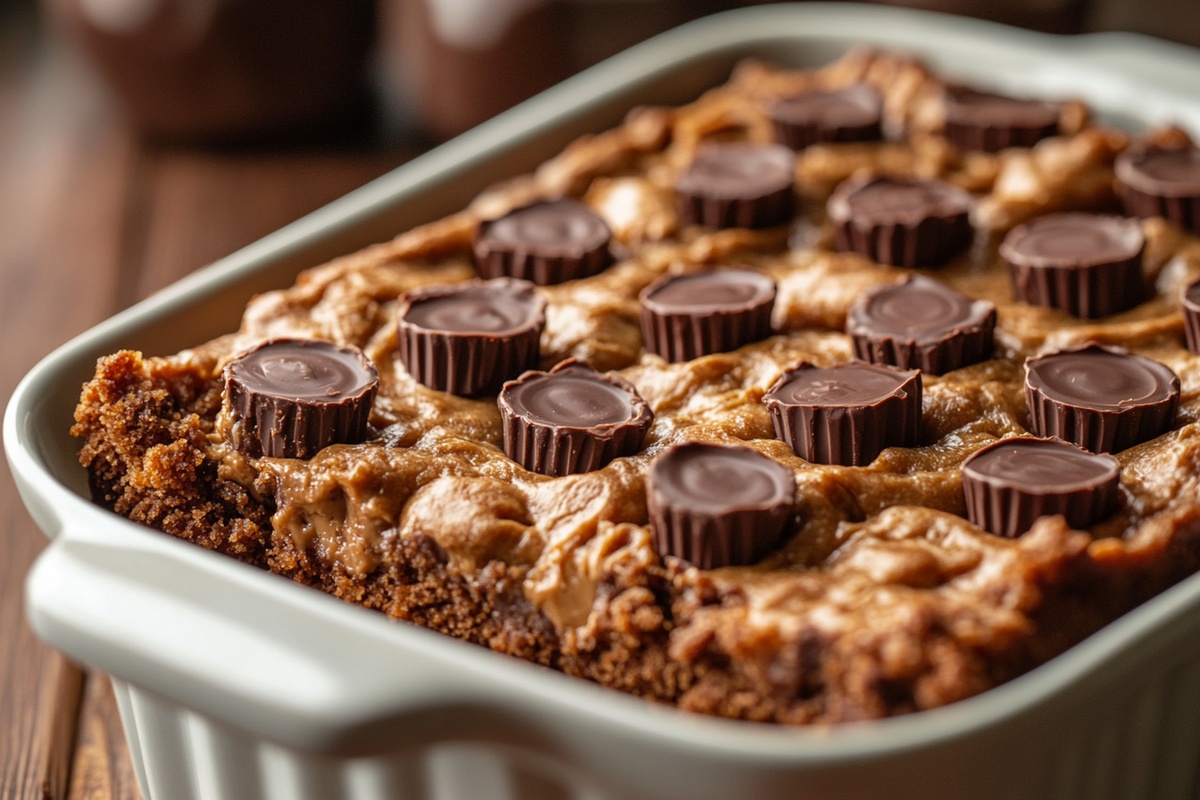
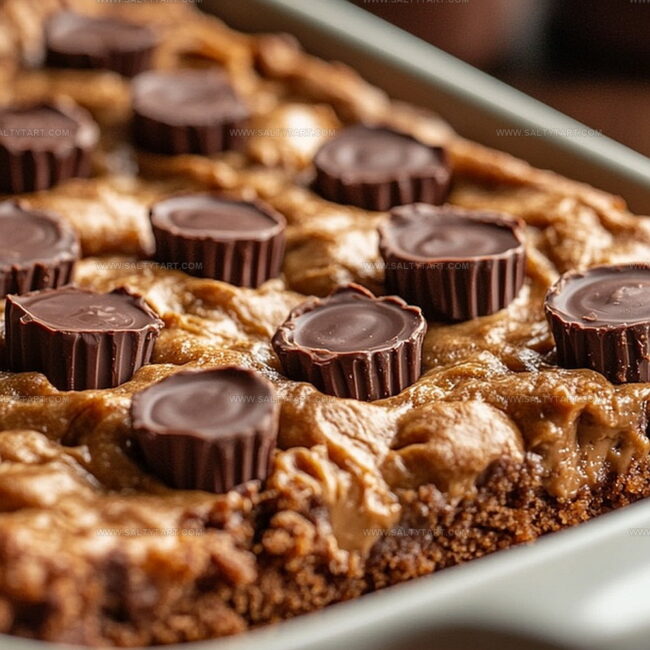
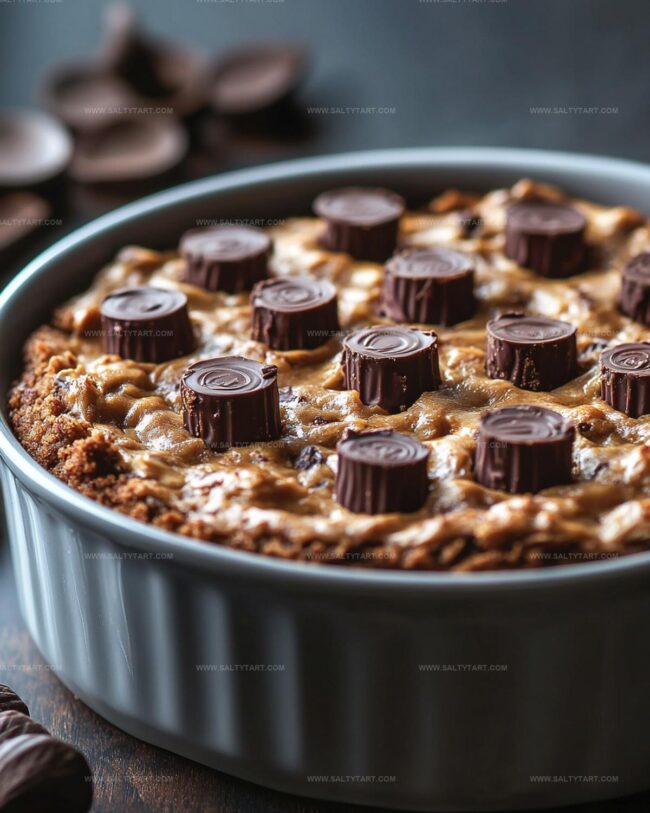
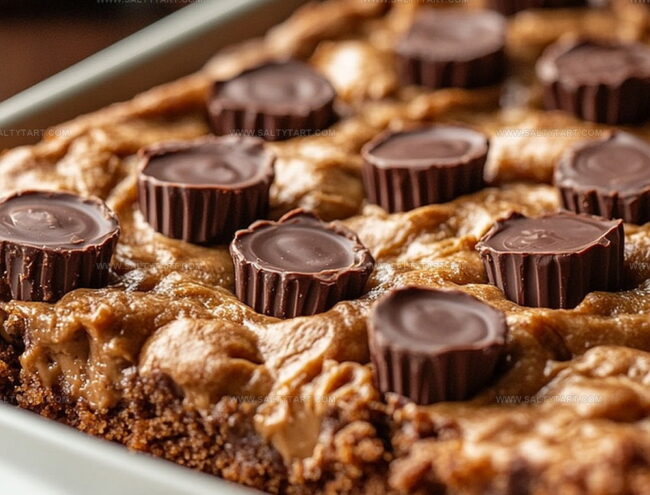
Step 6: Scatter Delicious Toppings
Distribute the following ingredients across the cake:Step 7: Bake to Perfection
Slide the baking dish into the preheated oven. Bake for 35-40 minutes until the edges are set but the center remains slightly soft and gooey.
Step 8: Cool and Serve
Let the cake rest for 10 minutes after removing from the oven.
Tips to Enhance Dump Cake Flavors
Variations to Switch Up Dump Cake
Pairing Ideas for Peanut Butter Dump Cake
How to Store Dump Cake Properly
FAQs
Yes, this dump cake is super easy to make. You don’t need advanced baking skills – just mix, pour, and bake. The recipe requires minimal preparation and almost no complicated techniques.
Definitely! Vanilla or chocolate pudding mix will work great. The key is using instant pudding mix to help create the right texture and moisture for the cake.
Not at all. Generic or store-brand peanut butter cups work perfectly fine. The goal is to have that delicious chocolate and peanut butter flavor throughout the cake.
Print
Peanut Butter Cup Dump Cake Recipe
- Total Time: 55 minutes
- Yield: 12 1x
Description
Rich chocolate and creamy peanut butter merge in this irresistible Peanut Butter Cup Dump Cake, creating a dessert that satisfies deepest chocolate cravings. Effortless preparation meets indulgent flavor, promising a quick and delicious treat that will delight your taste buds.
Ingredients
Main Ingredients:
- 1 box chocolate cake mix
- 1 (3.9 ounces/110 grams) box instant chocolate pudding mix
- 2 cups whole milk
Dairy and Fat Components:
- 1/2 cup creamy peanut butter
- 1/2 cup butter, melted
Toppings and Mix-ins:
- 1 cup mini peanut butter cups, chopped
- 1 cup milk chocolate chips
- 1/2 cup chopped peanuts
- Whipped cream or vanilla ice cream (for serving)
Instructions
- Prepare the oven at 350°F (175°C) and coat a 9×13-inch baking dish with cooking spray or butter.
- Combine pudding mix and milk in a bowl, whisking until completely smooth and allowing the mixture to thicken for 2-3 minutes.
- Transfer the pudding mixture into the prepared baking dish, spreading it evenly across the bottom.
- Create a uniform layer by sprinkling the dry cake mix directly over the pudding, ensuring complete coverage.
- Melt the butter and peanut butter together, then drizzle the combined mixture over the cake mix layer, using a spoon to create gentle swirling patterns.
- Distribute chopped peanut butter cups, chocolate chips, and peanuts across the top of the cake, ensuring even coverage.
- Place the baking dish in the preheated oven and bake for 35-40 minutes, watching for set edges and a slightly soft center.
- Remove from the oven and allow the cake to rest for 10 minutes, which helps it settle and become more stable.
- Serve warm, accompanied by a dollop of whipped cream or a scoop of vanilla ice cream for an indulgent dessert experience.
Notes
- Customize the sweetness by selecting different pudding mix flavors to match your taste preferences.
- Use gluten-free cake mix and pudding to make this recipe celiac-friendly and accommodate dietary restrictions.
- For a lighter version, substitute half the butter with Greek yogurt to reduce calories without compromising texture.
- Experiment with alternative nut butters like almond or cashew butter for unique flavor variations and potential allergy considerations.
- Prep Time: 15 minutes
- Cook Time: 40 minutes
- Category: Desserts
- Method: Baking
- Cuisine: American
Nutrition
- Serving Size: 12
- Calories: 349 kcal
- Sugar: 32 g
- Sodium: 210 mg
- Fat: 22 g
- Saturated Fat: 7 g
- Unsaturated Fat: 13 g
- Trans Fat: 0.2 g
- Carbohydrates: 34 g
- Fiber: 2 g
- Protein: 6 g
- Cholesterol: 25 mg
Mike Reynolds
Founder & Recipe Developer
Expertise
Farm-to-table cuisine, Seasonal recipe development, Sustainable cooking techniques, Food photography
Education
Asheville-Buncombe Technical Community College (A-B Tech)
Associate Degree in Culinary Arts
Mike studied culinary arts with a strong focus on farm-to-table principles and sustainable cooking. His training emphasized the importance of fresh, local ingredients and environmentally responsible practices in the kitchen.
Mike’s food journey began deep in the Blue Ridge Mountains, where weekends at farmers’ markets and home-cooked meals sparked a lifelong obsession with simple, seasonal eating.
After earning his Associate Degree in Culinary Arts from Asheville-Buncombe Technical Community College, he set out to bring farm-to-table cooking into everyday kitchens, without the fuss.
Mike’s philosophy is all about keeping it fresh, unfussy, and full of heart. When he’s not crafting new single-serving recipes, he’s hiking mountain trails, chatting with local farmers, or experimenting with wild ingredients in his backyard kitchen.