
Fluffy Peanut Butter Dream Bars Recipe: Sweet Heaven in Squares
Crafting delectable peanut butter dream bars always brings a spark of joy to my kitchen adventures.
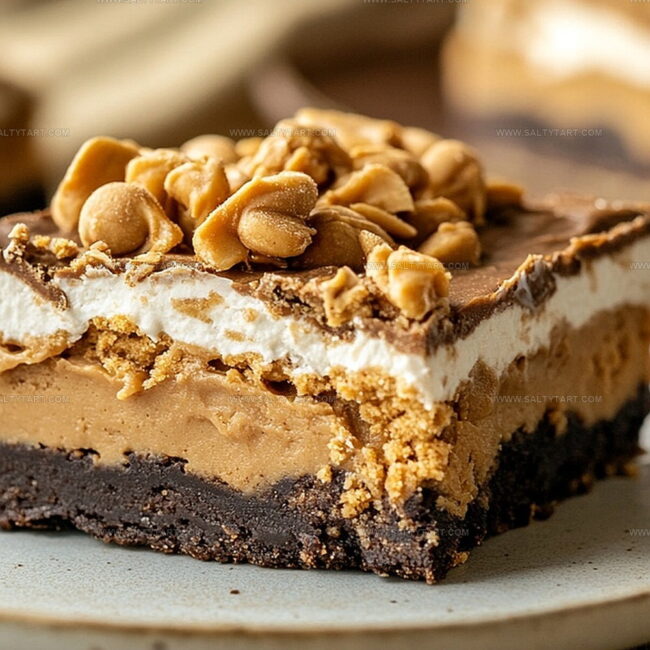
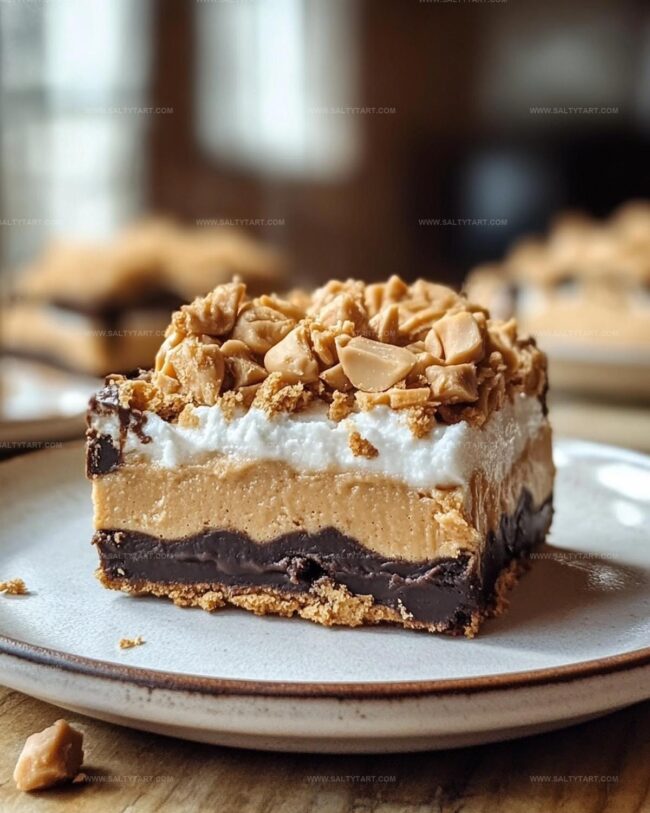
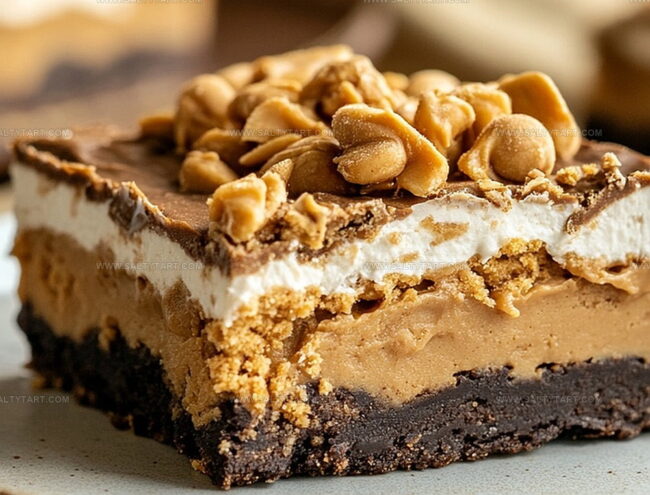
Layers of creamy goodness promise sweet satisfaction in every single bite.
Chocolate and nutty flavors combine into an irresistible treat that dances across taste buds.
Home bakers appreciate simple recipes with maximum deliciousness.
These bars deliver pure comfort and indulgence without complicated techniques.
Smooth textures and rich ingredients create a dessert that feels like a warm hug.
Let me show you how effortlessly magical this recipe can be – and trust me, you’ll want to make these again and again.
Why Peanut Butter Dream Bars Are Irresistible
Essential Ingredients for Peanut Butter Dream Bars
Crust Base:Peanut Butter Filling:Chocolate Topping:How to Prepare Peanut Butter Dream Bars Easily
Step 1: Create Crumbly Crust
Grab a mixing bowl and toss in graham cracker crumbs, melted butter, and sugar. Mix everything thoroughly until the ingredients form a cohesive mixture.
Press the crumb combination firmly and evenly into a greased 9×9-inch baking pan, creating a solid foundation for your delectable treat.
Step 2: Whip Creamy Peanut Butter Layer
Using an electric mixer, blend peanut butter, softened butter, powdered sugar, and vanilla extract.
Whip the ingredients until they transform into a silky, smooth consistency. Carefully spread this luxurious mixture across the graham cracker crust, ensuring an even coverage.
Step 3: Craft Chocolate Topping
Select a microwave-safe bowl and combine chocolate chips and peanut butter. Melt the ingredients in short 30-second bursts, stirring between each interval to prevent burning.
Continue heating and stirring until the mixture becomes completely smooth and glossy.
Step 4: Layer Chocolate Glaze
Pour the melted chocolate-peanut butter blend over the peanut butter layer.
Use a spatula to spread the topping evenly, creating a beautiful, uniform surface that covers the entire dessert.
Step 5: Chill and Set
Place the pan in the refrigerator and allow the bars to firm up for a minimum of 2 hours.
The cooling process helps the layers solidify and enhances the flavor combination.
Step 6: Slice and Serve
Remove the pan from the refrigerator and slice into square portions.
Serve the chilled bars directly from the refrigerator for the best texture and taste experience.
Pro Tips for Perfect Peanut Butter Dream Bars
Flavor Variations for Peanut Butter Dream Bars
Pairing Suggestions for Peanut Butter Dream Bars
Best Storage Practices for Peanut Butter Dream Bars
FAQs
No, these bars are super easy! With just a few simple steps and basic ingredients, anyone can create these delicious peanut butter dream bars at home.
Absolutely! Crunchy peanut butter will add extra texture and nutty flavor to the bars. Just substitute it in the same measurement.
Not at all. You’ll only need a mixing bowl, 9×9-inch pan, microwave, and basic kitchen utensils like a spatula and measuring cups.
When stored in an airtight container in the refrigerator, these peanut butter dream bars will stay delicious for up to 5-7 days.
Print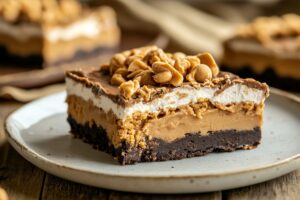
Peanut Butter Dream Bars Recipe
- Total Time: 2 hours 20 minutes
- Yield: 16 1x
Description
Indulgent peanut butter dream bars blend creamy richness with chocolate’s deep allure, creating a dessert that sings with sweet sophistication. Layers of silky peanut butter and smooth chocolate melt together, promising pure bliss in each delectable bite you’ll savor.
Ingredients
Main Ingredients:
- 1 cup creamy peanut butter
- 1 1/2 cups graham cracker crumbs
- 1 cup semi-sweet chocolate chips
Crust and Binding Ingredients:
- 1 cup (2 sticks/226 grams) unsalted butter
- 1/4 cup granulated sugar
- 1 1/2 cups powdered sugar
Flavor and Enhancing Ingredients:
- 1 teaspoon vanilla extract
- 2 tablespoons creamy peanut butter
Instructions
- Craft the foundational crust by thoroughly blending graham cracker crumbs with melted butter and sugar, ensuring complete incorporation of ingredients.
- Press the crumb mixture uniformly into a prepared 9×9-inch baking pan, creating a compact and even base layer.
- Whip peanut butter, softened butter, powdered sugar, and vanilla extract until achieving a silky, homogeneous consistency with no visible lumps.
- Carefully spread the creamy peanut butter mixture across the graham cracker crust, maintaining a smooth and level surface.
- Utilize microwave technique to gently melt chocolate chips and additional peanut butter, stirring between 30-second intervals to prevent scorching and ensure complete liquefaction.
- Gently cascade the glossy chocolate-peanut butter mixture over the existing peanut butter layer, using a spatula to distribute evenly and create a flawless top coating.
- Transfer the assembled dessert to the refrigerator, allowing a minimum of 2 hours for complete chilling and structural solidification.
- Once thoroughly chilled and set, slice into precise square portions, revealing the decadent layered composition.
- Serve directly from the refrigerator to maintain optimal texture and coolness.
Notes
- Crust Perfection: Use a flat-bottomed measuring cup or glass to press graham cracker mixture firmly and evenly for a compact, stable base.
- Smooth Peanut Butter Layer: Ensure butter and peanut butter are at room temperature to create a silky, lump-free mixture that spreads easily.
- Chocolate Melting Hack: Stir chocolate and peanut butter carefully between microwave intervals to prevent burning and achieve a glossy, smooth topping.
- Dietary Modifications: Swap regular butter for coconut oil to make the recipe dairy-free, or use gluten-free graham crackers for a gluten-sensitive version.
- Prep Time: 20 minutes
- Cook Time: 2 hours
- Category: Desserts, Snacks
- Method: Refrigerating
- Cuisine: American
Nutrition
- Serving Size: 16
- Calories: 261 kcal
- Sugar: 19 g
- Sodium: 81 mg
- Fat: 18 g
- Saturated Fat: 6 g
- Unsaturated Fat: 11 g
- Trans Fat: 0.1 g
- Carbohydrates: 22 g
- Fiber: 2 g
- Protein: 5 g
- Cholesterol: 17 mg
Jess Martinez
Contributing Recipe Writer & Nutrition Consultant
Expertise
Southwestern and Latin American cooking, Nutritional analysis and healthy recipe planning, Cultural food traditions, Modifying traditional dishes for better health
Education
Santa Fe Community College
Certificate in Culinary Arts
Focused on mastering the flavors and cooking methods of traditional Southwestern cuisine.
Jess’s love for bold, homegrown flavors led her straight into the world of Southwestern cooking and cultural nutrition.
After completing her Certificate in Culinary Arts at Santa Fe Community College, she made it her mission to show that good-for-you food can still taste incredible.
At saltytart.com, Jess shares vibrant, health-conscious recipes with roots in tradition but a fresh, modern twist. When she’s not testing new recipes, you’ll find her at local growers’ markets, tending her herb garden, or digging into food history books.