Heavenly Pepperoni Pizza Bombs Recipe: Cheesy Bite-Sized Joy
Pizza night takes an exciting twist with these irresistible pepperoni pizza bombs that burst with cheesy goodness.
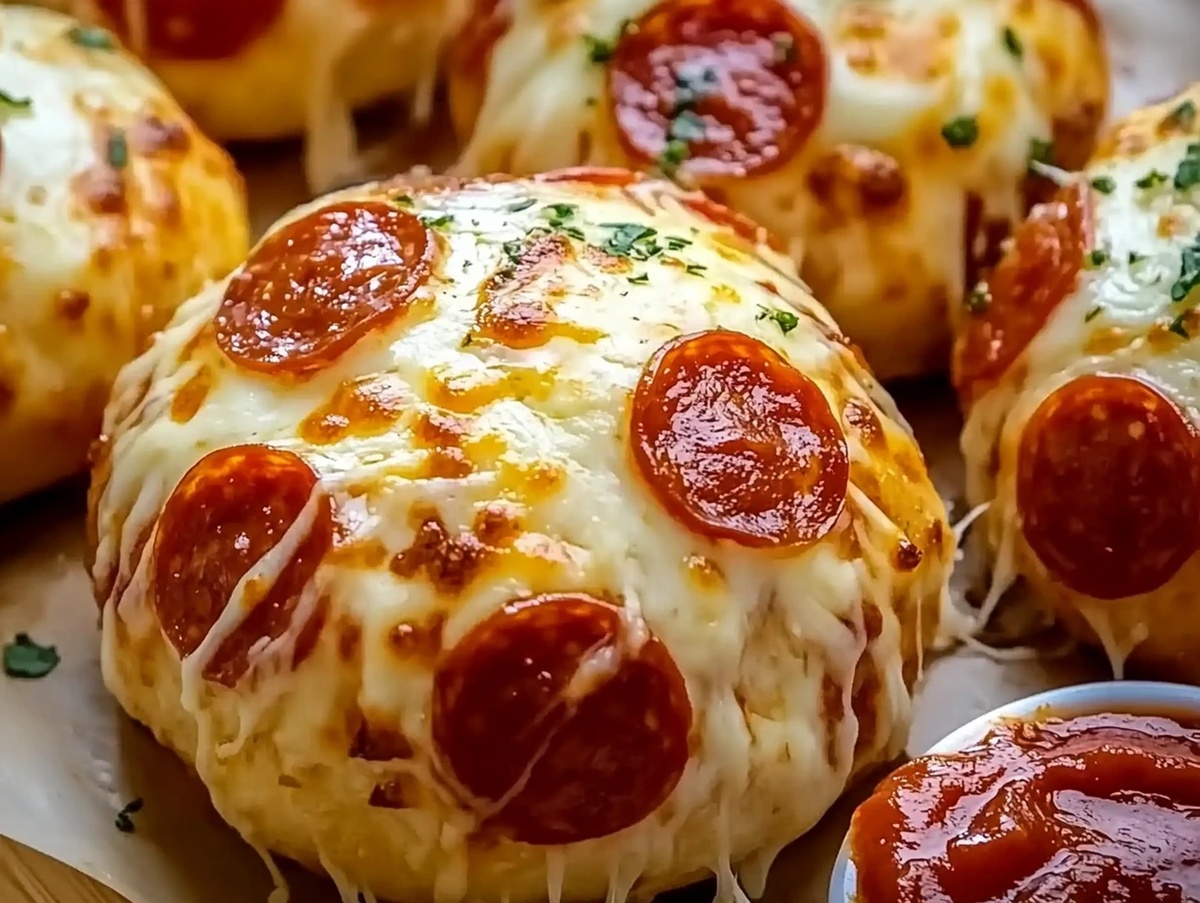
Melted mozzarella mingles perfectly with zesty pepperoni inside crispy dough pockets.
Compact and portable, these little flavor explosions make snacking pure magic.
Crisp edges give way to a molten center packed with savory ingredients.
Each bite delivers a satisfying crunch that captures classic pizza essence.
Homemade comfort doesn’t get more delicious than these handheld treats.
You’ll want to whip up a batch for game day, movie night, or whenever hunger strikes.
Grab some ingredients and let’s create something seriously scrumptious!
How To Store Pepperoni Pizza Bombs For Freshness
FAQs
The key ingredients are refrigerated biscuit dough, mozzarella cheese, mini pepperoni slices, melted butter, garlic powder, and Italian seasoning.
While store-bought biscuit dough works best for convenience, you can use homemade dough if it’s similar in texture and thickness to refrigerated biscuits.
Pinch the dough edges tightly and roll into a smooth ball, ensuring no gaps or openings to keep the cheese and pepperoni inside.
Pepperoni Pizza Bombs That Explode With Flavor
Ingredients To Make Pepperoni Pizza Bombs
Main Pizza Ingredients:Seasoning and Topping Ingredients:Serving Accompaniment:Easy Steps To Bake Pepperoni Pizza Bombs

Step 1: Prepare the Oven
Warm up your oven to 375°F. Grab a baking sheet and line it with parchment paper or give it a light spray of cooking oil to prevent sticking.
Step 2: Create Flavor-Packed Butter Glaze
Melt some butter and mix in garlic powder and Italian herbs. This magical mixture will give your pizza bombs an extra burst of deliciousness.
Step 3: Shape the Dough Pockets
Open up the biscuit container and separate each piece. Using your hands or a rolling pin, gently flatten each biscuit into a circular shape about 4 inches wide.
Sprinkle these circles with:Step 4: Craft the Pizza Bombs
Carefully gather the edges of each dough circle, hugging the cheesy pepperoni center. Pinch the top tightly to seal completely.
Roll each pocket into a smooth ball, making sure no filling can escape.
Step 5: Arrange and Glaze
Place the dough balls on the prepared baking sheet with the sealed side facing down.
Generously brush the tops with the butter herb mixture to create a golden, flavorful crust.
Step 6: Bake to Perfection
Slide the baking sheet into the oven and bake for 12-15 minutes.
Watch for a beautiful golden-brown color that signals they’re ready to devour.
Step 7: Serve and Enjoy
Pull the pizza bombs out of the oven and let them cool for a few minutes.
Grab some marinara or pizza sauce for dipping, and get ready for a taste explosion!
Pro Tips To Nail Pepperoni Pizza Bombs
Flavor Twists To Try On Pepperoni Pizza Bombs
Best Pairings To Serve With Pepperoni Pizza Bombs
Serve these pizza bombs alongside a vibrant, herb-infused marinara sauce that cuts through the richness and adds a tangy punch to each bite.
Select a hoppy IPA or light lager that balances the pepperoni’s spiciness and provides a refreshing contrast to the cheesy, buttery bombs.
Create a light mixed greens salad with arugula, basil, and a simple vinaigrette to cleanse the palate between these savory, indulgent pizza bombs.
Pour a crisp, slightly acidic white wine that helps cut through the richness of the cheese and pepperoni, offering a delightful palate-cleansing experience.
Print
Pepperoni Pizza Bombs Recipe
- Total Time: 30 minutes
- Yield: 8 1x
Description
Pepperoni pizza bombs explode with cheesy, savory goodness in this irresistible handheld snack that reimagines classic Italian flavors. Melted mozzarella and spicy pepperoni nestled in golden, buttery dough make you crave another bite of this crowd-pleasing appetizer.
Ingredients
Main Ingredients:
- 1 can (8 ounces) refrigerated biscuit dough
- 3/4 cup shredded mozzarella cheese
- 1/2 cup mini pepperoni slices
Butter Topping:
- 2 tablespoons melted butter
- 1 teaspoon garlic powder
- 1 teaspoon Italian seasoning
Optional Add-Ins:
- Marinara or pizza sauce
- Crushed red pepper flakes
- Chopped black olives
- Chopped mushrooms
- Chopped green peppers
Instructions
- Prepare the oven environment by heating to 375F (190C) and lining a baking sheet with parchment paper or applying a light cooking spray coating.
- Create a savory butter glaze by blending melted butter with garlic powder and Italian seasoning, then set aside for later application.
- Separate each biscuit dough piece and gently transform into a 4-inch circular shape using manual pressing or a rolling tool.
- Position shredded mozzarella cheese and miniature pepperoni slices centrally within each dough circle.
- Carefully encase the filling by lifting dough edges upward, meticulously sealing the top to prevent leakage.
- Smoothly roll the filled dough into compact spheres, ensuring complete closure with no visible openings.
- Arrange the formed dough balls with sealed side facing downward on the prepared baking sheet.
- Generously brush the exterior with prepared butter mixture to enhance flavor and promote golden-brown coloration.
- Roast in the preheated oven for 12-15 minutes until achieving a rich, golden exterior and confirming internal doneness.
- Allow pizza bombs to rest briefly after removing from oven, then serve alongside marinara or pizza sauce for optimal enjoyment.
Notes
- Customize the dough by using gluten-free biscuits for a celiac-friendly version that doesn’t compromise on taste or texture.
- Experiment with different cheese combinations like adding cheddar or pepper jack for a more complex flavor profile that elevates the classic pepperoni pizza bomb.
- Make ahead and freeze unbaked pizza bombs for quick weeknight meals by storing them in an airtight container with parchment paper between layers to prevent sticking.
- Create vegetarian alternatives by replacing pepperoni with diced bell peppers, mushrooms, or plant-based pepperoni for a meat-free option that’s equally delicious.
- Prep Time: 15 minutes
- Cook Time: 15 minutes
- Category: Lunch, Dinner, Appetizer, Snacks
- Method: Baking
- Cuisine: Italian
Nutrition
- Serving Size: 8
- Calories: 205 kcal
- Sugar: 1 g
- Sodium: 420 mg
- Fat: 14 g
- Saturated Fat: 6 g
- Unsaturated Fat: 7 g
- Trans Fat: 0.2 g
- Carbohydrates: 12 g
- Fiber: 0.5 g
- Protein: 8 g
- Cholesterol: 30 mg
Mike Reynolds
Founder & Recipe Developer
Expertise
Farm-to-table cuisine, Seasonal recipe development, Sustainable cooking techniques, Food photography
Education
Asheville-Buncombe Technical Community College (A-B Tech)
Associate Degree in Culinary Arts
Mike studied culinary arts with a strong focus on farm-to-table principles and sustainable cooking. His training emphasized the importance of fresh, local ingredients and environmentally responsible practices in the kitchen.
Mike’s food journey began deep in the Blue Ridge Mountains, where weekends at farmers’ markets and home-cooked meals sparked a lifelong obsession with simple, seasonal eating.
After earning his Associate Degree in Culinary Arts from Asheville-Buncombe Technical Community College, he set out to bring farm-to-table cooking into everyday kitchens, without the fuss.
Mike’s philosophy is all about keeping it fresh, unfussy, and full of heart. When he’s not crafting new single-serving recipes, he’s hiking mountain trails, chatting with local farmers, or experimenting with wild ingredients in his backyard kitchen.