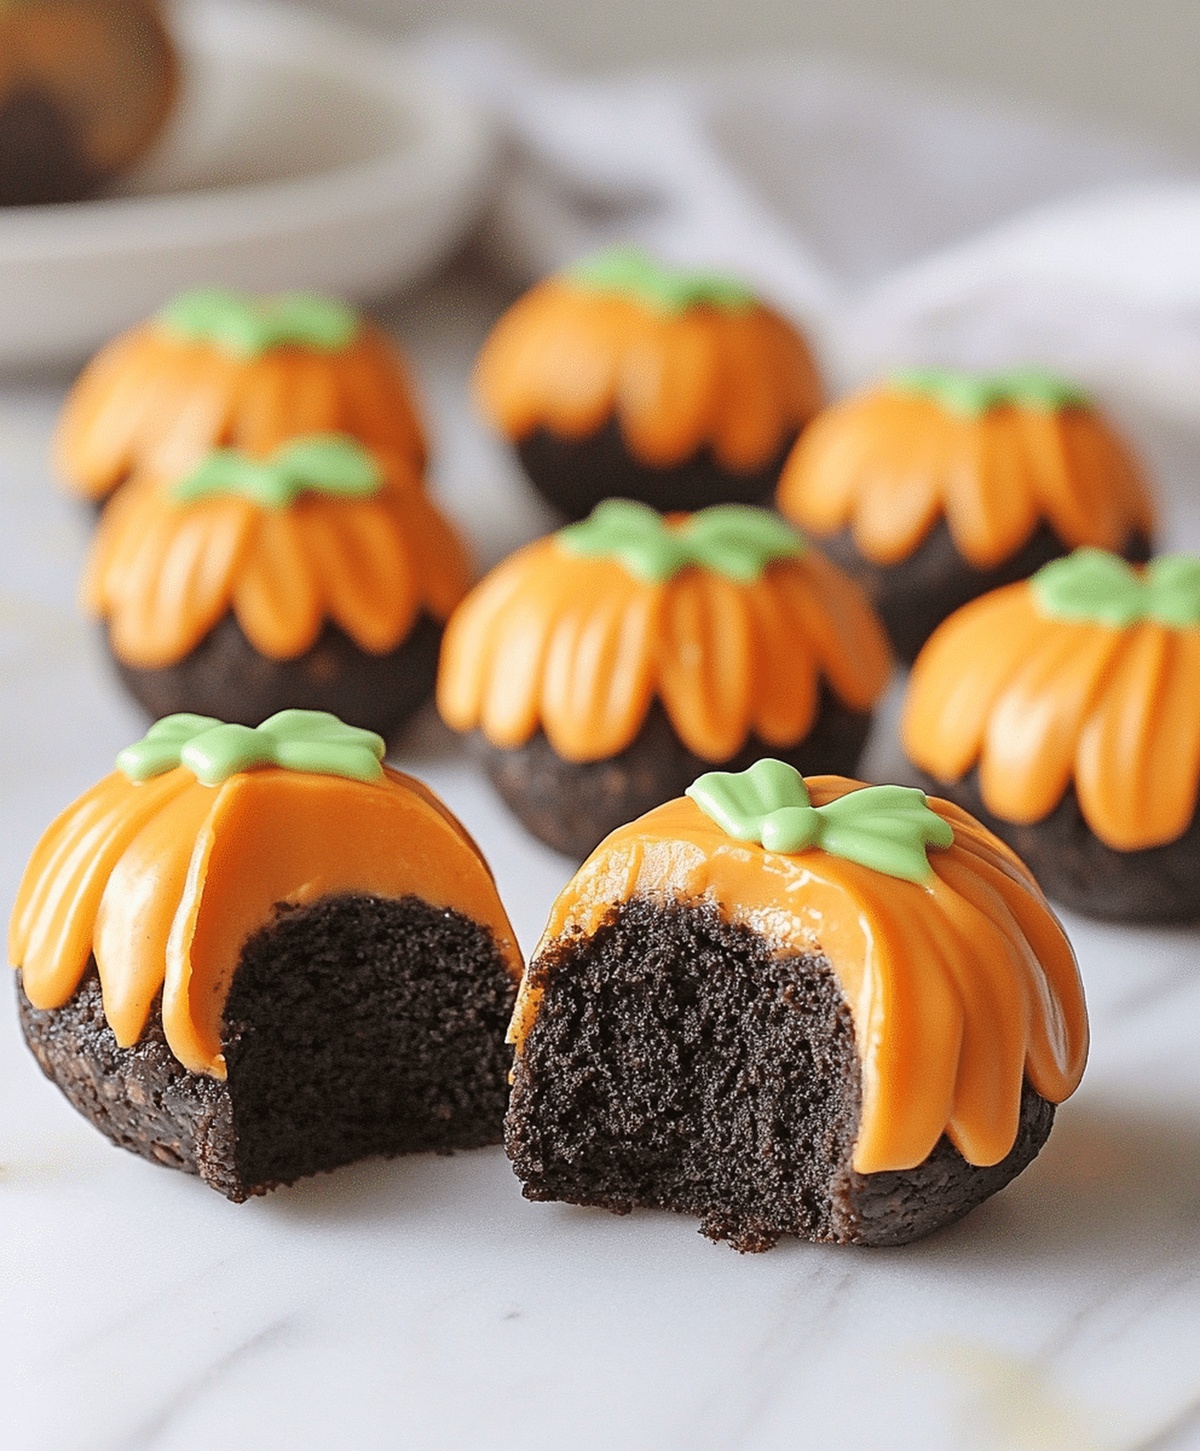
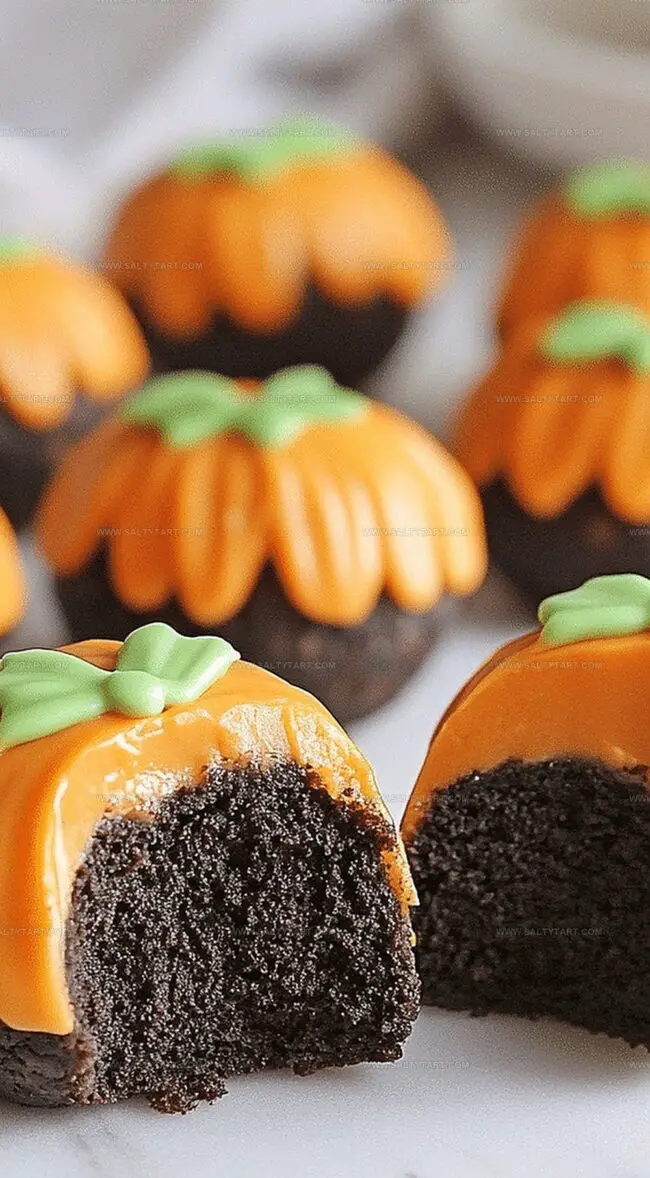
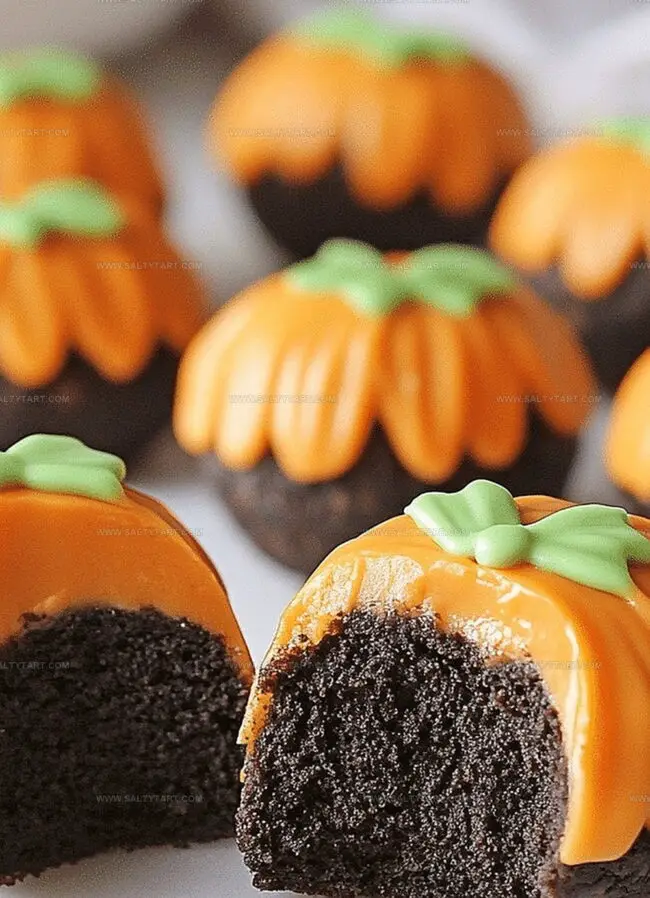
Fall’s Coziest Treat: Pumpkin Oreo Balls Recipe For Sweet Snacking
Creamy pumpkin Oreo balls burst with autumn’s sweetest whispers of comfort and nostalgia.
Crushed cookies blend seamlessly with rich cream cheese and warm spices.
Every bite promises a decadent moment of pure indulgence.
Seasonal flavors dance across your palate, creating memories of cozy gatherings.
Minimal ingredients and simple steps make this treat accessible to even novice bakers.
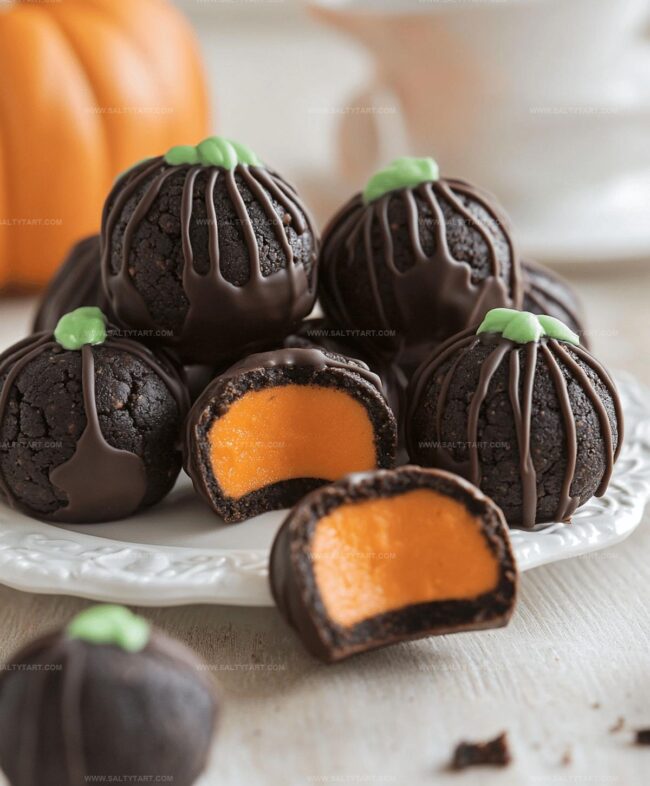
Chocolate coating adds a luxurious finish that turns these delightful orbs into an irresistible dessert.
Why wait?
Roll up your sleeves and start crafting these irresistible pumpkin treasures.
Pumpkin Oreo Balls – Fall Treat Worth Sharing
Pumpkin Oreo Balls Ingredient Lineup
For the Base:For the Coating:For the Garnish:Steps to Prepare Pumpkin Oreo Balls
Step 1: Pulverize Oreo Cookies
Grab your food processor or a sealed plastic bag and a rolling pin. Crush the Oreo cookies until they become fine, sandy crumbs.
Ensure no large chunks remain for a smooth texture.
Step 2: Blend Creamy Mixture
In a mixing bowl, combine the crushed Oreos with soft cream cheese and warm pumpkin spice.
Mix thoroughly until the ingredients form a consistent, moldable mixture.
Step 3: Shape Delightful Balls
Use your hands to roll the mixture into small, uniform bite-sized balls.
Gently place each ball on a parchment-lined baking sheet, ensuring they don’t touch.
Step 4: Quick Freeze Preparation
Transfer the baking sheet to the freezer.
Allow the balls to chill for 15-20 minutes, which helps them firm up and makes coating easier.
Step 5: Melt Chocolate Coating
Warm the white chocolate using a double boiler or microwave.
For a festive touch, stir in a few drops of orange food coloring to create a pumpkin-inspired look.
Step 6: Dip and Cover
Remove the chilled balls from the freezer.
Carefully dip each ball into the melted white chocolate, ensuring complete coverage. Gently tap off excess chocolate.
Step 7: Add Decorative Touches
Before the chocolate sets, sprinkle crushed Oreos or colorful Halloween-themed sprinkles on top for extra flair and texture.
Step 8: Final Chill and Serve
Return the decorated balls to the refrigerator for 15 minutes to allow the chocolate coating to completely harden.
Serve and enjoy these delectable pumpkin Oreo balls at your next gathering!
Pumpkin Oreo Balls – Little Tips
Pumpkin Oreo Balls – Creative Variations
Serve Pumpkin Oreo Balls at Parties
Keep Pumpkin Oreo Balls for Later Enjoyment
FAQs
Ensure the balls are thoroughly chilled and use slightly tempered chocolate at the right consistency. Keep the chocolate warm but not too hot, and work quickly when coating.
Yes, you can prepare them up to 3 days in advance. Store in an airtight container in the refrigerator until ready to serve.
Create a substitute by mixing ground cinnamon, nutmeg, ginger, and allspice in equal proportions. This will give a similar warm, seasonal flavor to your Oreo balls.
Print
Pumpkin Oreo Balls Recipe
- Total Time: 20 minutes
- Yield: 24 1x
Description
Indulgent pumpkin oreo balls bring autumn’s warmth to classic cookie truffles. Sweet spheres blend creamy pumpkin spice with crushed cookies, creating irresistible bites you’ll crave all season long.
Ingredients
- 1 package oreo cookies (crushed)
- 8 oz (226 g) cream cheese (softened)
- 1 tsp (5 ml) pumpkin spice
- 12 oz (340 g) white chocolate (for coating)
- orange food coloring (optional)
- crushed oreos or sprinkles for topping
Instructions
- Pulverize Oreo cookies into ultrafine crumbs using a food processor or by crushing within a sealed plastic bag with a rolling pin.
- Blend crushed Oreos with softened cream cheese and pumpkin spice seasoning until the mixture forms a uniform, cohesive texture.
- Shape the mixture into compact, bite-sized spheres approximately 1-inch in diameter, arranging them neatly on a parchment-lined baking tray.
- Refrigerate the formed balls for 15-20 minutes to firm their structure and enhance coating adhesion.
- Gently melt white chocolate using a double boiler or microwave, stirring until smooth and glossy. Optional: Incorporate orange food coloring for a festive appearance.
- Carefully immerse each chilled ball into the melted white chocolate, ensuring complete and even coverage using a dipping fork or spoon.
- Immediately garnish with crumbled Oreo fragments or seasonal sprinkles while the chocolate coating remains wet and receptive.
- Return the decorated balls to the refrigerator for an additional 15 minutes, allowing the chocolate to solidify and create a crisp outer shell.
- Once set, transfer to a serving platter and enjoy these decadent autumnal treats at room temperature.
Notes
- Crush Oreos thoroughly to ensure a smooth, consistent texture that helps bind the mixture perfectly.
- Use room temperature cream cheese for easier mixing and a creamier consistency when blending with Oreo crumbs.
- Chill the mixture before forming balls to prevent sticky hands and create more compact, well-shaped treats.
- Try different food coloring shades to match seasonal themes or personal preferences for festive presentation.
- Prep Time: 20 minutes
- Cook Time: 0 minutes
- Category: Snacks, Desserts
- Method: Chilling
- Cuisine: American
Nutrition
- Serving Size: 24
- Calories: 138
- Sugar: 12 g
- Sodium: 69 mg
- Fat: 8 g
- Saturated Fat: 5 g
- Unsaturated Fat: 2 g
- Trans Fat: 0 g
- Carbohydrates: 16 g
- Fiber: 1 g
- Protein: 1 g
- Cholesterol: 15 mg
Jess Martinez
Contributing Recipe Writer & Nutrition Consultant
Expertise
Southwestern and Latin American cooking, Nutritional analysis and healthy recipe planning, Cultural food traditions, Modifying traditional dishes for better health
Education
Santa Fe Community College
Certificate in Culinary Arts
Focused on mastering the flavors and cooking methods of traditional Southwestern cuisine.
Jess’s love for bold, homegrown flavors led her straight into the world of Southwestern cooking and cultural nutrition.
After completing her Certificate in Culinary Arts at Santa Fe Community College, she made it her mission to show that good-for-you food can still taste incredible.
At saltytart.com, Jess shares vibrant, health-conscious recipes with roots in tradition but a fresh, modern twist. When she’s not testing new recipes, you’ll find her at local growers’ markets, tending her herb garden, or digging into food history books.