Irresistible Raspberry Zinger Poke Cake Recipe for Sweet Moments
Sweet summer memories bloom with this raspberry zinger poke cake that brings a burst of nostalgia to every bite.
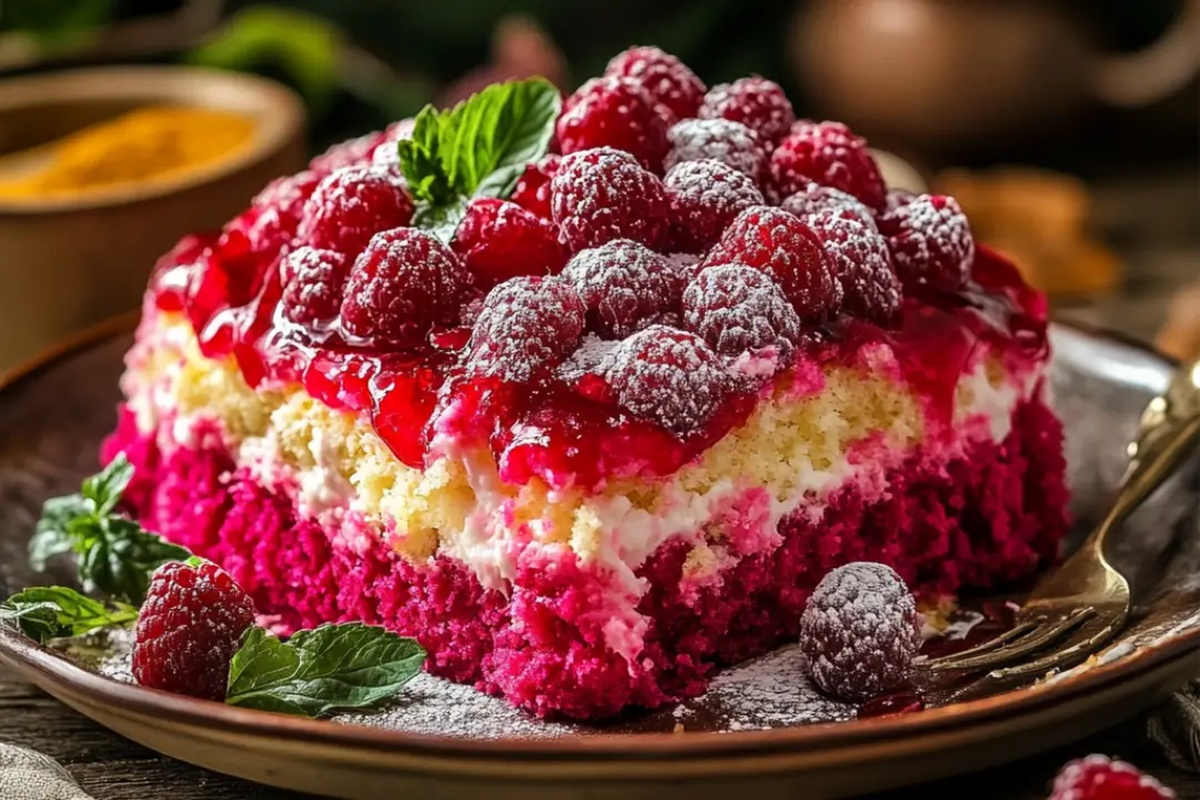
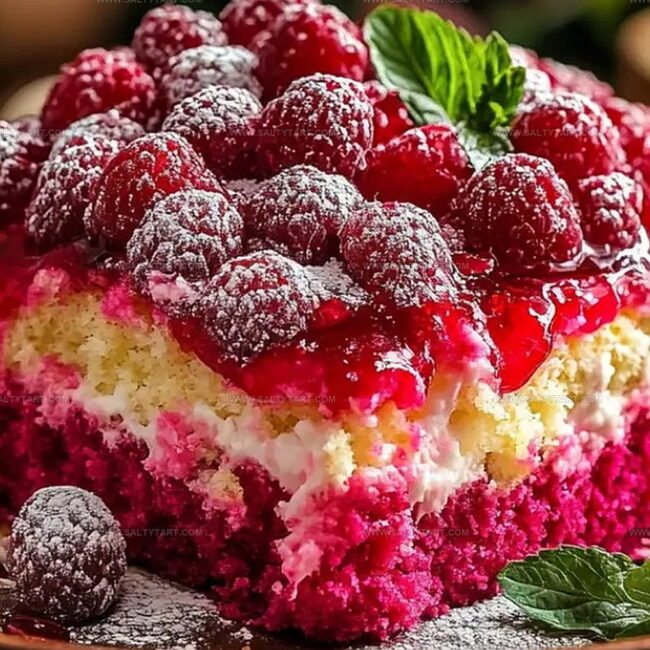
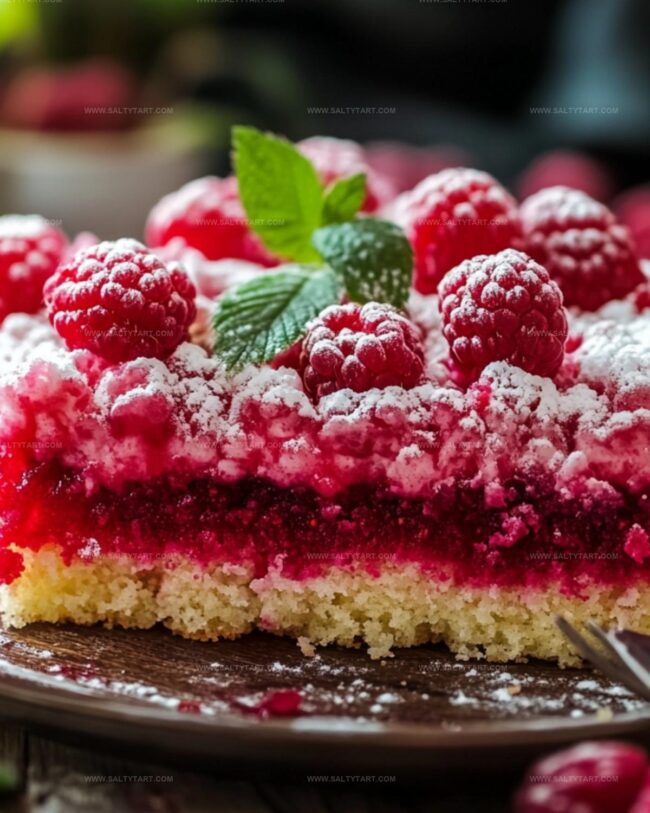
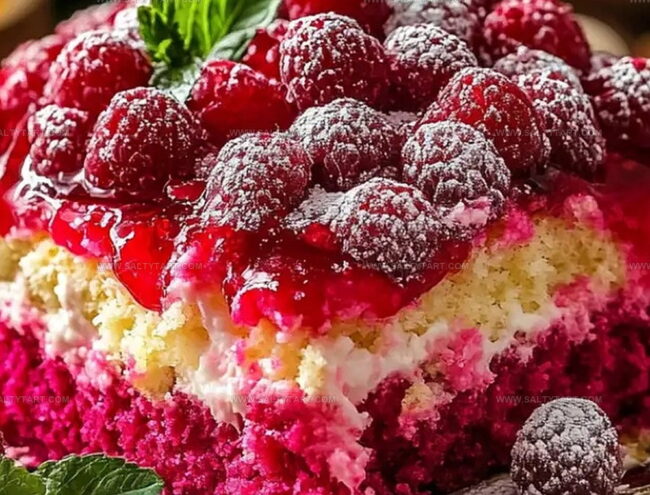
Layers of moist cake infused with tangy raspberry flavor create a delightful dessert that feels both comforting and exciting.
Soft, tender crumbs soak up a vibrant raspberry glaze, making each slice a celebration of fruity goodness.
The cake signature holes allow the bright raspberry essence to seep deeply into every morsel.
Creamy frosting adds a luscious finish that balances the cake playful texture and zesty notes.
Topped with fresh raspberries, this dessert promises to be the star of any gathering.
You’ll want to savor every single delectable forkful of this irresistible treat.
Raspberry Zinger Poke Cake: What Sets It Apart
Ingredients Needed for Raspberry Zinger Poke Cake
Main Ingredients:
Cake Base:Gelatin Layer:Topping Ingredients:How to Assemble Raspberry Zinger Poke Cake
Step 1: Mix Cake Batter
Follow the cake mix box directions carefully. Use a standard box of white or vanilla cake mix.
Grease a 9×13-inch baking pan thoroughly. Pour the mixed batter into the pan and bake according to package instructions.
Allow the cake to cool completely inside the pan.
Step 2: Create Raspberry Gelatin
Dissolve the raspberry gelatin powder in boiling water.
Stir until completely blended. Add cold water to help cool down the mixture and create the perfect consistency.
Step 3: Create Cake Holes
Use a wooden spoon handle or fork to poke deep holes across the entire cake surface. Make sure holes reach all the way to the bottom of the cake.
Space holes evenly for consistent gelatin distribution.
Step 4: Pour Gelatin Mixture
Slowly drizzle the prepared gelatin over the cake.
Ensure the liquid fills every single hole. This creates those signature moist pockets that make poke cakes amazing.
Step 5: Chill and Set
Refrigerate the cake for 2-3 hours. The gelatin needs time to fully set and absorb into the cake layers.
This waiting period helps develop rich raspberry flavor.
Step 6: Add Delicious Toppings
Spread a smooth layer of whipped cream over the chilled cake.
Sprinkle toasted coconut shreds evenly across the top. Arrange fresh raspberries as a beautiful garnish.
Step 7: Serve and Enjoy
Cut the cake into square servings. Serve chilled for maximum flavor and texture.
This dessert is perfect for summer gatherings or family celebrations.
Useful Advice on Raspberry Zinger Poke Cake
Ways to Add Variety to Raspberry Zinger Poke Cake
Complementary Dishes for Raspberry Zinger Poke Cake
Keeping Raspberry Zinger Poke Cake Fresh
FAQs
A poke cake is a dessert where holes are made in a baked cake and then filled with liquid or gelatin to create a moist, flavorful treat that absorbs the added liquid throughout the cake.
Fresh raspberries work best for topping the cake. If using frozen raspberries, thaw and drain them completely before adding to prevent excess moisture.
Make sure the cake is completely cooled before poking holes and adding gelatin. Use a fork or wooden spoon handle to create deep, even holes that reach the bottom of the cake.
Print
Raspberry Zinger Poke Cake Recipe
- Total Time: 55 minutes
- Yield: 12 1x
Description
Raspberry zinger poke cake delivers a delightful twist on classic dessert magic. Sweet raspberry layers meld with creamy textures, promising pure indulgence for dessert enthusiasts craving something extraordinary.
Ingredients
Main Cake Ingredients:
- 1 box white cake mix
- Box mix additional ingredients (as listed on the box)
- 1 package (3 ounces/85 grams) raspberry gelatin
- 1 cup boiling water
- 1/2 cup cold water
Fruit and Coconut Ingredients:
- 1 cup fresh raspberries
- 1 cup shredded coconut (toasted if desired)
Topping Ingredients:
- 1 cup whipped cream or whipped topping
Instructions
- Craft the cake foundation by following the boxed mix instructions, transferring the batter into a greased 9×13-inch pan. Bake according to package directions at recommended temperature, typically 350°F.
- Allow the cake to completely cool inside the baking pan, ensuring no residual warmth remains.
- Prepare raspberry gelatin by dissolving the powder in boiling water, stirring until fully integrated. Incorporate cold water to temper the mixture’s temperature.
- Using a wooden spoon handle or fork, puncture uniform holes across the entire cake surface, ensuring penetration to the bottom layer.
- Gradually cascade the prepared gelatin over the cake, guiding the liquid into each created cavity. Ensure comprehensive coverage.
- Refrigerate the cake for 2-3 hours, allowing the gelatin to solidify and permeate the cake’s interior.
- Once gelatin sets, generously spread whipped cream or topping across the cake’s surface, creating a smooth, even layer.
- Sprinkle toasted coconut flakes uniformly over the whipped topping, providing textural contrast.
- Artfully arrange fresh raspberries atop the cake for visual appeal and additional flavor dimension.
- Slice into neat squares and serve thoroughly chilled, presenting a refreshing and decadent dessert experience.
Notes
- Allow the cake to cool completely before poking holes to ensure the gelatin absorbs properly without making the cake mushy.
- Swap raspberry gelatin for other flavors like strawberry or cherry to create unique variations that match your taste preferences.
- Toast coconut beforehand to deepen its nutty flavor and add a delightful crunch that contrasts with the soft cake and creamy topping.
- Use sugar-free gelatin and low-fat whipped topping for a lighter version, or opt for gluten-free cake mix to accommodate different dietary needs.
- Prep Time: 20 minutes
- Cook Time: 35 minutes
- Category: Desserts
- Method: Baking
- Cuisine: American
Nutrition
- Serving Size: 12
- Calories: 240 kcal
- Sugar: 25 g
- Sodium: 220 mg
- Fat: 10 g
- Saturated Fat: 7 g
- Unsaturated Fat: 2 g
- Trans Fat: 0.1 g
- Carbohydrates: 35 g
- Fiber: 1.5 g
- Protein: 2 g
- Cholesterol: 30 mg
Jess Martinez
Contributing Recipe Writer & Nutrition Consultant
Expertise
Southwestern and Latin American cooking, Nutritional analysis and healthy recipe planning, Cultural food traditions, Modifying traditional dishes for better health
Education
Santa Fe Community College
Certificate in Culinary Arts
Focused on mastering the flavors and cooking methods of traditional Southwestern cuisine.
Jess’s love for bold, homegrown flavors led her straight into the world of Southwestern cooking and cultural nutrition.
After completing her Certificate in Culinary Arts at Santa Fe Community College, she made it her mission to show that good-for-you food can still taste incredible.
At saltytart.com, Jess shares vibrant, health-conscious recipes with roots in tradition but a fresh, modern twist. When she’s not testing new recipes, you’ll find her at local growers’ markets, tending her herb garden, or digging into food history books.