
Irresistible Red Velvet Cheesecake Brownies Recipe for Sweet Tooths
Decadent red velvet cheesecake brownies dance between rich chocolate and tangy cream cheese, creating a dessert that steals every conversation.
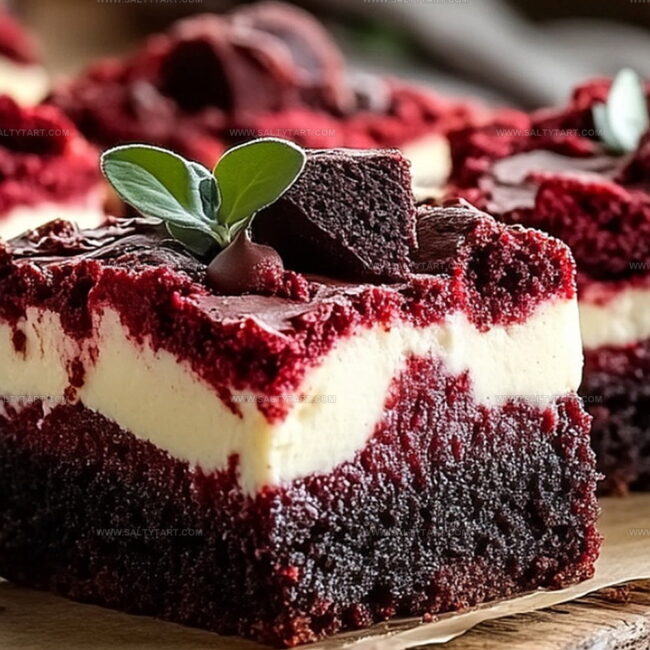
Layers of deep crimson cake mingle with smooth, velvety cheesecake swirls that promise pure indulgence.
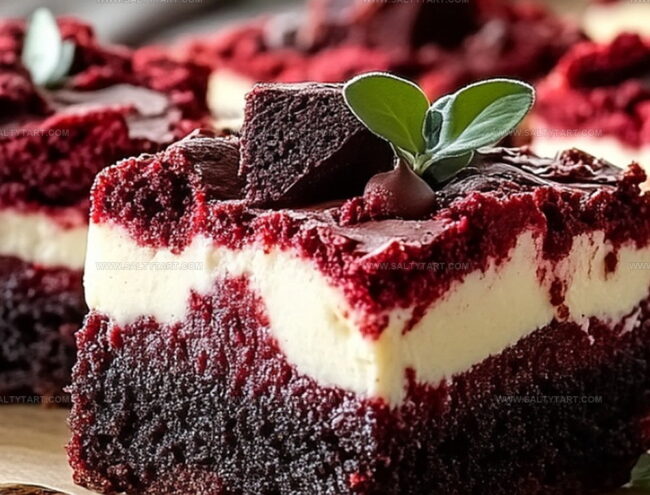
Each bite tells a story of luxurious textures and intense flavors waiting to unfold.
The contrast between fudgy brownie and silky cheesecake makes this treat irresistibly tempting.
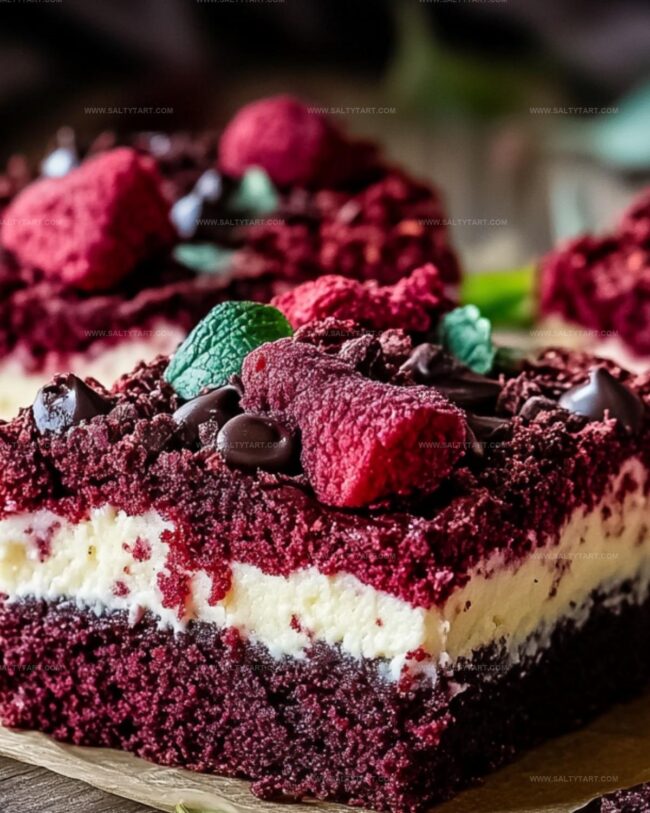
Chocolate lovers will swoon over the intense cocoa notes balanced by creamy cheese.
The vibrant red hue adds a dramatic visual appeal that makes these brownies impossible to ignore.
You won’t be able to resist cutting a generous slice and savoring every delectable moment.
Let’s transform your dessert game with this showstopping recipe that guarantees to impress.
Red Velvet Cheesecake Brownies Everyone Will Love
Red Velvet Cheesecake Brownie Ingredient List
Base Ingredients:Dry Ingredients:Cheesecake Layer Ingredients:Coloring Ingredient:Steps to Bake Red Velvet Cheesecake Brownies
Step 1: Prepare Baking Station
Warm up the oven to 350F. Line an 8×8-inch baking pan with parchment paper or lightly coat with cooking spray.
This ensures easy removal and prevents sticking.
Step 2: Create Brownie Base
In a large mixing bowl, combine these ingredients:Whisk everything until smooth and vibrant red.
Sift in:Fold dry ingredients gently into wet mixture until just combined. Pour about three-quarters of the batter into the prepared pan, spreading evenly with a spatula.
Keep remaining batter for decorative swirls.
Step 3: Whip Cheesecake Filling
In a separate bowl, blend:Beat until silky smooth and creamy.
Spread this luxurious mixture evenly over the red velvet layer.
Step 4: Create Marbled Magic
Drop spoonfuls of reserved red velvet batter across the cheesecake layer.
Use a toothpick or knife to gently swirl and create beautiful marble patterns.
Step 5: Bake to Perfection
Slide the pan into the preheated oven.
Bake for 30-35 minutes until edges look set and a toothpick inserted comes out with just a few moist crumbs.
Step 6: Cool and Slice
Remove from oven and let brownies cool completely in the pan.
Once cooled, lift out using parchment paper. Slice into squares or bars for a decadent dessert.
Good Notes for Cheesecake Brownie Lovers
Fun Swaps for Red Velvet Cheesecake Brownies
Treats to Serve With Cheesecake Brownies
Storing Red Velvet Cheesecake Brownies Well
FAQs
The vibrant red color comes from red food coloring added directly to the brownie batter. The traditional recipe uses a small amount of cocoa powder, which helps enhance the red hue and provides a subtle chocolate flavor.
Look for set edges and a toothpick that comes out with a few moist crumbs when inserted into the center. This indicates the brownies are cooked through but still deliciously fudgy and not overbaked.
Absolutely! You can use a hand mixer or even mix the ingredients by hand with a whisk. Just ensure ingredients are well combined and cream cheese is smoothly beaten for the cheesecake layer.
Print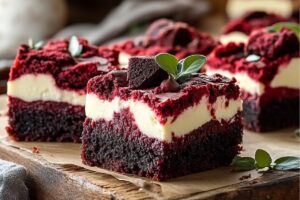
Red Velvet Cheesecake Brownies Recipe
- Total Time: 55 minutes
- Yield: 9 1x
Description
Indulgent red velvet cheesecake brownies blend rich chocolate and creamy cheesecake into one irresistible dessert. Layers of velvety goodness promise a delightful experience that will leave you craving more with each luxurious bite.
Ingredients
Main Ingredients:
- 2 large eggs
- 1 cup granulated sugar
- 3/4 cup all-purpose flour
- 1/4 cup unsweetened cocoa powder
- 1/2 cup unsalted butter, melted
Coloring and Flavoring:
- 1 tablespoon red food coloring
- 1 teaspoon vanilla extract
Additional Ingredients:
- 1/4 teaspoon salt
Instructions
- Prepare the baking workspace by positioning an oven rack in the center and heating to 350°F. Cover an 8-inch square pan with parchment paper or apply a thin layer of cooking spray.
- Create the red velvet base by whisking melted butter and sugar until thoroughly blended. Incorporate eggs, vanilla, and red food coloring, mixing until uniform in color and texture.
- Sift cocoa powder, flour, and salt into the wet mixture. Fold gently until ingredients are just combined, avoiding overmixing to maintain a tender texture.
- Transfer approximately 75% of the red velvet batter into the prepared pan, spreading evenly with a spatula. Reserve remaining batter for decorative swirling.
- Prepare the cheesecake layer by beating cream cheese, sugar, egg, and vanilla until silky smooth and free of lumps. Distribute this mixture uniformly over the red velvet foundation.
- Add visual interest by dropping small spoonfuls of reserved red velvet batter across the cheesecake surface. Use a toothpick to create elegant marbled patterns by dragging the batters together.
- Bake for 30-35 minutes, monitoring until edges appear set and center shows slight moisture when tested with a toothpick. Remove from oven and allow complete cooling within the pan.
- Once cooled, lift the entire dessert from the pan using parchment paper edges. Slice into precise squares or rectangular bars for serving.
Notes
- Chill cream cheese at room temperature for 30 minutes before mixing to ensure smooth, lump-free texture without overmixing.
- Use gel food coloring for more vibrant red color and prevent watery batter consistency.
- For gluten-free version, substitute all-purpose flour with almond or gluten-free flour blend and reduce liquid slightly.
- Prevent brownie edges from burning by placing a sheet of aluminum foil loosely over pan during last 10 minutes of baking.
- Prep Time: 20 minutes
- Cook Time: 35 minutes
- Category: Desserts, Snacks
- Method: Baking
- Cuisine: American
Nutrition
- Serving Size: 9
- Calories: 174 kcal
- Sugar: 20 g
- Sodium: 40 mg
- Fat: 8 g
- Saturated Fat: 5 g
- Unsaturated Fat: 3 g
- Trans Fat: 0.1 g
- Carbohydrates: 23 g
- Fiber: 1 g
- Protein: 2 g
- Cholesterol: 37 mg
Jess Martinez
Contributing Recipe Writer & Nutrition Consultant
Expertise
Southwestern and Latin American cooking, Nutritional analysis and healthy recipe planning, Cultural food traditions, Modifying traditional dishes for better health
Education
Santa Fe Community College
Certificate in Culinary Arts
Focused on mastering the flavors and cooking methods of traditional Southwestern cuisine.
Jess’s love for bold, homegrown flavors led her straight into the world of Southwestern cooking and cultural nutrition.
After completing her Certificate in Culinary Arts at Santa Fe Community College, she made it her mission to show that good-for-you food can still taste incredible.
At saltytart.com, Jess shares vibrant, health-conscious recipes with roots in tradition but a fresh, modern twist. When she’s not testing new recipes, you’ll find her at local growers’ markets, tending her herb garden, or digging into food history books.