
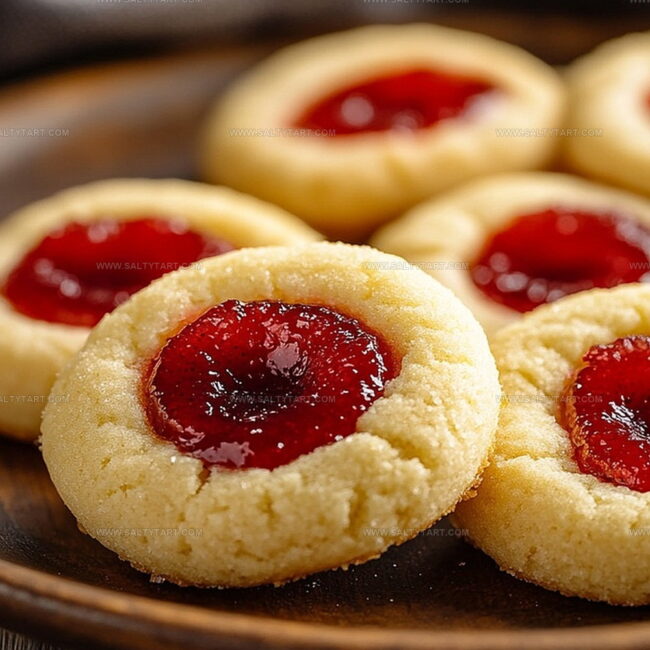
Buttery Strawberry Jam Thumbprint Cookies Recipe: Sweet Bliss
Baking soft strawberry jam thumbprint cookies always brings a smile to my face.
Sweet memories flood back from childhood kitchen adventures.
Grandma’s classic recipe inspired this delightful treat that combines buttery shortbread with vibrant fruit preserves.
Each bite promises a perfect balance of crisp cookie edges and luscious jam centers.
Delicate and elegant, these cookies make perfect gifts or afternoon snack companions.
Crumbling gently with every nibble, they’re simple enough for novice bakers yet impressive for seasoned pros.
You’ll want to clear your schedule and start mixing these irresistible morsels right away.
Reasons to Love Strawberry Jam Thumbprint Cookies
Ingredients for Strawberry Jam Thumbprint Cookies
Flour Base:Binding Ingredients:Sweet and Flavor Ingredients:Filling:How to Bake Strawberry Jam Thumbprint Cookies
Step 1: Prepare the Oven and Baking Surface
Heat the oven to 350 degrees Fahrenheit. Cover a baking sheet with parchment paper to prevent sticking and ensure easy cookie removal.
Step 2: Mix Dry Ingredients
Combine the following ingredients in a medium bowl:Whisk these ingredients thoroughly to create a smooth, well-blended dry mixture.
Step 3: Create Creamy Butter Base
In a large mixing bowl, blend softened butter with honey (or maple syrup) and vanilla extract.
Whip the mixture until it becomes light and fluffy, creating a smooth and creamy foundation for the cookies.
Step 4: Add Egg to Mixture
Crack an egg into the butter mixture and mix completely until the egg is fully incorporated and the batter looks smooth and consistent.
Step 5: Form Cookie Dough
Slowly add the dry ingredients to the wet mixture. Stir gently until a soft, pliable dough forms.
The dough should hold together without being too sticky or too dry.
Step 6: Shape Cookie Balls
Scoop out tablespoon-sized portions of dough.
Roll each portion between your palms to create smooth, round balls. Place these cookie balls evenly on the prepared baking sheet.
Step 7: Create Jam Wells
Using your thumb or the back of a spoon, press a gentle indentation into the center of each cookie ball. Make sure the wells are deep enough to hold the jam but not so deep that they cause the cookie to break.
Step 8: Fill with Strawberry Jam
Carefully spoon strawberry jam into the center of each cookie indentation. Use just enough jam to fill the well without overflowing.
Step 9: Bake to Golden Perfection
Place the cookie sheet in the preheated oven. Bake for 12-15 minutes, watching for the edges to turn a light golden brown.
This indicates the cookies are perfectly baked.
Step 10: Cool and Serve
Remove the baking sheet from the oven.
Let the cookies rest on the sheet for 5 minutes to firm up. Transfer them to a wire cooling rack to cool completely.
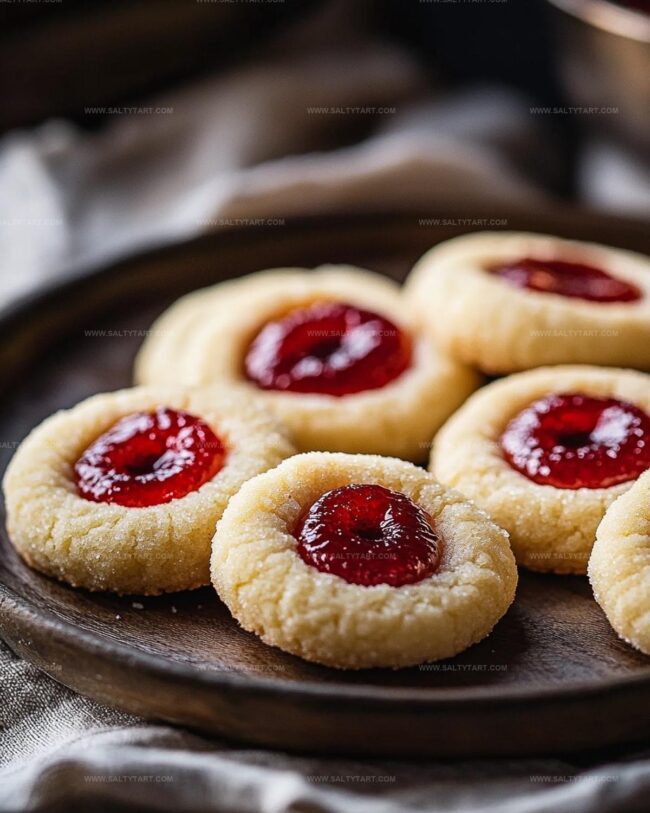
Once cooled, the strawberry jam thumbprint cookies are ready to enjoy!
Smart Tips for Jam Thumbprint Cookie Baking

Fun Twists for Strawberry Thumbprint Cookies
Pairings for Strawberry Jam Thumbprint Cookies
Pair these sweet thumbprint cookies with a chilled lavender lemonade for a refreshing contrast that complements the jam’s fruity richness.
Serve alongside a creamy chai tea latte, whose warm spices will enhance the cookie’s subtle honey and vanilla notes.
Enjoy with a light, crisp white wine like Moscato, which matches the cookie’s delicate sweetness and fruity strawberry jam center.
Match with a cold brew coffee featuring vanilla or almond undertones, creating a harmonious blend that elevates the cookie’s nutty almond flour base.
Storing Strawberry Jam Thumbprint Cookies Safely
FAQs
You can substitute all-purpose flour for whole wheat flour and replace almond flour with regular flour or gluten-free flour blend. Just keep in mind that the texture and taste might slightly change.
Make sure to use only 1/2 teaspoon of jam in each cookie indentation. Place the jam in the center and don’t let it touch the baking sheet directly. This helps prevent burning and ensures even baking.
This could happen if the butter was too soft or warm. Chill the dough for 15-20 minutes before shaping the cookies to help them maintain their shape and prevent excessive spreading.
Print
Strawberry Jam Thumbprint Cookies Recipe
- Total Time: 35 minutes
- Yield: 24 1x
Description
Sweet nostalgia meets delightful indulgence with strawberry jam thumbprint cookies, a classic treat that whispers childhood memories. Buttery, crumbly shortbread cradles a dollop of luscious strawberry preserve, inviting you to savor each tender, homemade bite.
Ingredients
Dry Ingredients:
- 1 1/2 cups whole wheat flour
- 1/2 cup almond flour
- 1/2 teaspoon baking powder
- 1/4 teaspoon salt
Wet Ingredients:
- 1/2 cup unsalted butter, softened
- 1/3 cup honey or maple syrup
- 1 large egg
- 1 teaspoon vanilla extract
Filling:
- 1/2 cup strawberry jam (sugar-free if preferred)
Instructions
- Prepare the oven environment by heating to 175C (350F) and lining a baking sheet with parchment paper for optimal cookie performance.
- Blend whole wheat flour, almond flour, baking powder, and salt in a medium bowl, creating a uniform dry mixture that will provide structure to the cookies.
- Cream butter, honey (or maple syrup), and vanilla extract in a large mixing bowl until the mixture becomes airy and smooth, developing a rich flavor base.
- Incorporate the egg thoroughly, ensuring a cohesive and smooth consistency throughout the dough.
- Gradually fold the dry ingredients into the wet mixture, gently stirring until a soft, pliable dough emerges.
- Craft uniform cookie portions by scooping tablespoon-sized dough and rolling into perfect spheres, then arranging them carefully on the prepared baking sheet.
- Create a gentle depression in the center of each dough ball using your thumb or the curved back of a spoon, forming a delicate well for the jam.
- Delicately fill each cookie’s center with strawberry jam, ensuring a precise and generous dollop that will melt during baking.
- Slide the baking sheet into the preheated oven and bake for 12-15 minutes, watching for a light golden hue developing around the cookie edges.
- Allow cookies to rest on the baking sheet for 5 minutes to stabilize, then transfer to a wire rack for complete cooling and optimal texture development.
Notes
- Add a splash of almond extract to enhance the nutty flavor from the almond flour and create a more complex taste profile.
- Chill the dough for 30 minutes before shaping to prevent spreading and maintain a more defined thumbprint shape.
- For a gluten-free version, swap whole wheat flour with a gluten-free all-purpose flour blend and ensure all ingredients are certified gluten-free.
- Experiment with different jam flavors like raspberry, apricot, or homemade preserves to personalize these delightful cookies.
- Prep Time: 20 minutes
- Cook Time: 15 minutes
- Category: Desserts, Snacks
- Method: Baking
- Cuisine: American
Nutrition
- Serving Size: 24
- Calories: 112 kcal
- Sugar: 5 g
- Sodium: 40 mg
- Fat: 6 g
- Saturated Fat: 2.5 g
- Unsaturated Fat: 3.5 g
- Trans Fat: 0 g
- Carbohydrates: 14 g
- Fiber: 2 g
- Protein: 2 g
- Cholesterol: 20 mg
Jess Martinez
Contributing Recipe Writer & Nutrition Consultant
Expertise
Southwestern and Latin American cooking, Nutritional analysis and healthy recipe planning, Cultural food traditions, Modifying traditional dishes for better health
Education
Santa Fe Community College
Certificate in Culinary Arts
Focused on mastering the flavors and cooking methods of traditional Southwestern cuisine.
Jess’s love for bold, homegrown flavors led her straight into the world of Southwestern cooking and cultural nutrition.
After completing her Certificate in Culinary Arts at Santa Fe Community College, she made it her mission to show that good-for-you food can still taste incredible.
At saltytart.com, Jess shares vibrant, health-conscious recipes with roots in tradition but a fresh, modern twist. When she’s not testing new recipes, you’ll find her at local growers’ markets, tending her herb garden, or digging into food history books.