The Best Super-Creamy Roasted Garlic Recipe (Freeze It Too)
Roasted garlic brings magical depth to super-creamy dishes with its mellow, caramelized richness.
Each golden clove develops intense, sweet complexity when slowly baked in foil.
My kitchen always smells incredible during this simple process.
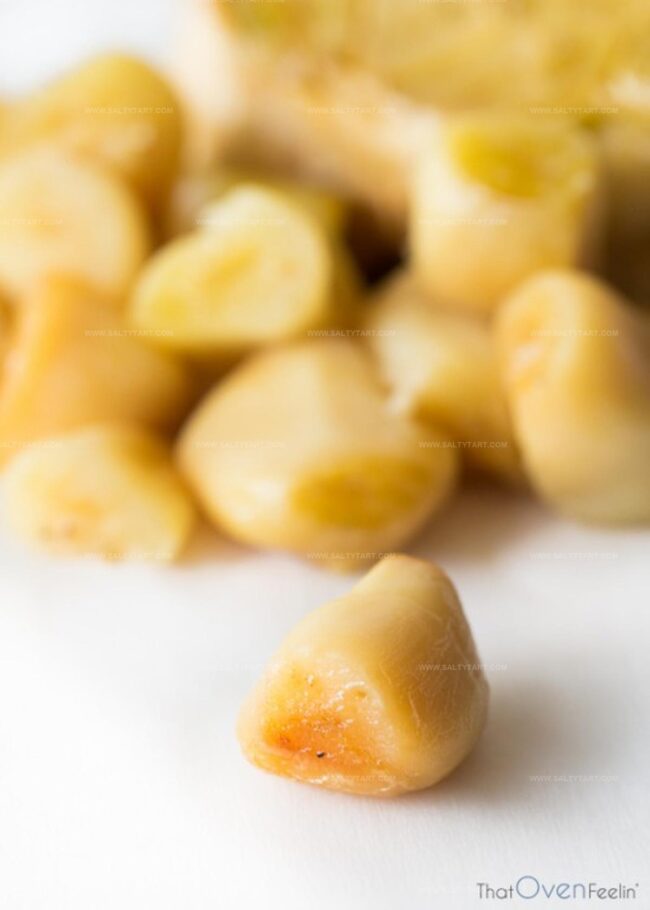
Soft, spreadable cloves emerge transformed after gentle roasting in the oven.
Storing extra batches becomes effortless when you understand freezing techniques.
Chefs and home cooks alike adore this versatile ingredient’s ability to enhance countless recipes.
One taste will convince you that roasted garlic deserves a permanent spot in your culinary arsenal.
Roasted Garlic with a Super Smooth Texture
Ingredients Needed to Make Roasted Garlic
Main Ingredients:Seasoning Ingredients:Storage Ingredients:How to Prepare Roasted Garlic Perfectly
Step 1: Warm Up the Oven
Set your oven to 375 degrees Fahrenheit, preparing it for the garlic transformation.
Step 2: Prep the Garlic Bulbs
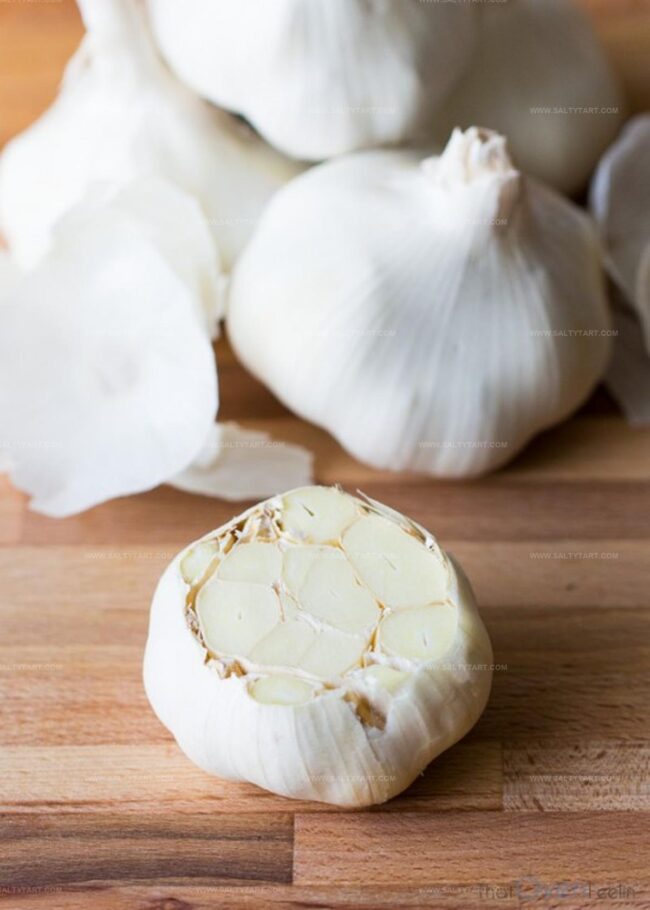
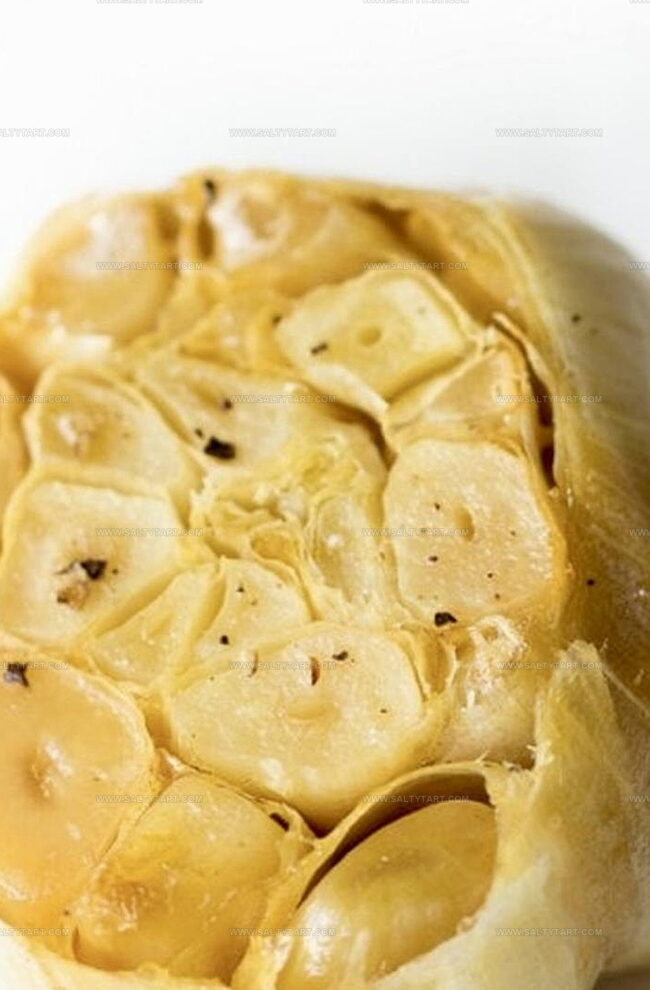
Slice off the top of each garlic bulb, exposing the inner cloves by cutting about a quarter to half inch from the peak.
Step 3: Season and Arrange
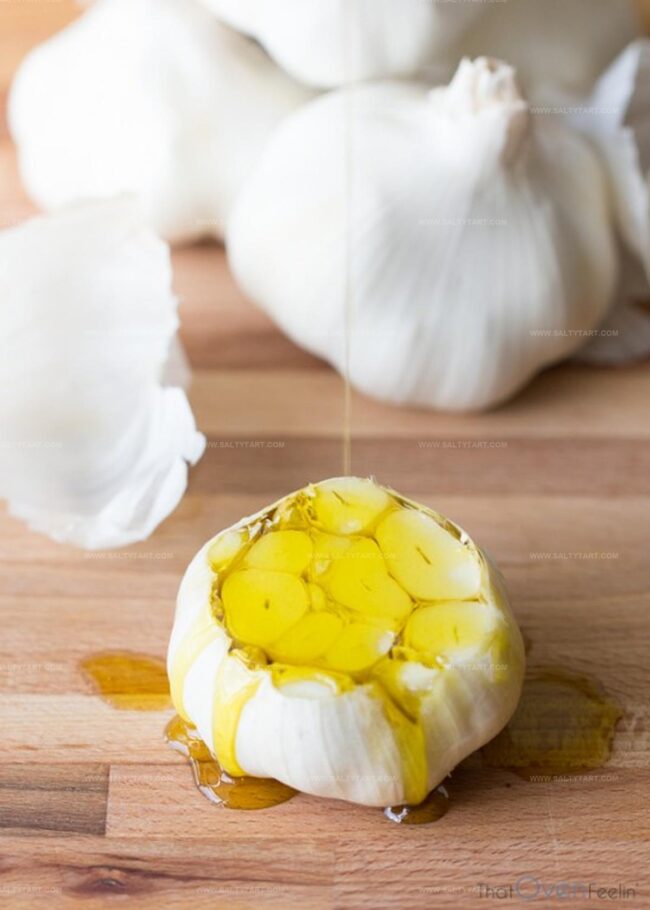
Place the garlic bulbs on a rimmed baking sheet with the cut side facing upward. Drizzle olive oil over the bulbs and sprinkle with salt and pepper to enhance their natural flavor.
Step 4: Cover and Roast
Wrap the baking sheet completely with aluminum foil, creating a cozy environment for the garlic. Bake in the preheated oven for 40 to 60 minutes, depending on the size of your bulbs.
Step 5: Check for Doneness
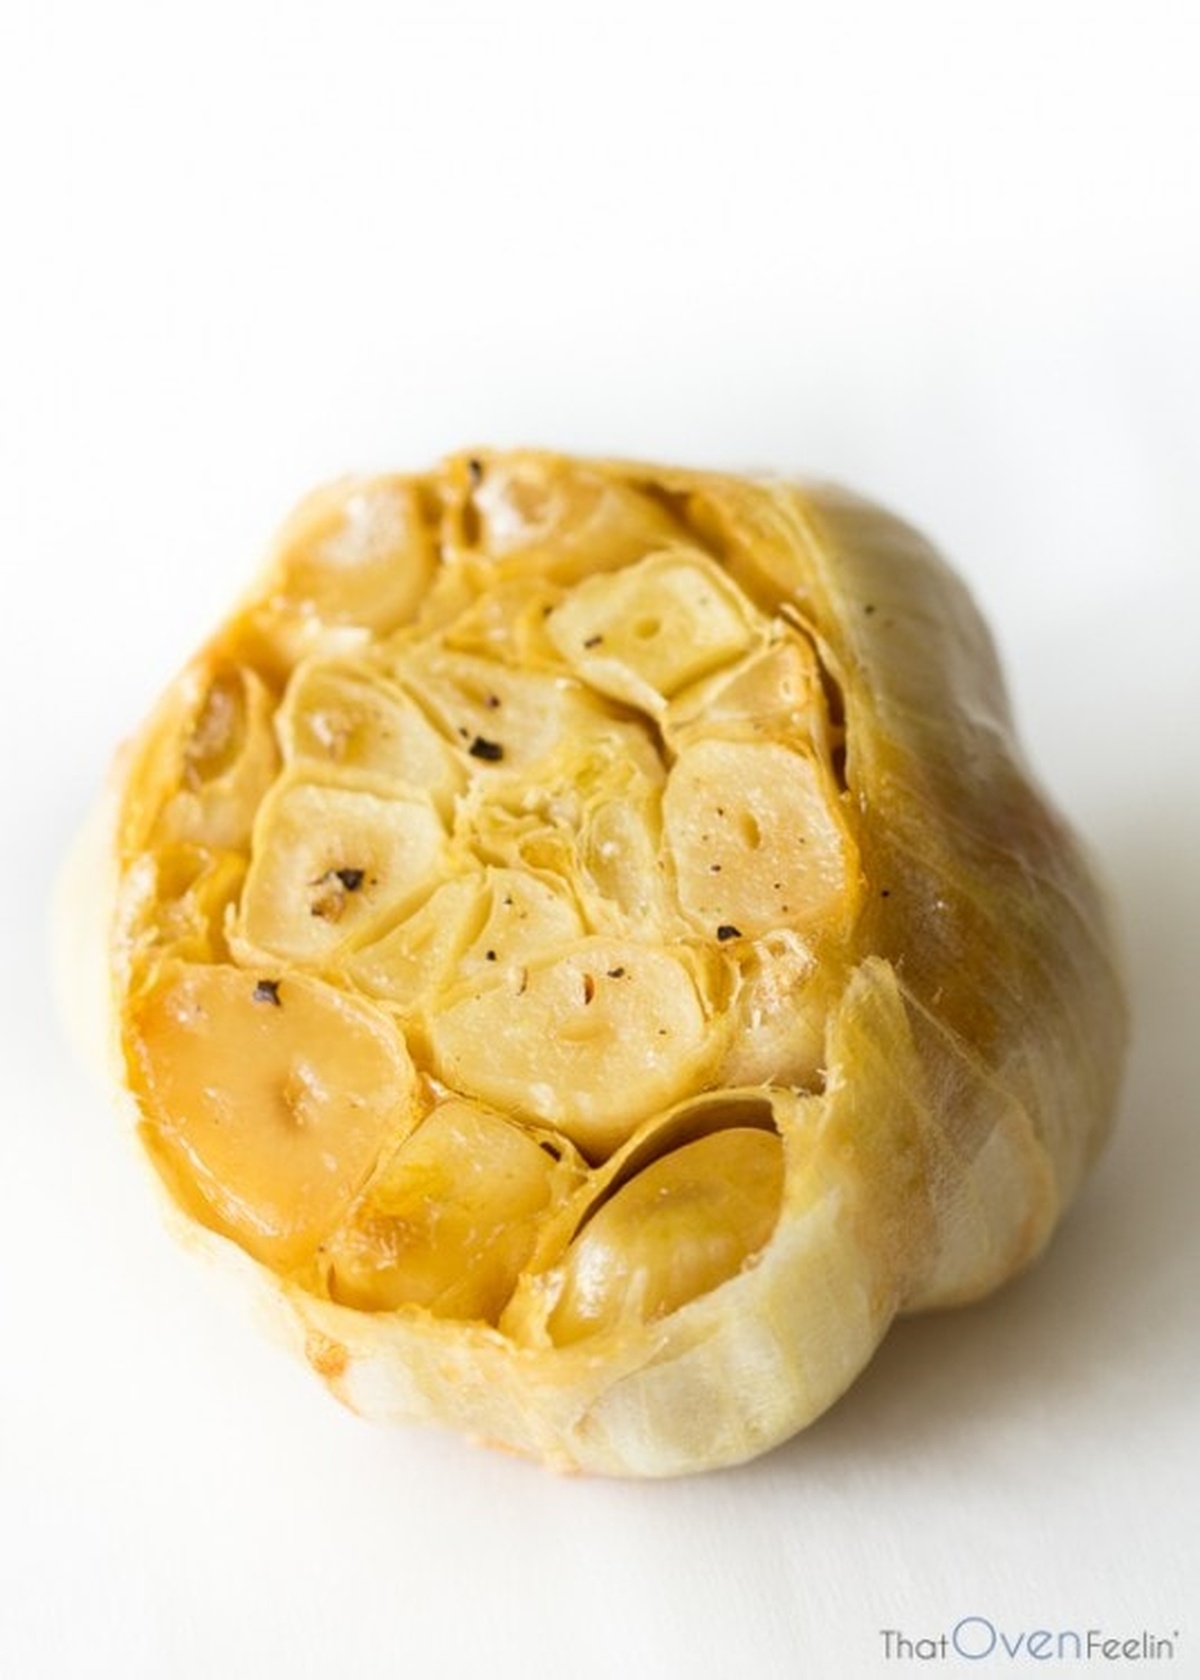
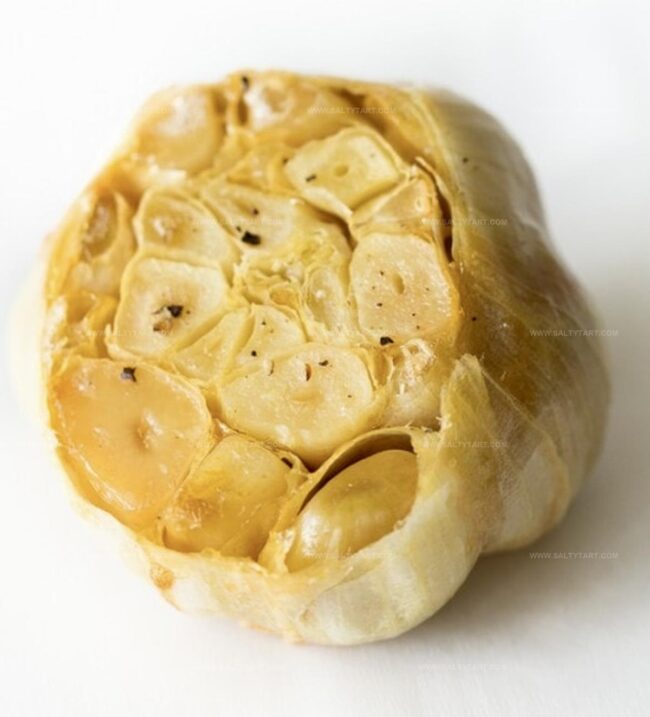
The garlic is ready when the center cloves become soft enough to pierce easily with a toothpick and develop a beautiful golden-brown color.
Step 6: Cool and Extract
Allow the roasted garlic bulbs to cool down completely.
Gently squeeze the bulbs to release the soft, caramelized cloves. If some cloves are stubborn, use a small spoon or paring knife to help them out.
Step 7: Freezing Whole Cloves
For whole clove preservation, spread the roasted cloves on a baking sheet and place in the freezer. Once fully frozen, transfer the cloves to a zip-top bag for long-term storage.
Step 8: Freezing Mashed Garlic
Alternatively, mash the roasted garlic with a fork and spoon the mixture into an ice cube tray. Freeze until solid, then pop out the garlic cubes and store in a zip-top bag or container for easy future use.
Tips to Nail Roasted Garlic Texture and Flavor
Variations to Change Up Roasted Garlic

Pairing Ideas That Match Roasted Garlic

Storage Guidelines for Roasted Garlic
FAQs
Roasting garlic transforms its sharp, pungent flavor into a sweet, mellow, and creamy taste. The slow roasting process caramelizes the natural sugars, making it much more delicate and less intense than raw garlic.
Roasted garlic can be stored in an airtight container in the refrigerator for up to 2 weeks. Make sure to cover it with a thin layer of olive oil to help preserve its freshness and prevent it from drying out.
Yes, you can use various types of garlic like softneck, hardneck, or elephant garlic. Each variety will have a slightly different flavor profile, but the roasting method remains the same.
Print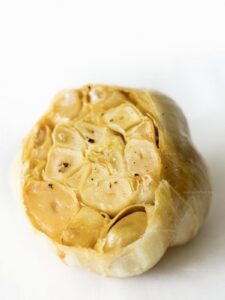
Super-Creamy Roasted Garlic (And How To Freeze It!) Recipe
- Total Time: 1 hour 15 minutes
- Yield: 6 1x
Description
Roasted garlic elevates this super-creamy recipe with rich, mellow flavor. Garlic heads caramelize slowly, releasing sweet notes that complement countless dishes, and home cooks can easily freeze portions for future culinary adventures.
Ingredients
- 6 bulbs garlic
- 3–4 tablespoons (tbsps) olive oil
- salt (to taste)
- pepper (to taste)
Instructions
- Prepare oven to 375°F, positioning rack in middle to ensure even roasting of garlic bulbs.
- Using a sharp knife, carefully trim the top portion of each garlic bulb, exposing the individual clove tips by cutting approximately ¼ to ½ inch from the peak.
- Arrange trimmed garlic bulbs on a rimmed baking sheet with cut sides facing upward, creating a stable roasting surface.
- Drizzle extra virgin olive oil over the exposed garlic cloves, ensuring even coverage, then sprinkle with kosher salt and freshly ground black pepper for enhanced flavor.
- Completely seal the baking sheet with aluminum foil, creating a steamy environment that will help soften and caramelize the garlic during roasting.
- Roast in preheated oven for 40-60 minutes, checking tenderness by piercing center cloves with a toothpick; garlic should be golden brown and extremely soft when fully cooked.
- Remove from oven and allow garlic to cool for 10-15 minutes, which helps prevent burning and makes squeezing out cloves easier.
- Gently squeeze roasted garlic cloves from their papery skins, using a small spoon or paring knife to assist if needed.
- For long-term storage, spread individual cloves on a parchment-lined baking sheet and freeze until solid, then transfer to a sealed freezer bag.
- Alternatively, mash roasted garlic and portion into ice cube trays, freezing for convenient future use in cooking and meal preparation.
Notes
- Roast garlic at a consistent temperature to ensure even caramelization and rich, sweet flavor development.
- Choose fresh, firm garlic bulbs with tight, unbroken skin for the best roasting results.
- Drizzle olive oil generously to help garlic cloves soften and prevent burning during roasting.
- Check garlic frequently during the last 10-15 minutes to avoid over-browning, which can create bitter taste.
- Let roasted garlic cool completely before handling to prevent burns and make squeezing easier.
- Freeze roasted garlic in individual portions for convenient future use in sauces, spreads, or marinades.
- Store frozen garlic cubes or whole cloves in airtight containers for up to 3 months without losing flavor intensity.
- Prep Time: 15 minutes
- Cook Time: 60 minutes
- Category: Appetizer, Snacks
- Method: Roasting
- Cuisine: American
Nutrition
- Serving Size: 6
- Calories: 40 kcal
- Sugar: 0.1 g
- Sodium: 100 mg
- Fat: 4.5 g
- Saturated Fat: 0.6 g
- Unsaturated Fat: 3.7 g
- Trans Fat: 0 g
- Carbohydrates: 2 g
- Fiber: 0.5 g
- Protein: 0.8 g
- Cholesterol: 0 mg
Mike Reynolds
Founder & Recipe Developer
Expertise
Farm-to-table cuisine, Seasonal recipe development, Sustainable cooking techniques, Food photography
Education
Asheville-Buncombe Technical Community College (A-B Tech)
Associate Degree in Culinary Arts
Mike studied culinary arts with a strong focus on farm-to-table principles and sustainable cooking. His training emphasized the importance of fresh, local ingredients and environmentally responsible practices in the kitchen.
Mike’s food journey began deep in the Blue Ridge Mountains, where weekends at farmers’ markets and home-cooked meals sparked a lifelong obsession with simple, seasonal eating.
After earning his Associate Degree in Culinary Arts from Asheville-Buncombe Technical Community College, he set out to bring farm-to-table cooking into everyday kitchens, without the fuss.
Mike’s philosophy is all about keeping it fresh, unfussy, and full of heart. When he’s not crafting new single-serving recipes, he’s hiking mountain trails, chatting with local farmers, or experimenting with wild ingredients in his backyard kitchen.