Dreamy Sweetened Condensed Milk Snowballs Recipe for Holidays
Magical sweetened condensed milk snowballs dance between childhood memories and delectable dessert dreams.
Powdery white treats promise pure comfort in every delightful bite.
Small confections carry nostalgia wrapped in sugary softness.
Grandmothers and bakers share this cherished recipe through generations.
Sweet spheres melt perfectly on your tongue, creating instant happiness.
Minimal ingredients guarantee swift preparation for anyone wanting quick deliciousness.
You’ll fall in love with these irresistible little clouds of joy.
Indulge and watch smiles bloom around your kitchen table.
Ingredients for Sweetened Condensed Milk Snowballs
Main Ingredients:Flavor Enhancers:Finishing Ingredient:Optional Mix-Ins:How to Prepare Sweetened Condensed Milk Snowballs
Step 1: Butter Bliss
Beat softened butter with a mixer until super fluffy and light. This process takes about three minutes and creates a creamy base for your delightful treats.
Step 2: Creamy Transformation
Pour sweetened condensed milk into the butter. Mix thoroughly for two minutes.
If you want extra flavor, splash in a hint of vanilla or almond extract.
Step 3: Smooth Out the Mixture
Scrape down bowl sides to ensure everything blends perfectly.
Continue mixing for another minute until the texture looks silky and consistent.
Step 4: Flour Power
Gently fold in dry ingredients:Mix until everything combines smoothly.
Want to jazz things up? Toss in some fun extras like:Step 5: Shape Your Cookies
Use a cookie scoop to create uniform balls.
Place them on a parchment-lined baking sheet, leaving two inches between each cookie.
Step 6: Bake to Perfection
Pop the baking sheet into a preheated oven at 320°F.
Bake for exactly 12 minutes until edges turn golden.
Step 7: Initial Cooling
Remove cookies from oven and let them rest on the baking sheet for five minutes.
This helps them set and become more stable.
Step 8: Final Touch
Transfer cookies to a wire rack to cool completely.
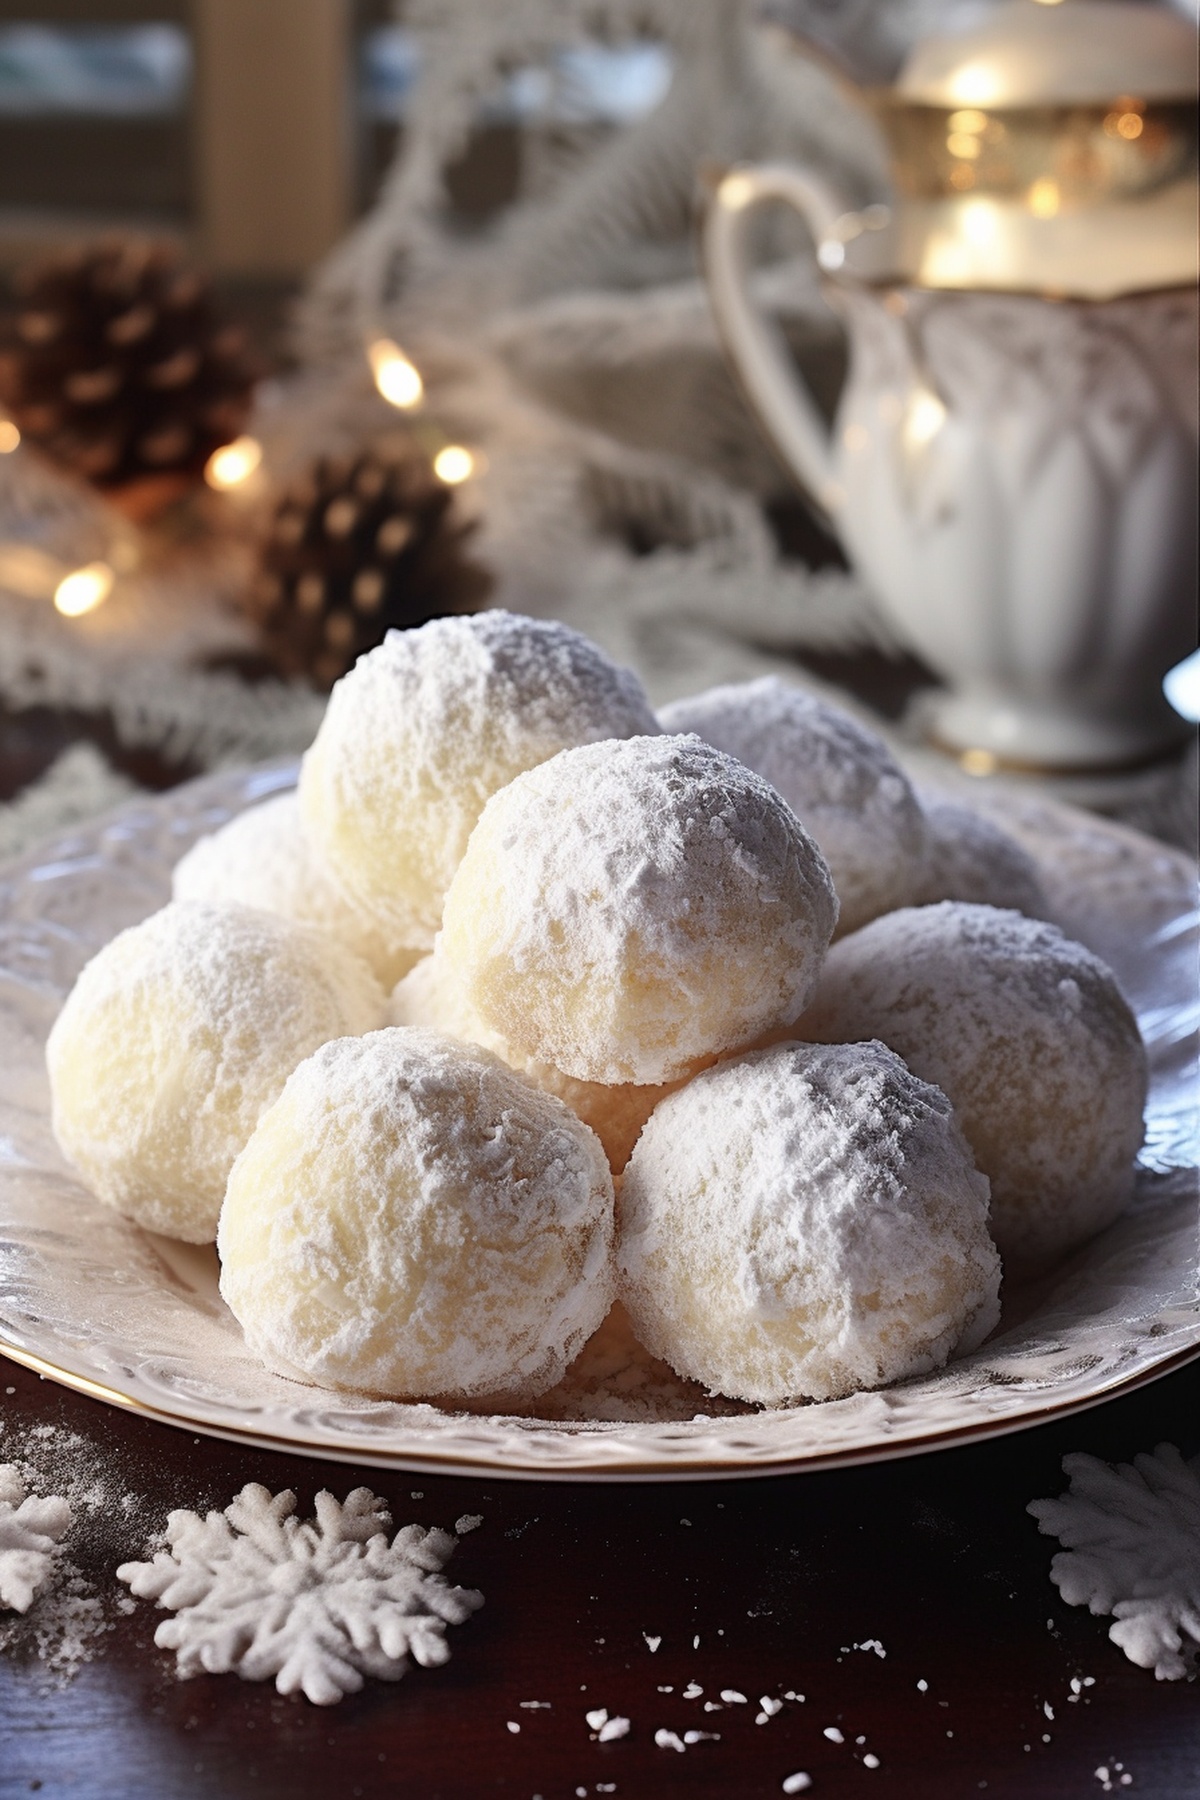
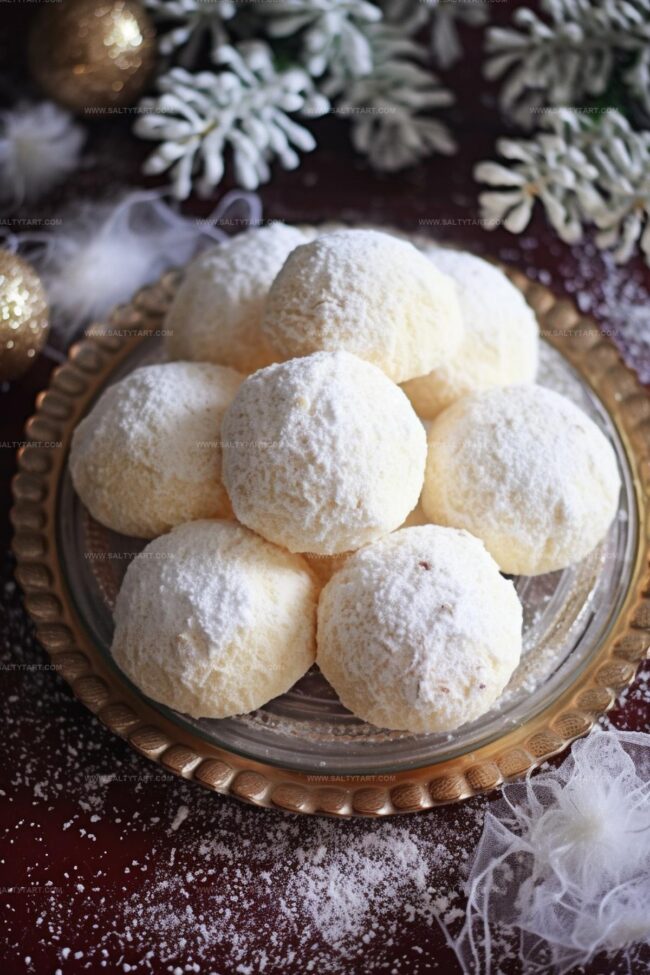
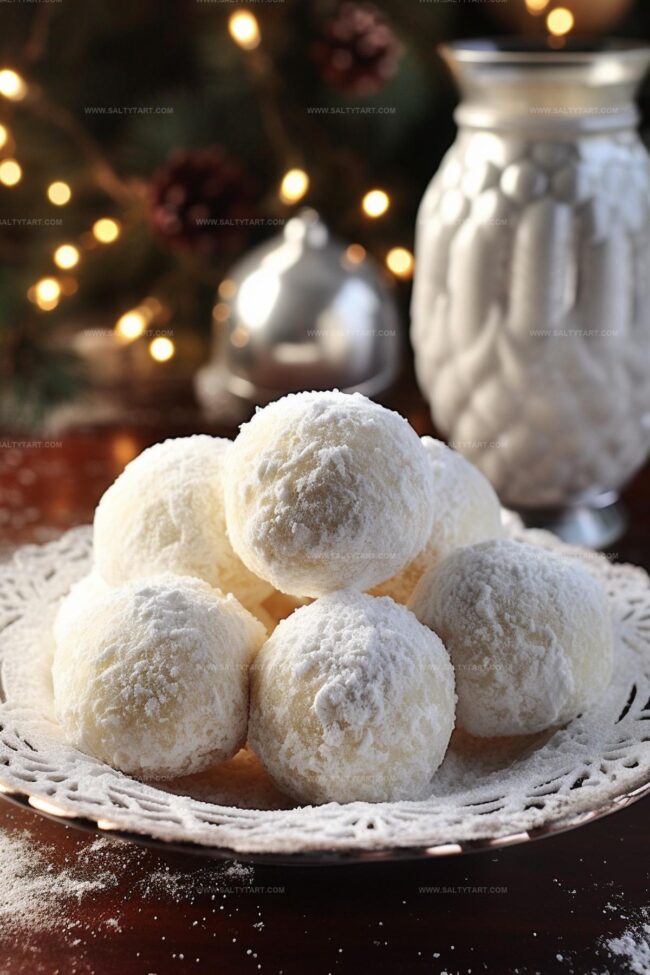
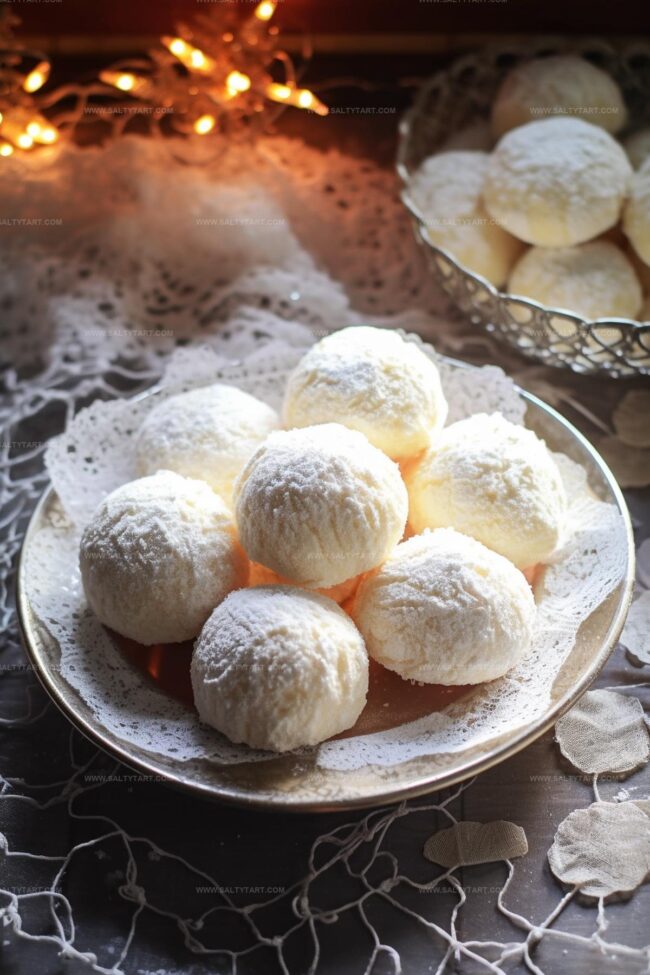
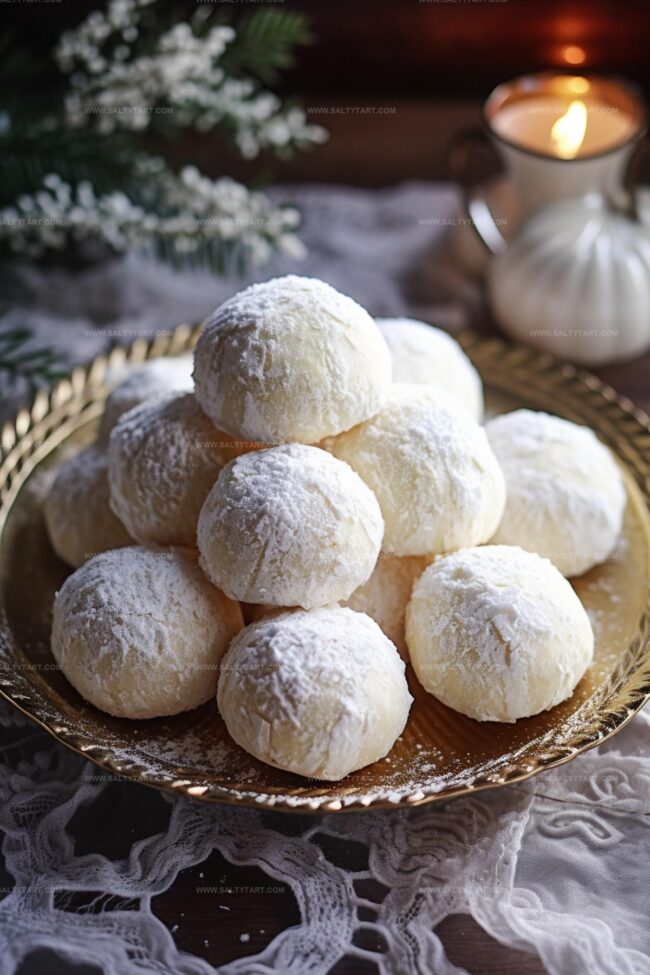
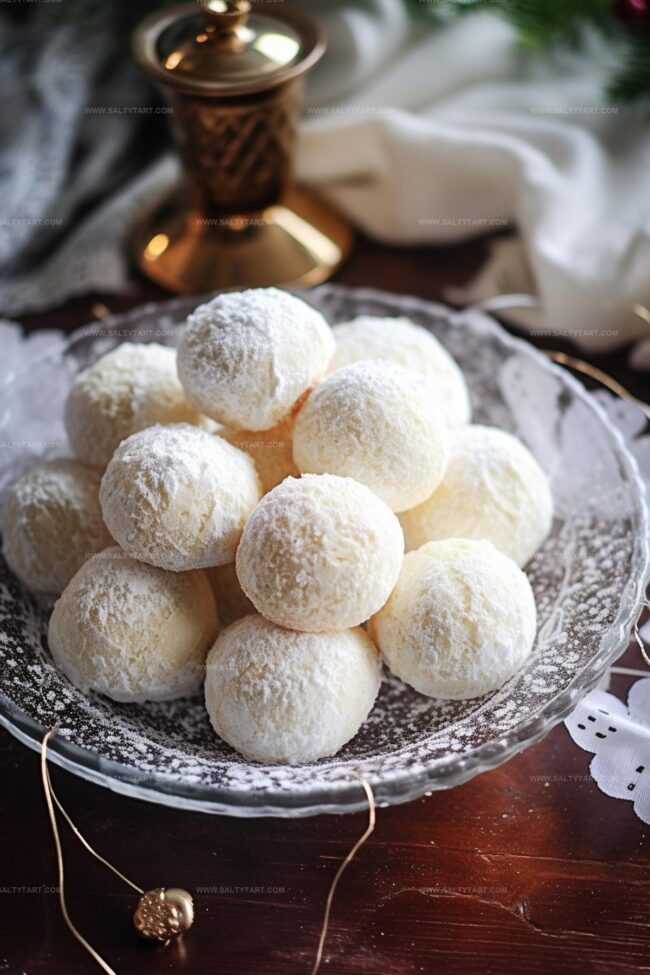
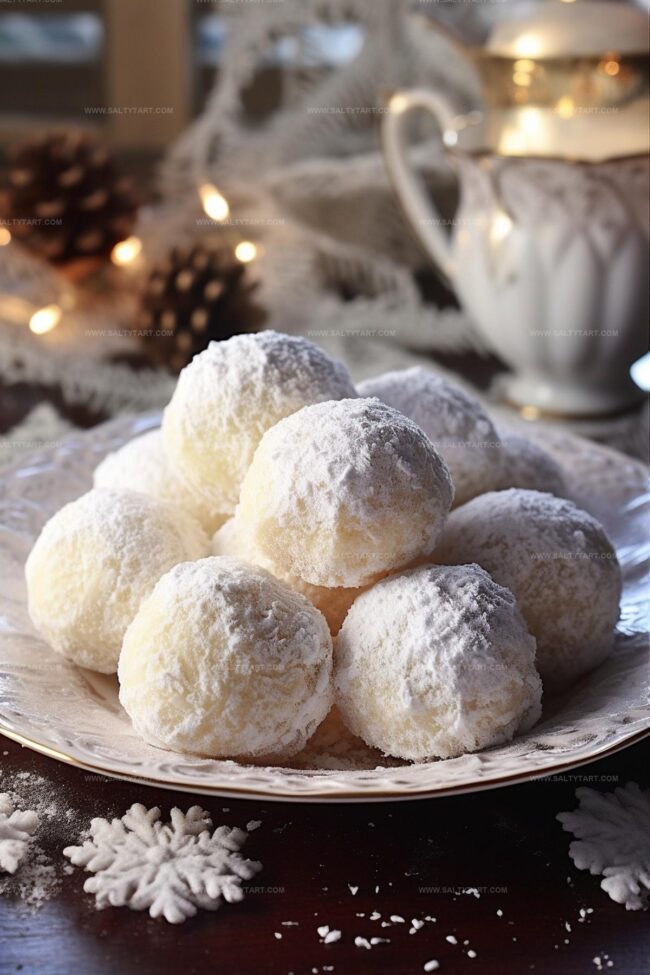
Once cooled, dust generously with powdered sugar for that classic snowball look. Store in an airtight container and enjoy your delectable treats!
Pro Tips to Get Sweetened Condensed Milk Snowballs Just Right
Delicious Variations of Sweetened Condensed Milk Snowballs

Pairing Suggestions for Sweetened Condensed Milk Snowballs
How to Store Sweetened Condensed Milk Snowballs
FAQs
Ensure your butter is softened but not melted, and chill the dough for 30 minutes before baking. Using cold butter or refrigerated dough helps prevent excessive spreading.
Stick to all-purpose flour for best results. Alternative flours like almond or coconut flour may alter the texture and require recipe adjustments.
Look for light golden edges and a slightly firm center. The cookies will continue to set as they cool, so avoid overbaking.
Always use the spoon and level method. Spoon flour into the measuring cup and level it off with a straight edge to prevent using too much flour, which can make cookies dry.
Why Sweetened Condensed Milk Snowballs Are Irresistible

Sweetened Condensed Milk Snowballs Recipe
- Total Time: 22 minutes
- Yield: 12 1x
Description
Mexican sweetened condensed milk snowballs blend rich cultural heritage with delightful coconut confections. Delicate powdery spheres melt gracefully, offering sweet memories of festive family gatherings.
Ingredients
- 1/2 cup (120 ml) sweetened condensed milk
- 1 cup (227 g) butter, adequately softened
- 2 cups (240 g) all-purpose flour
- 3 teaspoons (15 ml) baking powder
- 1/2 cup (60 g) confectioner’s sugar
Instructions
- Prepare the butter by softening it to room temperature and place in a mixing bowl. Whip using an electric mixer until the texture becomes fluffy and pale, continuing for approximately three minutes.
- Pour the sweetened condensed milk into the butter mixture. Beat thoroughly for two minutes, incorporating any flavor extracts during this process.
- Pause to scrape down the bowl’s sides, ensuring complete ingredient integration. Mix for an additional minute to create a uniform consistency.
- Gently fold in the flour and baking powder, blending until a smooth dough forms. If desired, fold in optional mix-ins like chocolate chips or dried fruit.
- Using a cookie scoop, drop uniform dough portions onto a parchment-lined baking sheet. Space each portion at least two inches apart to prevent merging during baking.
- Position the baking sheet in a preheated oven at 320°F. Bake for precisely 12 minutes until edges appear lightly golden.
- Remove from oven and let cookies rest on the baking sheet for five minutes, allowing them to set and stabilize.
- Transfer cookies to a wire cooling rack. Once completely cooled, delicately dust with confectioner’s sugar, creating an elegant, powdery finish.
Notes
- Softening butter perfectly creates a smoother, more consistent cookie texture that helps distribute ingredients evenly and prevents dense, heavy snowballs.
- Avoid overmixing the dough after adding flour to prevent tough, chewy cookies by gently folding ingredients until just combined.
- Chilling the dough for 30 minutes before baking can help prevent spreading and maintain the snowball’s classic round shape, especially in warmer kitchen environments.
- For gluten-free variations, substitute all-purpose flour with a 1:1 gluten-free baking blend to accommodate dietary restrictions without compromising the cookie’s delicate texture.
- Prep Time: 10 minutes
- Cook Time: 12 minutes
- Category: Snacks, Desserts
- Method: Baking
- Cuisine: American
Nutrition
- Serving Size: 12
- Calories: 197 kcal
- Sugar: 8 g
- Sodium: 84 mg
- Fat: 11 g
- Saturated Fat: 7 g
- Unsaturated Fat: 3 g
- Trans Fat: 0.4 g
- Carbohydrates: 22 g
- Fiber: 0.4 g
- Protein: 2 g
- Cholesterol: 30 mg
Mike Reynolds
Founder & Recipe Developer
Expertise
Farm-to-table cuisine, Seasonal recipe development, Sustainable cooking techniques, Food photography
Education
Asheville-Buncombe Technical Community College (A-B Tech)
Associate Degree in Culinary Arts
Mike studied culinary arts with a strong focus on farm-to-table principles and sustainable cooking. His training emphasized the importance of fresh, local ingredients and environmentally responsible practices in the kitchen.
Mike’s food journey began deep in the Blue Ridge Mountains, where weekends at farmers’ markets and home-cooked meals sparked a lifelong obsession with simple, seasonal eating.
After earning his Associate Degree in Culinary Arts from Asheville-Buncombe Technical Community College, he set out to bring farm-to-table cooking into everyday kitchens, without the fuss.
Mike’s philosophy is all about keeping it fresh, unfussy, and full of heart. When he’s not crafting new single-serving recipes, he’s hiking mountain trails, chatting with local farmers, or experimenting with wild ingredients in his backyard kitchen.