
Dreamy Tropical Coconut No-Bake Balls Recipe for Sweet Escapes
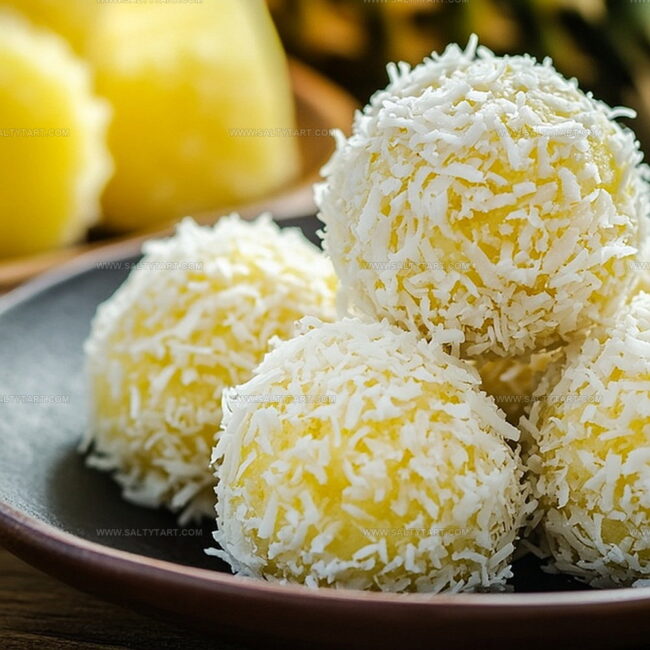
These delightful tropical coconut no-bake balls burst with island-inspired flavors that transport you to a sun-drenched beach.
Creamy coconut meets sweet condensed milk in a dreamy no-oven treat.
Cool and refreshing, they require minimal effort and maximum enjoyment.
Each bite promises a smooth, velvety texture that melts effortlessly on your tongue.
Simple ingredients combine to create a dessert that feels like a mini tropical vacation.
Kids and adults alike will adore these quick, no-fuss delights.
You’ll want to savor every single bite of this effortless coconut confection.
Why Pineapple Coconut No-Bake Balls Are So Good
What Goes Into Pineapple Coconut No-Bake Balls
Fruit Base:Dry Ingredients:Liquid Binders and Flavor Enhancers:Additional Ingredients:Steps for Rolling No-Bake Pineapple Coconut Balls

Step 1: Pulverize Pineapple
Grab your food processor and toss in the dried pineapple. Blend until the pineapple transforms into tiny, uniform pieces that will create an amazing tropical base for your no-bake treats.
Step 2: Combine Delicious Ingredients
Add these delightful ingredients to the food processor:Pulse and blend everything together until the mixture starts forming a cohesive, sticky dough that holds its shape.
Step 3: Shape Tropical Treats
Use your hands to scoop out small portions of the mixture.
Gently roll each portion between your palms, creating perfect bite-sized spheres that will melt in your mouth.
Step 4: Create Coconut Coating
Sprinkle extra shredded coconut on a plate.
Roll each ball through the coconut, ensuring a beautiful, delicate exterior that adds extra texture and flavor.
Step 5: Chill and Set
Transfer your coconut pineapple balls to the refrigerator.
Let them rest and firm up for at least 30 minutes, allowing the flavors to meld and the texture to become wonderfully smooth.
Step 6: Serve and Enjoy
Pull out your tropical treats and serve them chilled or at room temperature.
These no-bake balls are perfect for a quick snack, dessert, or energizing bite that transports you to a sunny paradise.
Tips for Chewy Pineapple Coconut Balls
Fun Swaps for No-Bake Pineapple Coconut Balls
Pairings for Pineapple Coconut Ball Snacks
Pair these sweet no-bake balls with a light, refreshing piña colada that echoes the pineapple and coconut flavors.
Serve alongside a warm Earl Grey tea, whose bergamot notes beautifully complement the tropical sweetness of the balls.
Match with a smooth cold brew or vanilla latte, creating a delightful contrast between the creamy drink and the chewy coconut texture.
Select a crisp, chilled Moscato or Riesling that highlights the fruity undertones and provides a light, sweet counterpoint.
Storing No-Bake Pineapple Coconut Balls
FAQs
No, dried pineapple is necessary for the right texture and consistency. Fresh pineapple has too much moisture and will make the mixture too wet to form balls.
Yes, almond flour helps bind the ingredients and provides structure. If you’re allergic, try substituting with coconut flour, but the texture might slightly change.
They can be stored in an airtight container in the refrigerator for up to 7 days. The coconut coating helps maintain their shape and prevents them from drying out.
Print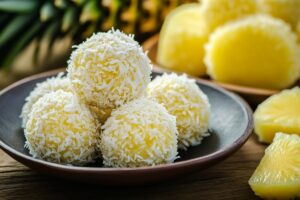
Tropical Coconut No-Bake Balls Recipe
- Total Time: 45 minutes
- Yield: 12 1x
Description
Coconut lovers rejoice with these delightful no-bake balls that blend Caribbean sweetness and creamy textures. Rich ingredients combine effortlessly, creating perfect bite-sized treats you’ll crave again and again.
Ingredients
Primary Ingredients:
- 1 cup dried pineapple, finely chopped
- 1 cup shredded unsweetened coconut
- 1/2 cup almond flour
Binding Ingredients:
- 1/4 cup honey
- 1 tablespoon coconut oil, melted
Flavor and Seasoning Ingredients:
- 1 teaspoon vanilla extract
- 1/4 teaspoon salt
Coating:
- Additional shredded unsweetened coconut for rolling
Instructions
- Pulverize dried pineapple in a food processor until it reaches a fine, uniform texture.
- Incorporate shredded coconut, almond flour, honey, vanilla extract, coconut oil, and salt into the processor.
- Blend ingredients until they form a cohesive, slightly tacky mixture that holds together when pressed.
- Use a small scoop or spoon to portion out consistent-sized pieces of the mixture.
- Gently roll each portion between your palms to create smooth, round spheres.
- Generously coat each ball by rolling them in additional shredded coconut, ensuring full coverage.
- Transfer the coconut-covered balls to a container or baking sheet.
- Chill in the refrigerator for approximately 30 minutes, allowing them to set and firm up.
- Serve directly from the refrigerator or let sit at room temperature for a softer texture.
Notes
- Swap honey with agave nectar or maple syrup for a vegan-friendly version that maintains the sweet, tropical flavor profile.
- Use gluten-free almond flour to ensure the recipe remains suitable for those with gluten sensitivities or celiac disease.
- Enhance texture by toasting the shredded coconut briefly before coating the balls, which adds a deeper, nuttier dimension to the treat.
- Store these no-bake balls in an airtight container in the refrigerator for up to a week, making them a convenient make-ahead snack or dessert option.
- Prep Time: 15 minutes
- Cook Time: 30 minutes
- Category: Snacks, Desserts
- Method: Blending
- Cuisine: Caribbean
Nutrition
- Serving Size: 12
- Calories: 110 kcal
- Sugar: 9 g
- Sodium: 50 mg
- Fat: 6 g
- Saturated Fat: 5 g
- Unsaturated Fat: 1 g
- Trans Fat: 0 g
- Carbohydrates: 14 g
- Fiber: 2 g
- Protein: 2 g
- Cholesterol: 0 mg
Jess Martinez
Contributing Recipe Writer & Nutrition Consultant
Expertise
Southwestern and Latin American cooking, Nutritional analysis and healthy recipe planning, Cultural food traditions, Modifying traditional dishes for better health
Education
Santa Fe Community College
Certificate in Culinary Arts
Focused on mastering the flavors and cooking methods of traditional Southwestern cuisine.
Jess’s love for bold, homegrown flavors led her straight into the world of Southwestern cooking and cultural nutrition.
After completing her Certificate in Culinary Arts at Santa Fe Community College, she made it her mission to show that good-for-you food can still taste incredible.
At saltytart.com, Jess shares vibrant, health-conscious recipes with roots in tradition but a fresh, modern twist. When she’s not testing new recipes, you’ll find her at local growers’ markets, tending her herb garden, or digging into food history books.