
Dreamy Valentine’s Black Forest Bars Recipe: Love in Every Bite
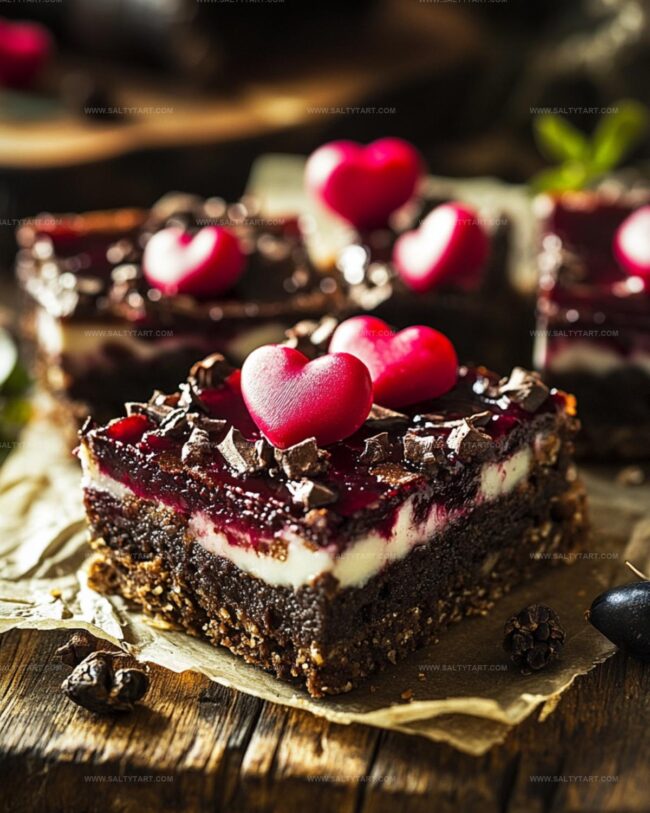
Decadent chocolate layers meld with luscious cherry black forest dream bars that promise pure romantic indulgence.
Sweet cherries and rich chocolate create an irresistible dessert perfect for special moments.
Dark chocolate crumbles blend seamlessly with soft cake-like textures.
Velvety cream adds elegant sophistication to each delightful bite.
Luxurious and smooth, these bars capture the essence of classic black forest flavors.
The recipe whispers romance with every carefully crafted layer.
Prepare to fall in love with this enchanting dessert that transforms ordinary Valentine’s celebrations into extraordinary culinary experiences.
Valentines Black Forest Dream Bars: Unique Characteristics
Ingredients for Valentines Black Forest Dream Bars
Base Ingredients:Cream Cheese Layer Ingredients:Topping Ingredients:Preparation Instructions for Valentines Black Forest Dream Bars
Step 1: Warm Up the Oven
Crank the oven to a toasty 350F (175C). Grab a 9×13-inch baking pan and give it a quick spray with cooking oil or line it with parchment paper for easy cleanup.
Step 2: Create the Chocolate Cookie Foundation
Grab your chocolate chunk cookie mix and follow the package instructions. Mix in the oil and egg until well combined.
Press the dough firmly and evenly across the entire bottom of the prepared pan, creating a smooth cookie base.
Step 3: Bake the Cookie Layer
Slide the pan into the preheated oven and bake for 12-15 minutes.
Look for golden edges and a set center. Once done, pull it out and let the cookie base cool completely in the pan.
Step 4: Whip Up the Creamy Filling
In a mixing bowl, beat the cream cheese and sugar until they become silky smooth. Gently fold in the thawed whipped topping, creating a light and fluffy mixture.
Step 5: Layer on the Cherry Goodness
Spread the cherry pie filling in an even layer across the cooled cookie base. Make sure to cover the entire surface.
Step 6: Add the Creamy Topping
Carefully spread the cream cheese mixture over the cherry layer. Use a spatula to create a smooth, even surface.
Step 7: Chill and Set
Cover the pan with plastic wrap and park it in the refrigerator. Let the bars chill for at least 2 hours until completely set.
Step 8: Slice and Serve
Cut into beautiful bars, serve them cold, and watch everyone swoon over your Valentine’s Day dessert creation!
Tips When Making Valentines Black Forest Dream Bars
Flavor Variations on Valentines Black Forest Dream Bars
Suitable Sides for Valentines Black Forest Dream Bars
How to Store Valentines Black Forest Dream Bars
FAQs
The key ingredients include Chocolate Chunk Cookie Mix, cream cheese, cherry pie filling, whipped topping, egg, oil, and sugar.
Yes, you can create a homemade chocolate cookie base using flour, cocoa powder, sugar, butter, and egg as alternatives to the boxed mix.
Absolutely! The recipe is easy to prepare, has sweet flavors kids love, and doesn’t require complicated techniques, making it perfect for family dessert.
These dream bars can stay fresh in the refrigerator for 3-4 days when stored in an airtight container, maintaining their creamy texture and delicious flavor.
Print
Valentines Black Forest Dream Bars Recipe
- Total Time: 35 minutes
- Yield: 12 1x
Description
Black forest dream bars weave chocolate and cherry romance into a delightful dessert experience. Sweet layers of rich ganache and kirsch-soaked cherries create an irresistible indulgence you’ll crave again and again.
Ingredients
Main Ingredients:
- 1 package chocolate chunk cookie mix
- 1 can (21 ounces) cherry pie filling
- 8 ounces cream cheese
- 1 tub (8 ounces) frozen whipped topping, thawed
Binding Ingredients:
- 1/3 cup oil
- 1 egg
- 1/4 cup sugar
Measurement Equivalents:
- 1 package chocolate chunk cookie mix (approximately 15.25 ounces)
- 21 ounces (595 grams) cherry pie filling
- 8 ounces (227 grams) cream cheese
- 1/3 cup (79 milliliters) oil
- 1 egg
- 1/4 cup (50 grams) sugar
- 8 ounces (227 grams) frozen whipped topping, thawed
Instructions
- Warm the oven to 350F (175C) and prepare a 9×13-inch baking dish with parchment paper or a light grease coating.
- Mix the chocolate chunk cookie mix with oil and egg according to package instructions, then firmly press the dough into the prepared pan to create an even base layer.
- Bake the cookie foundation for 12-15 minutes until edges turn golden and center sets. Remove from oven and allow complete cooling.
- Whip cream cheese and sugar in a mixing bowl until silky and uniform, then gently incorporate the thawed whipped topping for a light, airy texture.
- Distribute cherry pie filling uniformly across the cooled cookie foundation, ensuring complete coverage.
- Carefully layer the cream cheese mixture over the cherry filling, using a spatula to create a smooth, even surface.
- Seal the pan with plastic wrap and refrigerate for minimum 2 hours, allowing the dessert to set and flavors to meld.
- Once chilled, slice into elegant bars, serving directly from the refrigerator for optimal texture and taste.
Notes
- Swap cookie mix with gluten-free alternative for dietary restrictions, ensuring everyone can enjoy this decadent dessert.
- Use low-fat cream cheese and sugar substitute to create a lighter version without compromising rich, indulgent flavors.
- Drain cherry pie filling slightly to prevent excess liquid from making the base soggy, maintaining perfect texture and structural integrity.
- Garnish with dark chocolate shavings or fresh cherries before serving to elevate visual appeal and add extra layers of flavor complexity.
- Prep Time: 20 minutes
- Cook Time: 15 minutes
- Category: Desserts
- Method: Baking
- Cuisine: American
Nutrition
- Serving Size: 12
- Calories: 244 kcal
- Sugar: 21 g
- Sodium: 172 mg
- Fat: 13 g
- Saturated Fat: 6 g
- Unsaturated Fat: 6 g
- Trans Fat: 0.2 g
- Carbohydrates: 29 g
- Fiber: 1 g
- Protein: 3 g
- Cholesterol: 27 mg
Jess Martinez
Contributing Recipe Writer & Nutrition Consultant
Expertise
Southwestern and Latin American cooking, Nutritional analysis and healthy recipe planning, Cultural food traditions, Modifying traditional dishes for better health
Education
Santa Fe Community College
Certificate in Culinary Arts
Focused on mastering the flavors and cooking methods of traditional Southwestern cuisine.
Jess’s love for bold, homegrown flavors led her straight into the world of Southwestern cooking and cultural nutrition.
After completing her Certificate in Culinary Arts at Santa Fe Community College, she made it her mission to show that good-for-you food can still taste incredible.
At saltytart.com, Jess shares vibrant, health-conscious recipes with roots in tradition but a fresh, modern twist. When she’s not testing new recipes, you’ll find her at local growers’ markets, tending her herb garden, or digging into food history books.