The Sweetest Vanilla Strawberry Ombre Cake Recipe Ever Made
Sweet layers of vanilla strawberry ombre cake promise a delightful visual and taste adventure that’ll make your dessert dreams come true.
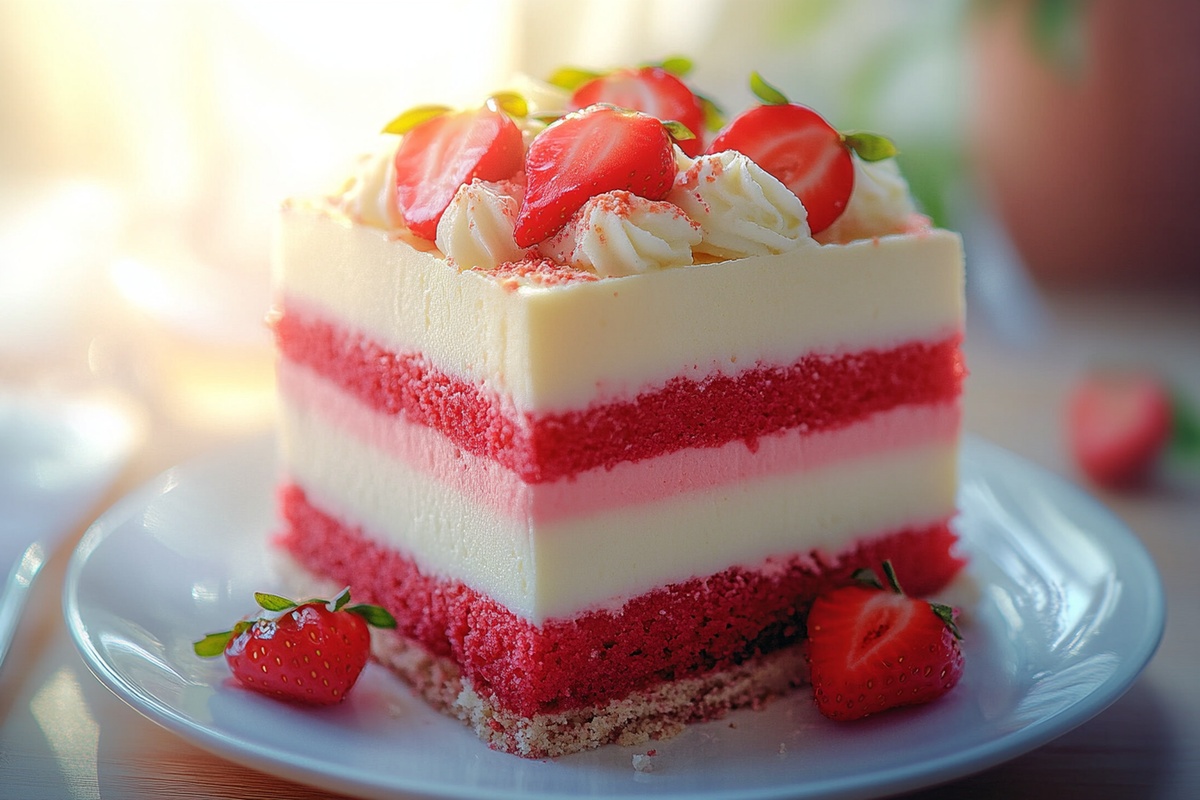
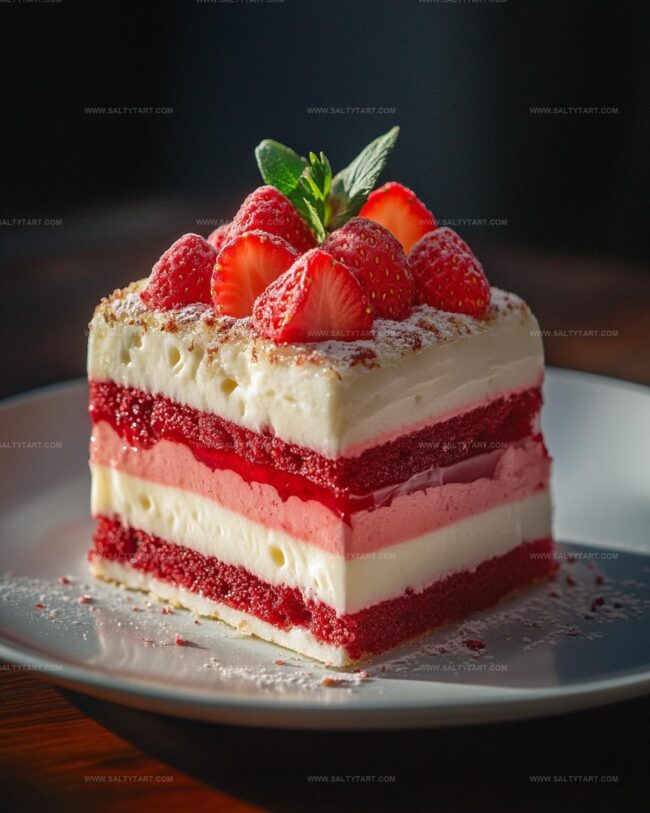
Soft pastel hues cascade through delicate cake tiers, creating a mesmerizing gradient effect.
Bakers with a passion for creative presentations will adore this stunning centerpiece.
Each slice reveals a beautiful color transition from pale pink to deep rose.
Creamy frosting and fresh strawberries complement the elegant design, making this cake a showstopper at any gathering.
Subtle vanilla undertones balance the fruity brightness, ensuring a harmonious flavor profile.
You’ll want to grab your mixing bowls and start this delectable baking journey right now.
Vanilla Strawberry Ombre Cake Overview
Ingredients for Vanilla Strawberry Ombre Cake
Cake Base Ingredients:Leavening and Seasoning:Liquid and Moisture Ingredients:Strawberry Coloring and Filling:Frosting Component:Baking Instructions for Ombre Cake
Step 1: Prepare Oven
Set the oven to 350°F (175°C) for perfect baking conditions.
Step 2: Create Butter Base
Whip butter and sugar until the mixture becomes light, airy, and pale.
Add eggs individually, mixing thoroughly after each egg to ensure smooth incorporation.
Step 3: Add Flavor Essence
Pour vanilla extract into the butter mixture and blend completely.
Step 4: Combine Dry Ingredients
Sift all dry ingredients together in a separate bowl to eliminate potential lumps.
Step 5: Merge Wet and Dry Components
Gradually fold dry ingredients into wet mixture, alternating with milk.
Stir gently until the batter becomes uniform and silky.
Step 6: Create Ombre Effect
Separate batter into three distinct bowls.
Add varying amounts of pureed strawberries to each bowl, creating gradient pink layers from pale to deep.
Step 7: Prepare Baking Vessels
Generously grease and flour cake pans to prevent sticking.
Step 8: Bake Cake Layers
Pour each color of batter into separate pans. Bake for 25-30 minutes until a toothpick inserted comes out clean.
Step 9: Cool Cake Layers
Allow cakes to cool completely on a wire rack before assembling.
Step 10: Craft Strawberry Filling
Simmer fresh strawberries with sugar in a saucepan until the mixture reaches a thick, jammy consistency.
Step 11: Assemble Ombre Cake
Layer cakes from darkest pink to lightest, spreading strawberry filling between each layer.
Step 12: Frost and Decorate
Cover the entire cake with smooth buttercream frosting.
Serve and enjoy the beautiful gradient masterpiece.
Tips for Perfect Ombre Cake Layers
Variations on Vanilla Strawberry Ombre Cake
Pairings for Ombre Cake Slices
A sweet, light Italian white wine that complements the strawberry’s delicate flavor and enhances the cake’s vanilla notes.
Elegant bubbly drink that brings out the cake’s celebratory feel, with crisp effervescence cutting through the rich buttercream.
Creamy, cold beverage that echoes the cake’s fruity profile, offering a refreshing counterpoint to the dessert’s sweetness.
Smooth coffee drink that highlights the cake’s vanilla undertones, providing a warm, sophisticated companion to each slice.
Storage Advice for Ombre Cake
FAQs
To create the ombre effect, add different amounts of pureed strawberries to three separate portions of the cake batter. Start with a small amount for the lightest layer, gradually increasing the strawberry puree for the middle and darkest layers.
Yes, you can use frozen strawberries for both the filling and the batter coloring. Thaw and drain them completely before pureeing to avoid excess moisture in the cake.
Cake flour is recommended as it creates a lighter, softer texture compared to all-purpose flour. If you don’t have cake flour, you can make a substitute by mixing all-purpose flour with cornstarch.
Print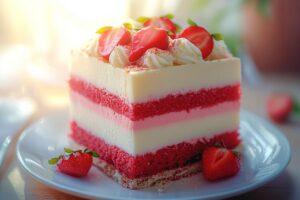
Vanilla Strawberry Ombre Cake Recipe
- Total Time: 1 hour 15 minutes
- Yield: 8 1x
Description
Sweet layers of creamy vanilla cake whisper delicate strawberry secrets in this elegant Vanilla Strawberry Ombre Cake. Delightful pink gradients blend seamlessly from pale blush to deep rose, promising a visual and flavor experience that delights dessert enthusiasts.
Ingredients
Main Cake Ingredients:
- 2 cups cake flour
- 1 1/2 cups sugar
- 1 cup unsalted butter
- 4 large eggs
- 2 teaspoons vanilla extract
- 2 teaspoons baking powder
- 1/2 teaspoon salt
Cream and Fruit Components:
- 2 cups heavy cream
- 1 cup powdered sugar
- 2 cups fresh strawberries
Flavor Enhancers:
- 1 teaspoon vanilla extract (for additional flavor)
Instructions
- Preheat the oven to 350°F (175°C), ensuring an ideal baking environment for the cake layers.
- Using an electric mixer, cream butter and sugar until the mixture becomes pale and voluminous, then incorporate eggs individually, mixing thoroughly after each addition.
- Blend in vanilla extract to enhance the cake’s aromatic profile.
- In a separate mixing bowl, sift together cake flour, baking powder, and salt to ensure a smooth, lump-free dry ingredient base.
- Gradually fold the dry ingredients into the wet mixture, alternating with milk to create a uniform, silky batter.
- Divide the batter evenly into three distinct bowls, then incorporate varying amounts of pureed strawberries to achieve a gradient of pink hues.
- Prepare cake pans by greasing and dusting with flour, then carefully pour each color-specific batter into its designated pan.
- Bake for 25-30 minutes at 350°F, checking doneness by inserting a toothpick that should emerge clean when the layers are fully baked.
- Allow cake layers to cool completely on a wire rack, preventing moisture buildup and ensuring structural integrity.
- Create strawberry filling by simmering fresh strawberries with sugar in a saucepan until the mixture reaches a thick, jam-like consistency.
- Construct the cake by positioning the darkest pink layer as the base, spreading strawberry filling between each subsequent layer, progressing from dark to light pink and finishing with the vanilla layer.
- Generously frost the entire cake with buttercream, creating a smooth, elegant finish that complements the ombre color scheme.
Notes
- Adjust strawberry puree amounts carefully to achieve a gradual color transition from pale to deep pink, ensuring each layer looks distinct and vibrant.
- Freeze cake layers for 15-20 minutes before assembling to prevent crumbling and make frosting easier, creating a more stable and professional-looking dessert.
- Substitute dairy milk with almond or oat milk for a lactose-free version, maintaining the cake’s moisture and tender crumb while accommodating dietary preferences.
- Use room temperature ingredients to guarantee smooth batter mixing and even cake texture, preventing potential lumps or uneven baking.
- Prep Time: 45 minutes
- Cook Time: 30 minutes
- Category: Desserts
- Method: Baking
- Cuisine: American
Nutrition
- Serving Size: 8
- Calories: 320 kcal
- Sugar: 28 g
- Sodium: 150 mg
- Fat: 18 g
- Saturated Fat: 11 g
- Unsaturated Fat: 6 g
- Trans Fat: 0.5 g
- Carbohydrates: 35 g
- Fiber: 1.5 g
- Protein: 4 g
- Cholesterol: 75 mg
Mike Reynolds
Founder & Recipe Developer
Expertise
Farm-to-table cuisine, Seasonal recipe development, Sustainable cooking techniques, Food photography
Education
Asheville-Buncombe Technical Community College (A-B Tech)
Associate Degree in Culinary Arts
Mike studied culinary arts with a strong focus on farm-to-table principles and sustainable cooking. His training emphasized the importance of fresh, local ingredients and environmentally responsible practices in the kitchen.
Mike’s food journey began deep in the Blue Ridge Mountains, where weekends at farmers’ markets and home-cooked meals sparked a lifelong obsession with simple, seasonal eating.
After earning his Associate Degree in Culinary Arts from Asheville-Buncombe Technical Community College, he set out to bring farm-to-table cooking into everyday kitchens, without the fuss.
Mike’s philosophy is all about keeping it fresh, unfussy, and full of heart. When he’s not crafting new single-serving recipes, he’s hiking mountain trails, chatting with local farmers, or experimenting with wild ingredients in his backyard kitchen.