
The Creamiest Velvety Peanut Butter Balls Recipe You’ll Love
Crafting delectable peanut butter balls brings pure joy to any sweet-loving kitchen.
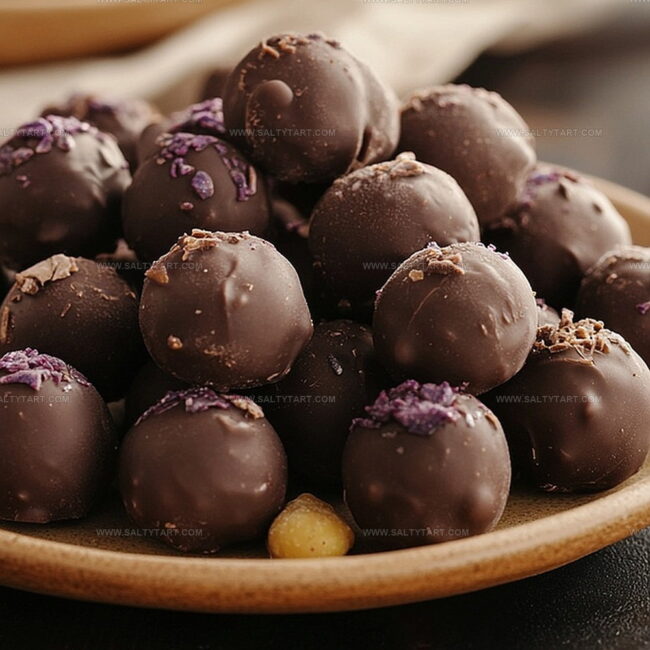
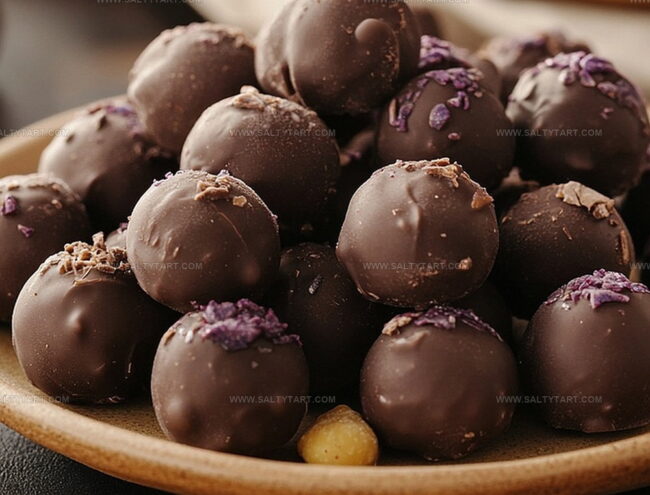
Chocolate-coated spheres of creamy goodness await your culinary adventure.
Smooth ingredients blend effortlessly into perfect bite-sized treats.
Each morsel promises a rich, indulgent experience that melts smoothly on your tongue.
No complicated techniques stand between you and these delightful confections.
Childhood memories of classic desserts resurface with every delicate bite.
Roll up your sleeves and dive into this irresistible recipe that guarantees smiles all around.
Why Reeses Peanut Butter Balls Are a Treat
Ingredients for Classic Reeses Peanut Butter Balls
Core Ingredients:Chocolate Coating:Preparation Support:How to Make Reeses Peanut Butter Balls at Home
Step 1: Blend Creamy Base
Mix softened peanut butter and unsalted butter in a microwave-safe bowl. Heat in microwave for 20-30 seconds until ingredients become smooth and blendable.
Step 2: Create Dough Consistency
Incorporate powdered sugar and vanilla extract into the butter mixture. Stir thoroughly until the mixture transforms into a cohesive, moldable dough that holds its shape.
Step 3: Shape Delightful Spheres
Roll the prepared mixture into small round balls, ensuring each truffle is approximately one inch in diameter. Aim for uniform size to guarantee consistent coating and texture.
Step 4: Chill Initial Preparation
Place the shaped balls on a parchment-lined tray. Transfer to refrigerator and allow them to firm up for 30 minutes, which helps maintain their structure during chocolate coating.
Step 5: Prepare Chocolate Coating
Combine milk chocolate chips and heavy cream in a microwave-safe bowl. Melt ingredients gradually, stirring every 15 seconds until achieving a silky, glossy chocolate mixture.
Step 6: Immerse in Chocolate
Remove chilled balls from refrigerator. Carefully dip each sphere into melted chocolate, ensuring complete and even coverage.
Gently place coated truffles back onto parchment tray.
Step 7: Final Chilling
Return chocolate-covered truffles to refrigerator.
Allow them to set for an additional 15 minutes until chocolate hardens into a smooth, glossy shell.
Tips for Creamy and Smooth Peanut Butter Balls
Flavorful Add-Ins for Peanut Butter Balls
What to Serve With Peanut Butter Balls
Select a full-bodied Cabernet Sauvignon or Merlot to complement the rich, sweet chocolate and nutty peanut butter flavors, creating a luxurious dessert experience.
Serve chilled whole milk alongside these peanut butter balls to balance the intense chocolate coating and provide a classic, nostalgic drinking companion.
Brew a strong espresso or dark roast coffee to cut through the sweetness and highlight the deep chocolate and peanut butter notes, offering a sophisticated contrast.
Crumble the peanut butter balls over a scoop of creamy vanilla ice cream for a decadent dessert that amplifies the treat’s texture and temperature variations.
Storing Reeses Peanut Butter Balls for Snacking
FAQs
No, they’re super easy! With just a few simple ingredients and basic steps, anyone can make these delicious treats in under an hour.
Not at all. You’ll only need a microwave, mixing bowl, parchment paper, and a baking tray – basic kitchen tools most people already have.
Yes! While milk chocolate works best, you can also use dark or white chocolate depending on your preference. Just ensure it melts smoothly.
When stored in an airtight container in the refrigerator, they’ll keep for about 1-2 weeks, maintaining their delicious flavor and texture.
Print
Velvety Peanut Butter Balls Recipe
- Total Time: 46 minutes
- Yield: 24 1x
Description
Creamy peanut butter balls melt hearts with their irresistible chocolate coating and smooth interior. Rich flavors and classic comfort combine, promising pure indulgence for chocolate and peanut butter enthusiasts who crave a delightful sweet treat.
Ingredients
Main Ingredients:
- 1 cup creamy peanut butter
- 1/2 cup unsalted butter
- 2 cups powdered sugar
Coating Ingredients:
- 12 ounces (340 grams) milk chocolate chips
- 2 tablespoons heavy cream
Flavoring Ingredient:
- 1 teaspoon vanilla extract
Instructions
- Warm peanut butter and butter in microwave for 20-30 seconds until easily mixable, creating a smooth base.
- Incorporate powdered sugar and vanilla, blending thoroughly to form a cohesive, pliable mixture.
- Craft uniform spheres approximately one inch in diameter, ensuring consistent sizing for even coating.
- Transfer formed balls onto parchment-lined tray, then chill in refrigerator for half an hour to firm up.
- Prepare chocolate coating by microwaving milk chocolate chips with heavy cream, stirring every 15 seconds until glossy and completely melted.
- Carefully immerse each chilled ball into warm chocolate, rotating to achieve full, even coverage.
- Position chocolate-drenched spheres back on parchment, then return to refrigerator for additional 15 minutes to solidify chocolate shell.
- Remove from refrigerator and allow to rest at room temperature for 5-10 minutes before serving for optimal texture and flavor.
Notes
- Soften butter and peanut butter carefully to prevent overheating, which can cause separation and affect texture.
- Use room temperature ingredients for smoother mixing and easier ball formation.
- For gluten-free version, ensure powdered sugar is certified gluten-free and use dairy-free chocolate chips if needed.
- Chill balls thoroughly before chocolate coating to prevent cracking and ensure clean chocolate coverage.
- Prep Time: 45 minutes
- Cook Time: 1 minute
- Category: Snacks, Desserts
- Method: No-bake
- Cuisine: American
Nutrition
- Serving Size: 24
- Calories: 190 kcal
- Sugar: 15 g
- Sodium: 55 mg
- Fat: 13 g
- Saturated Fat: 5 g
- Unsaturated Fat: 7 g
- Trans Fat: 0.1 g
- Carbohydrates: 16 g
- Fiber: 1 g
- Protein: 3 g
- Cholesterol: 15 mg
Jess Martinez
Contributing Recipe Writer & Nutrition Consultant
Expertise
Southwestern and Latin American cooking, Nutritional analysis and healthy recipe planning, Cultural food traditions, Modifying traditional dishes for better health
Education
Santa Fe Community College
Certificate in Culinary Arts
Focused on mastering the flavors and cooking methods of traditional Southwestern cuisine.
Jess’s love for bold, homegrown flavors led her straight into the world of Southwestern cooking and cultural nutrition.
After completing her Certificate in Culinary Arts at Santa Fe Community College, she made it her mission to show that good-for-you food can still taste incredible.
At saltytart.com, Jess shares vibrant, health-conscious recipes with roots in tradition but a fresh, modern twist. When she’s not testing new recipes, you’ll find her at local growers’ markets, tending her herb garden, or digging into food history books.